

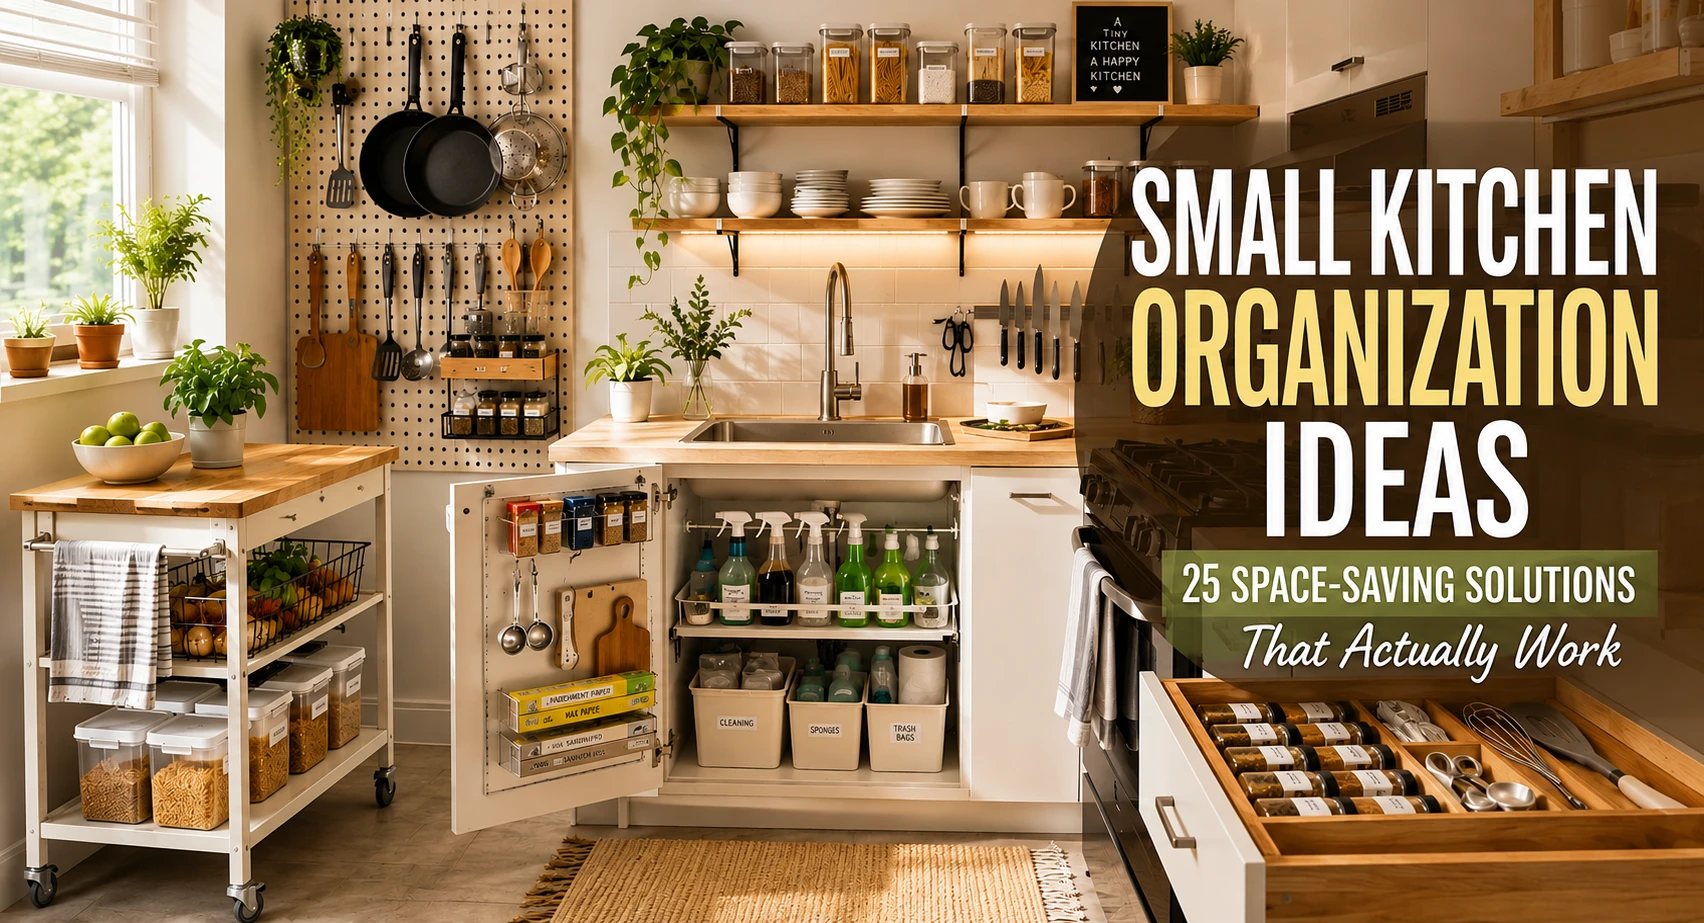
I used to dread cooking dinner. Not because I do not enjoy it, I genuinely do. But because every single time I stepped into my tiny kitchen, I’d spend the first ten minutes just finding things.
Pulling out the cutting board meant removing two pots. Getting to the rice meant digging past three half-open bags. It wasn’t a kitchen. It was a game of Jenga.
If that sounds familiar, you are not alone. Most apartments and small homes have kitchens under 100 square feet, and the reality is that standard storage advice written for people with full pantries and island counters simply does not apply. This guide is different.
Every idea here is renter-friendly, budget-conscious, and built around the kind of kitchen most of us actually live in.
What Are Small Kitchen Organization Ideas
Small kitchen organization ideas are practical methods for maximizing storage and counter space in kitchens under 150 square feet. They focus on vertical space, hidden storage, and rearranging what you already own, not buying a bigger kitchen.
1. Use the Inside of Cabinet Doors for Extra Storage
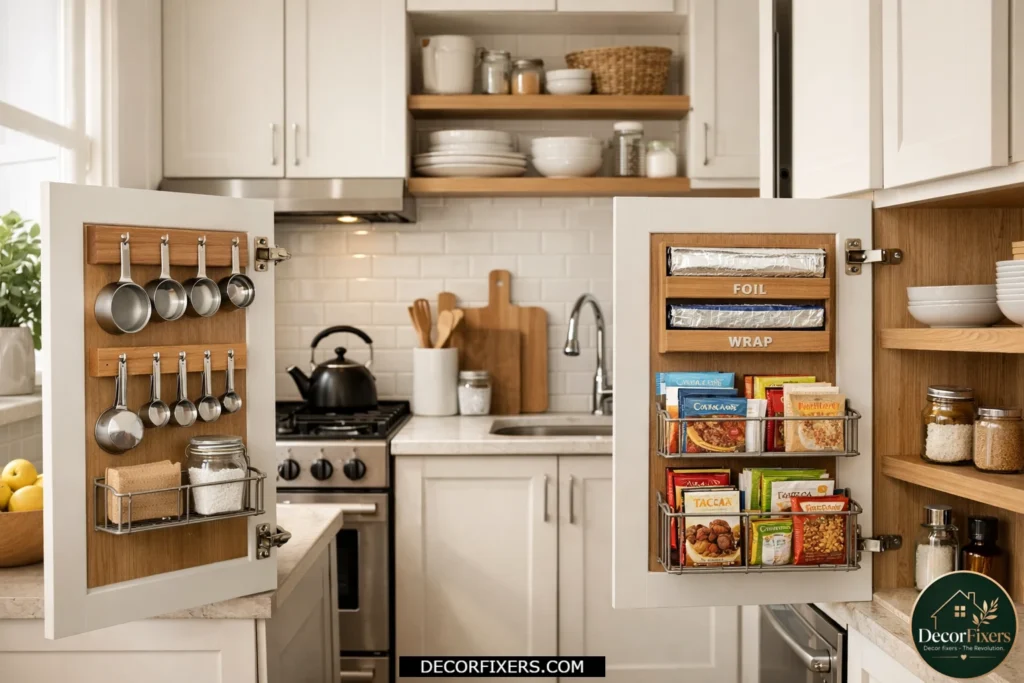
Most people look inside their cabinets and see shelves. What they miss is the door itself, a completely unused vertical surface that’s already there, waiting. Attach an over-door organizer or a few adhesive Command hooks, and you’ve got a home for cutting boards, aluminum foil rolls, measuring cups, or a row of spice packets.
This is one of the first things I did in my current apartment, and the difference was immediate. Over-door racks from brands like iDesign cost as little as $8–$15 on Amazon and require zero drilling. For renters, this is as close to a free storage upgrade as it gets.
2. Mount a Pegboard on One Wall
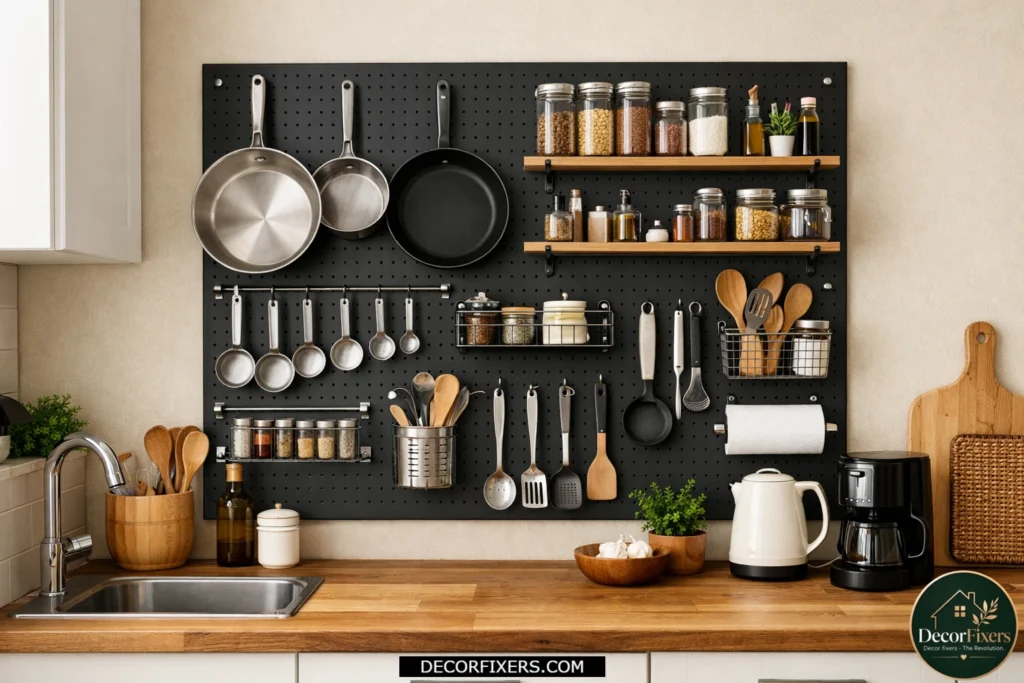
Pegboards are the most flexible wall storage solution ever made, and they’ve been popular for decades because they actually work. A single 2×4 ft pegboard (available at Home Depot or IKEA for around $20–$40) can hold pots, pans, utensils, measuring cups, and even a small shelf for jars. Everything is visible, reachable, and rearrangeable.
What most guides skip is this: you do not even need to mount it permanently. Lean a pegboard against the backsplash wall, anchor it lightly with a few Command strips, and it holds surprisingly well. Renters, take note.
3. Add a Rolling Kitchen Cart for Instant Counter and Storage Space
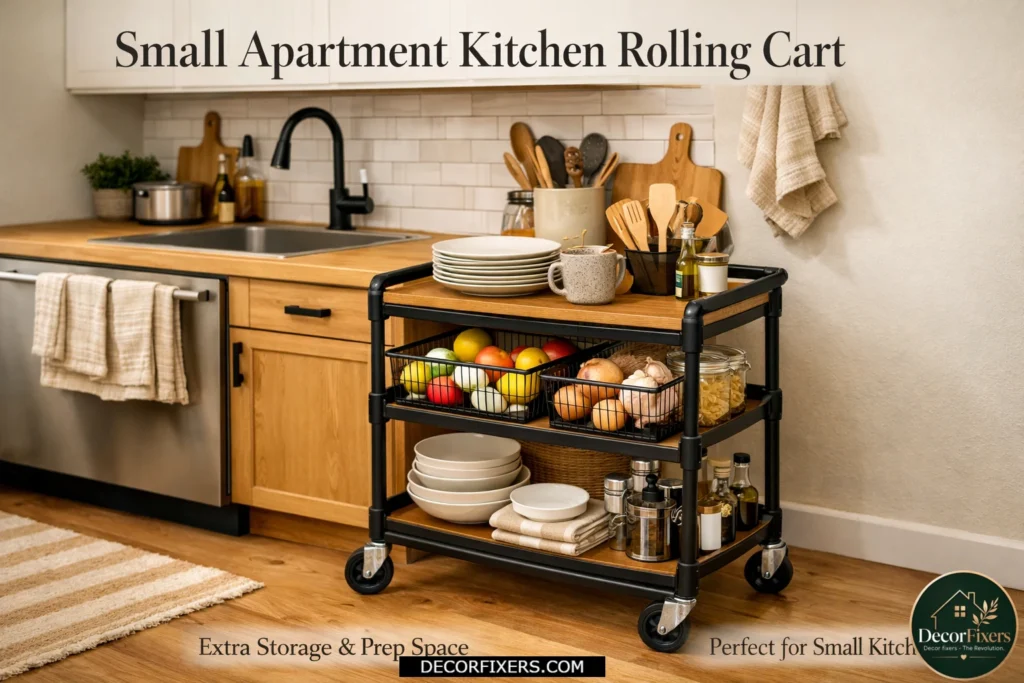
A rolling cart is the single best purchase for a small kitchen, and I’ll stand by that opinion even if some minimalists push back. It gives you extra counter space, additional shelves underneath, and it moves out of the way when you need the floor. The IKEA RASKOG cart is the gold standard here; it runs around $34.99 and comes in multiple colors. It’s not flimsy and fits between the fridge and the wall in most kitchens.
Quick note: if your kitchen has a narrow galley layout, measure the gap before ordering. The RASKOG is about 14 inches wide; tight fits do happen.
4. Stack Pots and Pans Vertically with a File Organizer

This one sound strange until you try it. A standard metal case organizer, the kind meant for documents, works perfectly for storing pot lids and flat pans upright inside a cabinet. Instead of a tower of nesting cookware, you have to fully unload to reach the bottom piece; everything slides in and out individually.
You can grab a simple wire file organizer for under $10. Or step up to a dedicated pan organizer rack from iDesign or Spectrum Diversified; those run $15–$25 and are built specifically for cookware. Either way, this 10-minute setup saves you frustration every single day.
5. Install a Tension Rod Under the Sink
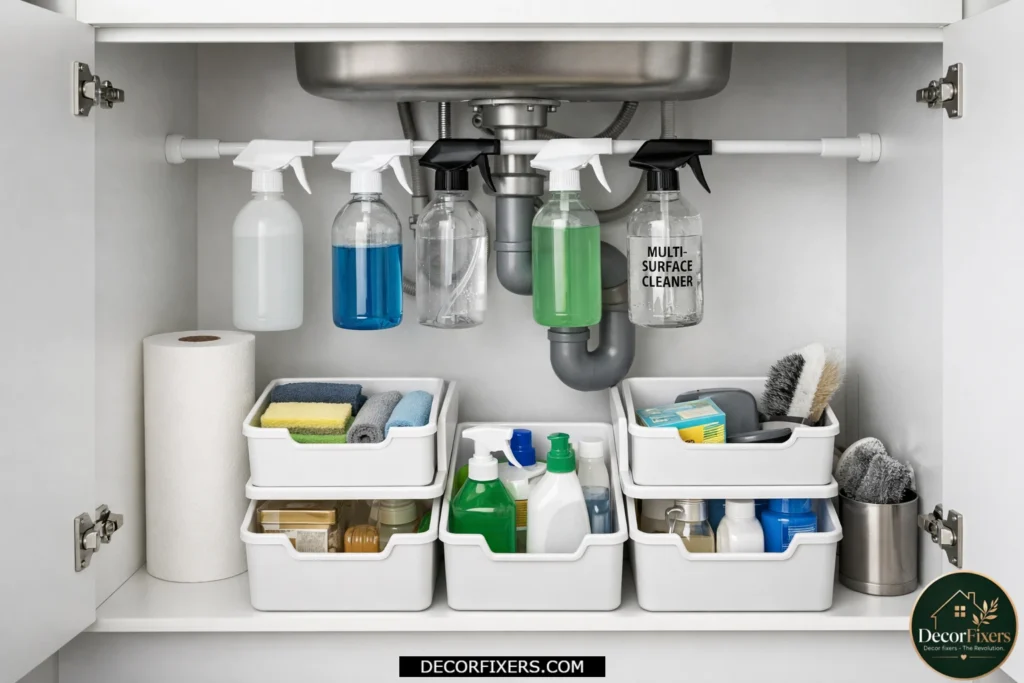
The cabinet under your sink is probably a disaster. It usually is. The space is oddly shaped, there’s a pipe in the way, and everything just gets shoved in and forgotten. One tension rod, literally a $6 curtain rod, stretched across the width of the cabinet at mid-height, gives you a place to hang spray bottles by their triggers, freeing up the entire floor of the cabinet for bins and supplies.
Add one or two small stackable bins below the rod, and you’ve effectively doubled the usable space under that sink. This is one of those ideas that makes you wonder why nobody told you sooner. Or maybe I should say it this way: it’s so cheap and so effective that it feels almost unfair.
6. Use a Lazy Susan in Deep Corner Cabinets
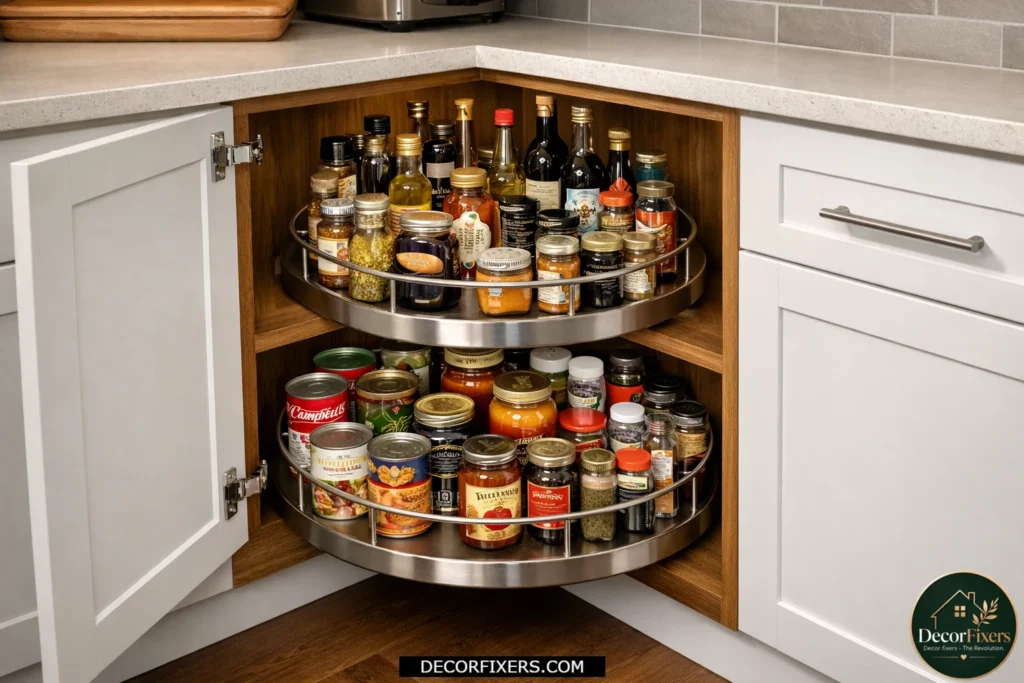
Corner cabinets have a cruel design. The door opens easily. The stuff near the front is reachable. Everything else disappears into a black hole in the back left corner, where nothing is ever found again. A rotating Lazy Susan, even a basic one-tier version for $12–$20, completely fixes this. Everything rotates to the front on demand.
The two-tier version is the upgrade worth having. Sauces on top, cans on the bottom, and suddenly your most chaotic cabinet is the most functional one you own. The Container Store sells premium versions, but the Amazon Basics ones work just as well for most kitchens.
7. Hang a Magnetic Knife Strip Instead of Using a Block
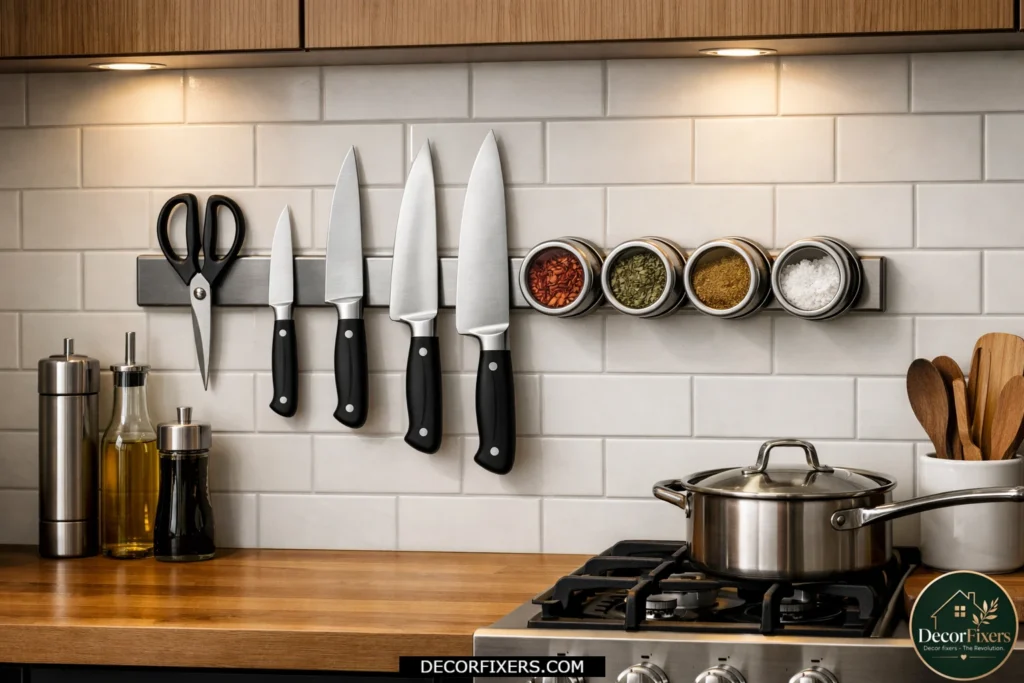
Knife blocks are expensive, take up precious counter space, and, honestly, do not work well for small kitchens. A magnetic wall-mounted knife strip holds the same knives, or more, in a thin vertical strip on your backsplash or side wall. A good one costs $15–$30 and can be mounted with Command strips if you’d rather avoid screws.
Beyond knives, magnetic strips hold metal spice tins, scissors, bottle openers, and even small pans. This is one of those ideas that also makes your kitchen look dramatically more intentional, like a real cook lives there.
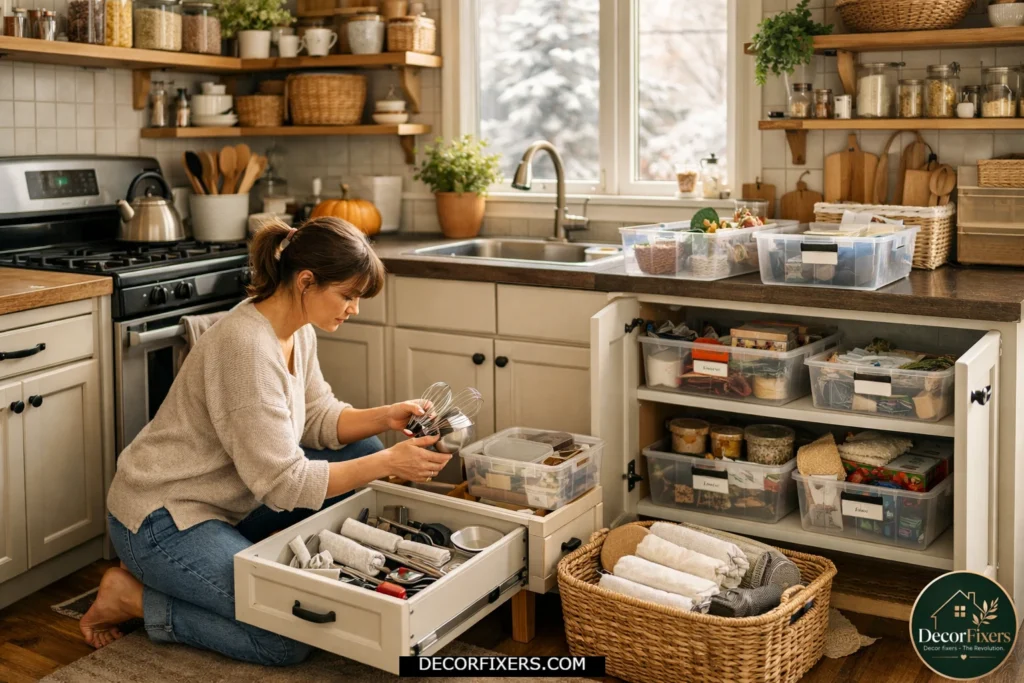
8. Declutter First, Then Organize
Here’s the thing: no number of organizers, bins, or clever hacks will fix a kitchen with too much stuff. This step comes before everything else. Go through every drawer, every cabinet, every shelf, and pull out anything you haven’t used in 12 months.
According to the Research and Markets 2024 kitchen organizer industry report, the U.S. kitchen organizer market is projected to hit $23.59 billion by 2029, partly driven by the surge in compact living spaces. Most people buying organizers would benefit more from removing five things than buying one more bin.
9. Put a Shelf Riser Inside Your Cabinets
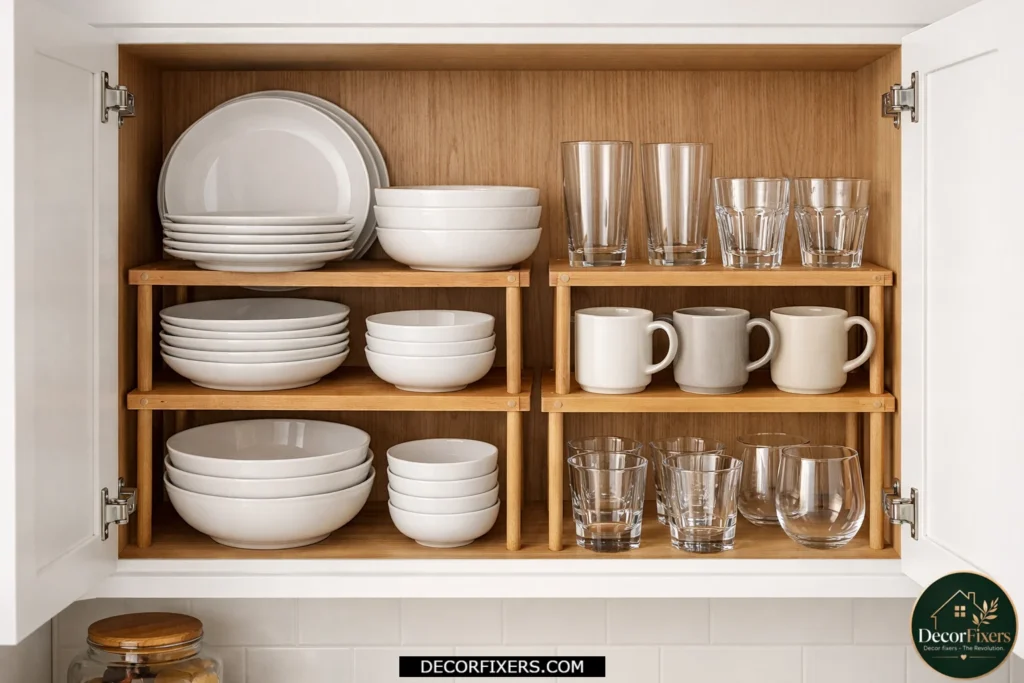
Standard kitchen cabinets have 12–16 inches of vertical space between shelves. That’s way more room than a single layer of plates or bowls needs. A simple stackable shelf riser, usually $10–$18, sits inside the cabinet and creates two levels of storage in the same space. Plates and bowls on one level, mugs or glasses on the shelf above.
I’ve seen conflicting advice on whether to use wire or solid risers. My read: wire for cabinets where airflow helps (spices, produce), solid bamboo for dishes where you want a clean look. Bamboo risers look great on open shelves, too.
10. Store Spices in a Drawer, Not a Cabinet

Most people store spices in a cabinet, stacked in rows where the ones in the back become permanently invisible. Moving them to a drawer, laid flat with labels facing up, changes everything. You see every single jar at a glance. Nothing gets buried. Nothing expires unknown.
Get a pack of small uniform spice jars (around $15–$25 for a set of 20–30) and transfer your spices into them. Label the lids with a permanent marker. This sounds like a lot of work once, and it is, but the payoff is months of effortless cooking.
11. Use Stackable Clear Containers in the Pantry or Cabinets
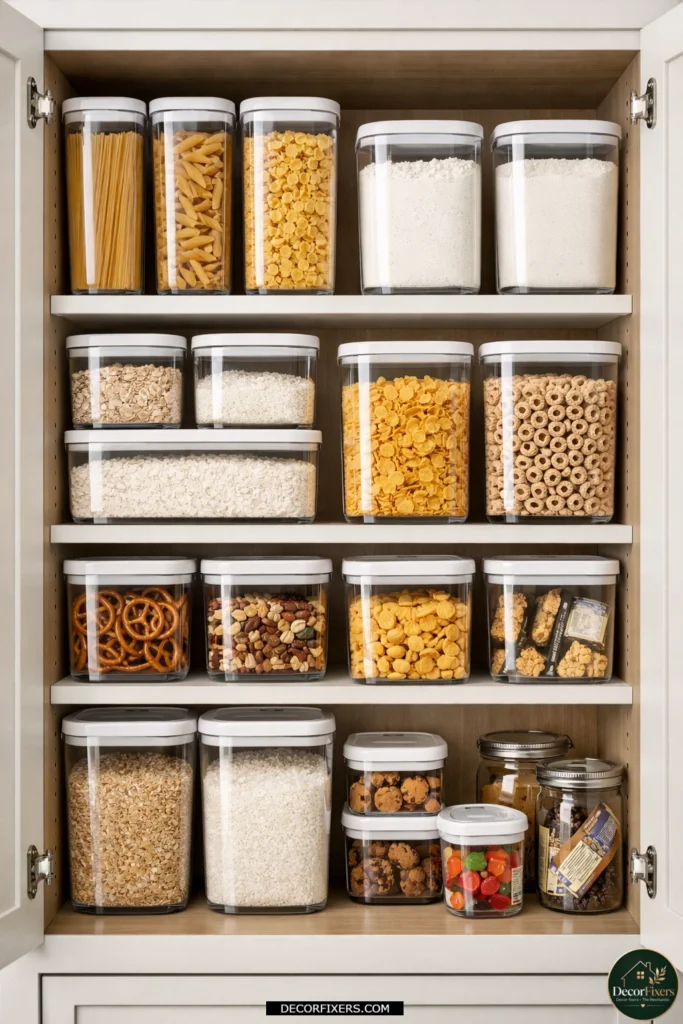
Mismatched bags, half-open boxes, and differently-sized containers are why most small pantries feel chaotic even when they’re not that full. Swapping to uniform, clear, stackable containers, like the iDesign Linus line, creates visual order instantly. You can see what you have, what you’re low on, and nothing tips over.
A basic starter set runs $20–$35 and covers pasta, rice, flour, cereals, and snacks. The key is uniformity, same brand, same shape, so they stack and align cleanly. This is one investment worth doing the first time properly.
12. Hang a Rail System on the Backsplash
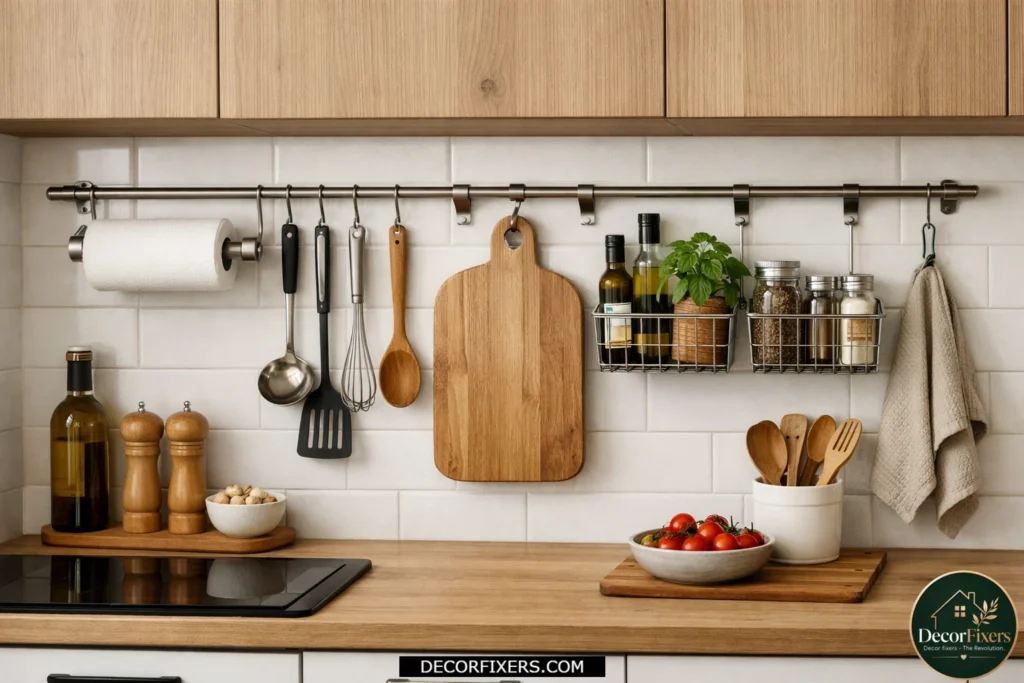
IKEA’s GRUNDTAL rail system, or any stainless wall rail with S-hooks, turns your backsplash into a working vertical storage zone. Hang utensils, small pots, a paper towel holder, a cutting board, or baskets for produce. The whole system costs under $30 and can be drilled into tile or, for renters, mounted on a pegboard leaned against the wall.
Some experts argue that open wall storage makes a kitchen look cluttered. That’s valid if you hang everything you own. But if you curate, only your most-used 8–10 items, a rail system makes the kitchen feel professional, not messy.
13. Use the Space Above Your Cabinets

The gap between your cabinet tops and the ceiling is real estate. Most kitchens have 6–18 inches of space there that sits empty. This isn’t prime storage, you don’t want things you need every day up there, but it’s perfect for seasonal items, large serving platters, or attractive baskets holding bulk supplies.
Get a small folding step stool (stores flat between the fridge and wall) and reclaim that height. Decorative wicker baskets or matching white bins keep the look clean from below. Even in a kitchen with limited wall space, the top of the cabinets adds genuine storage capacity with zero installation.
14. Try a Fold-Down Wall Table for Extra Prep Space
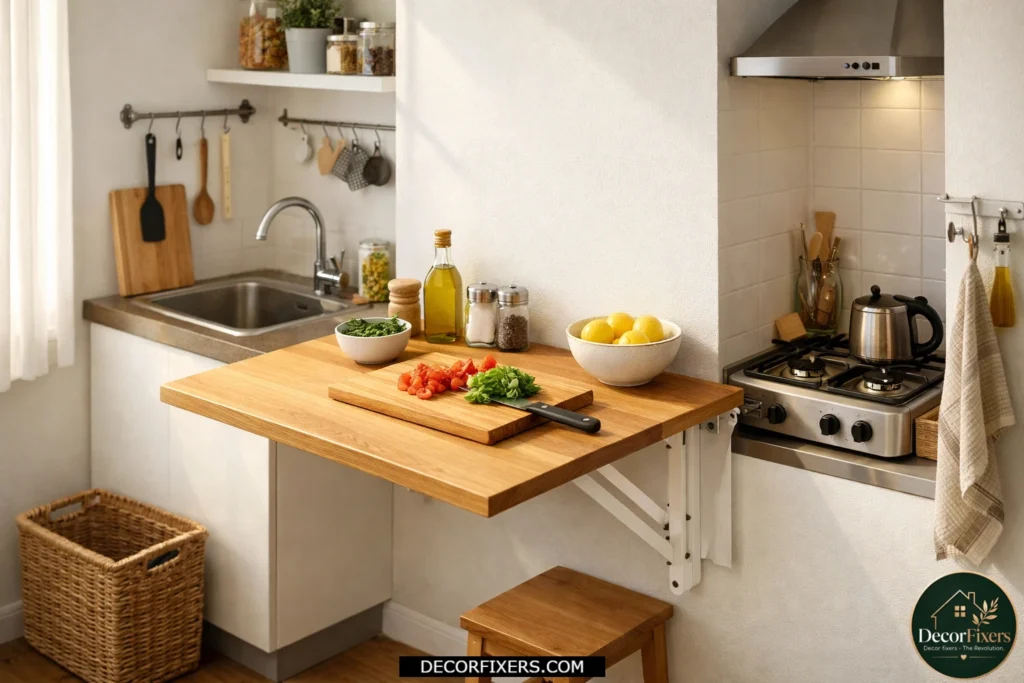
If counter space is the core problem, not just storage, a fold-down wall table changes the equation entirely. These mount flat against the wall and fold down to create a work surface when you need it, folding back up when you don’t. A good one costs $40–$80 and takes about an hour to install.
Look, if you’re in a kitchen where you literally can’t chop vegetables without moving something off the counter first, this is what actually solves that problem. It’s not glamorous. It’s not an island. But it works.
15. Organize Tupperware by Separating Lids and Bases
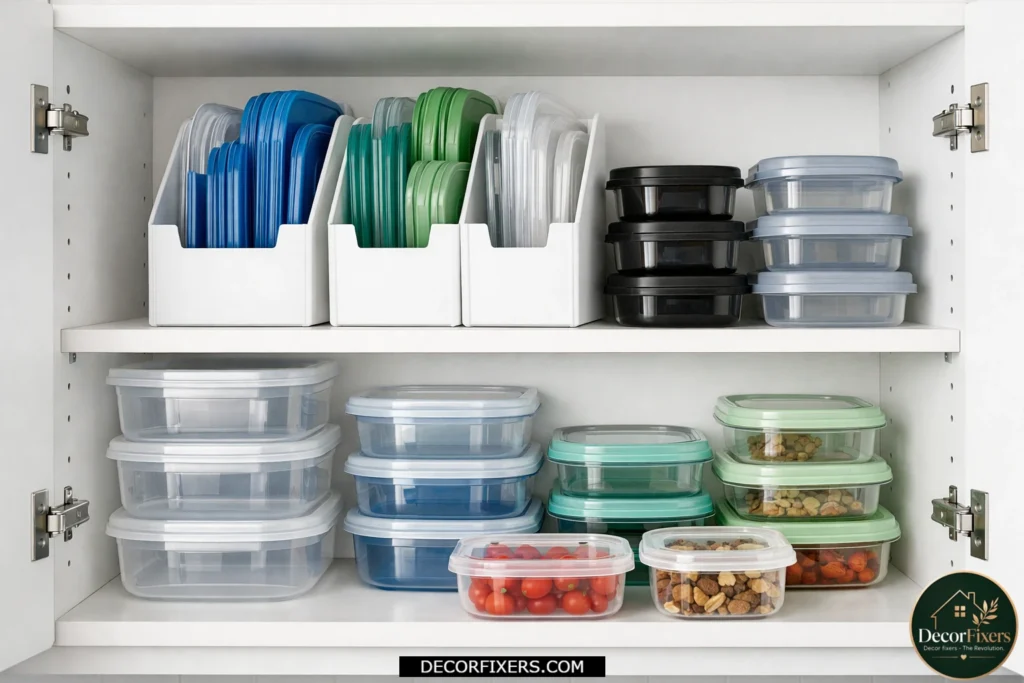
Tupperware chaos is universal. The reason it happens is structural: lids and bases are different shapes, and they do not stack well together. Fix it by separating them. Use one bin for stacked containers (nested by size) and a separate bin; a simple file organizer works great to hold lids vertically, like files.
This entire system costs under $15 in bins and takes about five minutes to set up. You will never dig through a pile of mismatched Tupperware again. It sounds minor until you realize how many times a week that chaos slows you down.
16. Add Under-Shelf Hanging Baskets Inside Cabinets
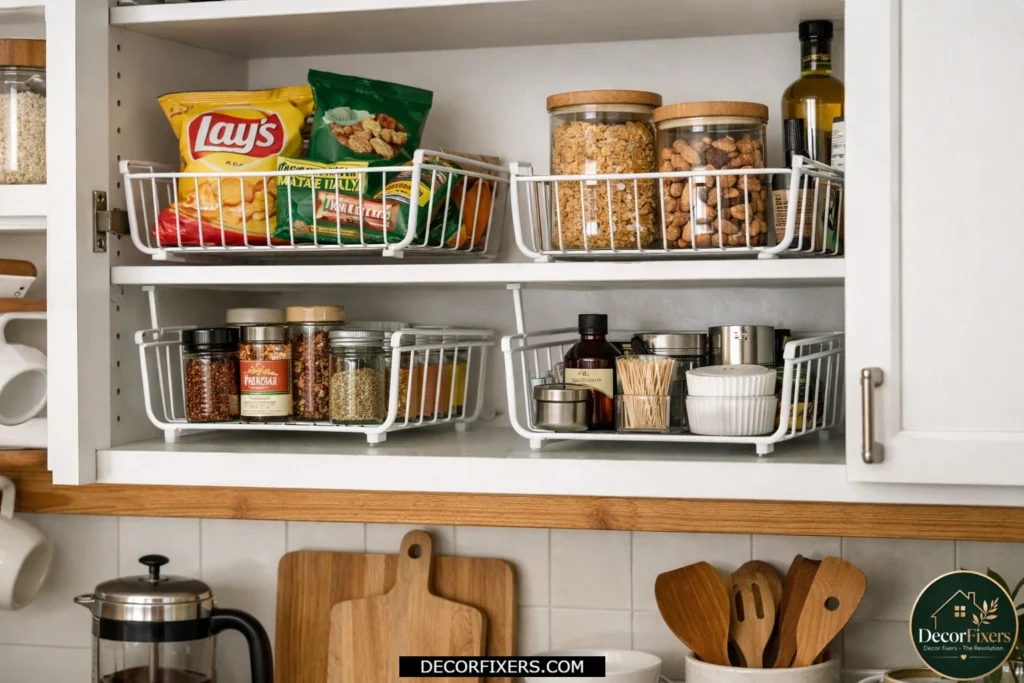
Under-shelf baskets clip onto an existing cabinet shelf and hang below it, creating a second storage tier with zero tools. They hold produce on open shelving, or inside cabinets, spice jars, small bags, or lightweight items that would otherwise get stacked on top of each other.
These are particularly useful in the cabinet above the stove, where there’s usually dead space. A 2-pack of wire clip-on baskets runs $8–$14. They’re renter-proof, removable in 30 seconds, and genuinely add storage without touching a single wall.
17. Consolidate Your Cleaning Products Under the Sink
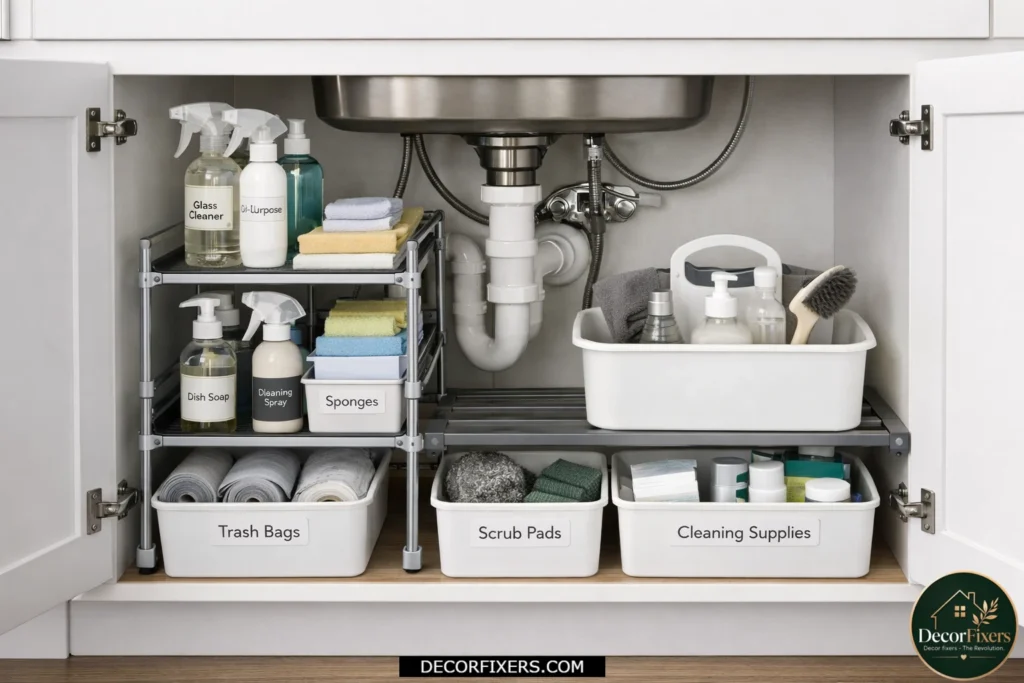
Under the sink tends to get crowded fast with cleaning products, sponges, and miscellaneous supplies. A simple two-step system fixes this: an expandable under-sink organizer ($15–$25) that creates upper and lower storage tiers, plus a small caddy that holds the daily essentials. Everything has a home. Nothing gets lost behind the drain pipe again.
Throw away duplicates and products you haven’t used in months. Cleaning under the sink is the least glamorous part of kitchen organization, and the one that makes the most immediate physical difference because it’s a space you access every day.
18. Hang Pot Lids on the Inside of a Lower Cabinet Door
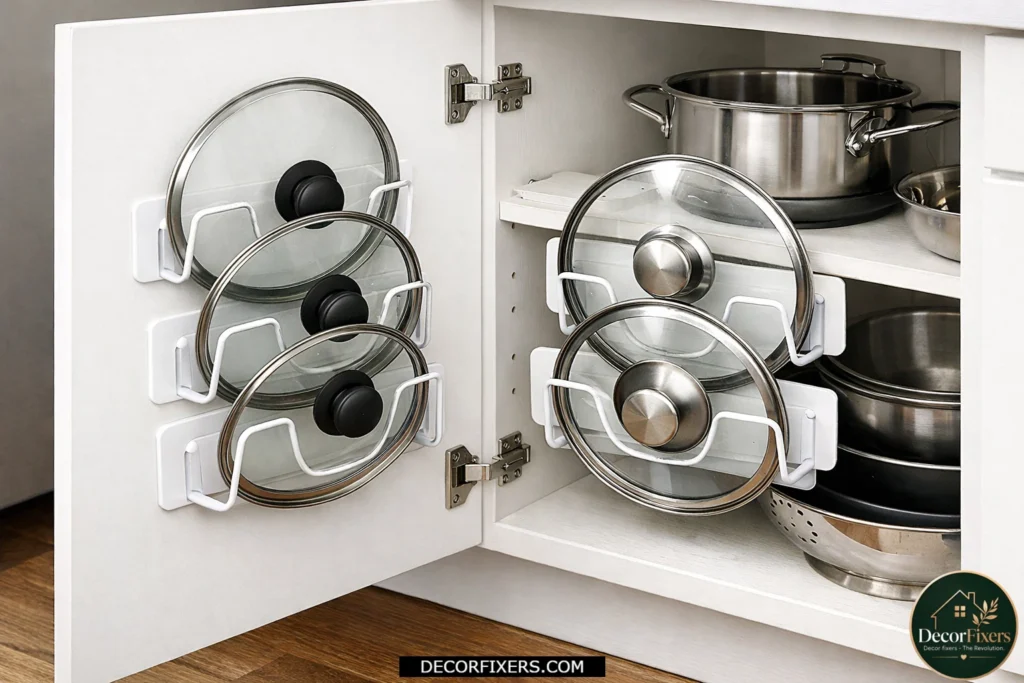
Pot lids are notoriously terrible at storing. They don’t stack; they slide, and they always seem to be the item at the very bottom of the pile. Mounting two or three adhesive hooks or a horizontal lid rack on the inside of a lower cabinet door solves this permanently. Lids hang vertically, stay in place, and are instantly accessible.
Self-adhesive lid racks designed for this purpose cost $10–$18. They’re one of those purchases that causes zero doubt after the fact. Every person who does this wonders why they waited so long.
19. Install a Pull-Out Cutting Board
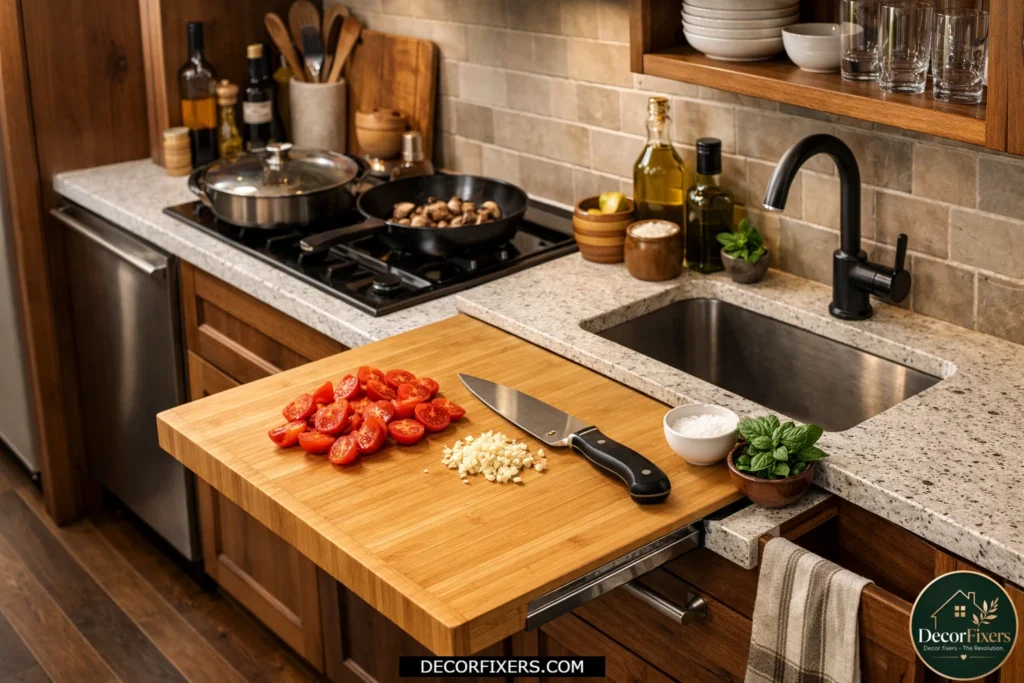
If you have even one lower cabinet where the shelf is at counter height, a pull-out cutting board is worth serious consideration. It slides out when you need it and disappears when you don’t. This is especially powerful in galley kitchens where every inch of visible counter space feels precious.
Ready-made pull-out cutting board inserts cost $30–$70, depending on size and material. Butcher block and bamboo are the best surfaces, durable and cleanable. This is a slightly bigger investment, but it changes how the kitchen actually functions during cooking.
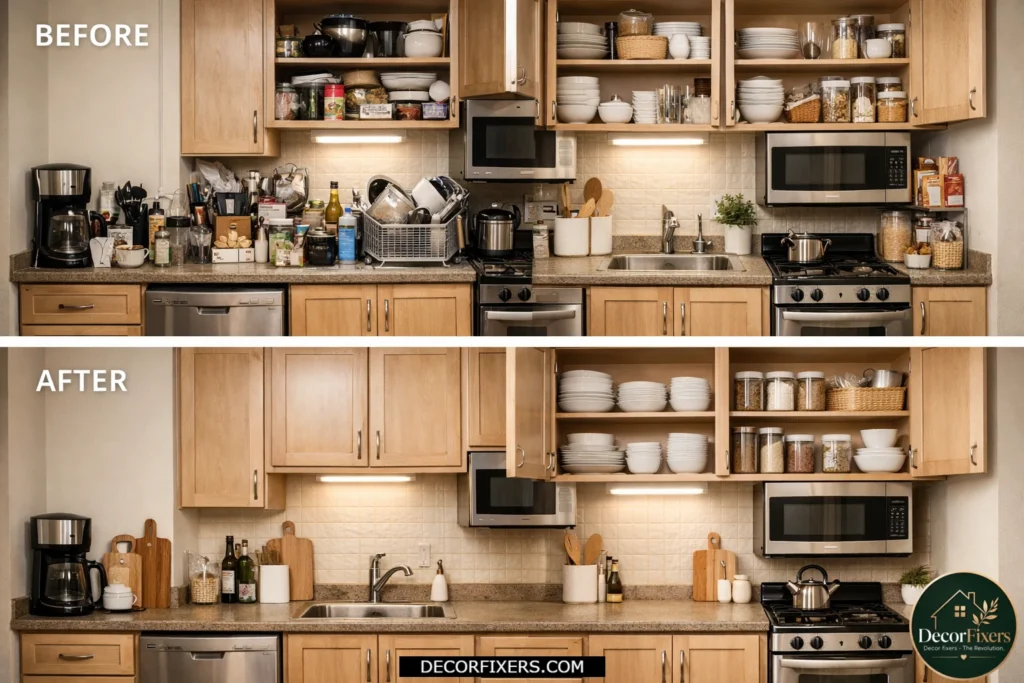
20. Go Vertical With Open Shelving for Frequently Used Items

Open shelving gets a bad reputation because it can look messy if done carelessly. Done right, it’s actually one of the most functional and visually appealing things you can do in a small kitchen.
Mount two or three narrow floating shelves ($20–$50 each) and keep only daily-use items there: a few mugs, oils and vinegars you use constantly, and a small stack of bowls.
The key rule: never put something on an open shelf that you don’t reach for at least twice a week. Everything else goes in a cabinet. This forces you to be intentional and keeps the display clean. The visual effect is a kitchen that looks bigger because the eye has clear surfaces to rest on.
21. Use Stackable Can Organizers to Rotate Pantry Stock
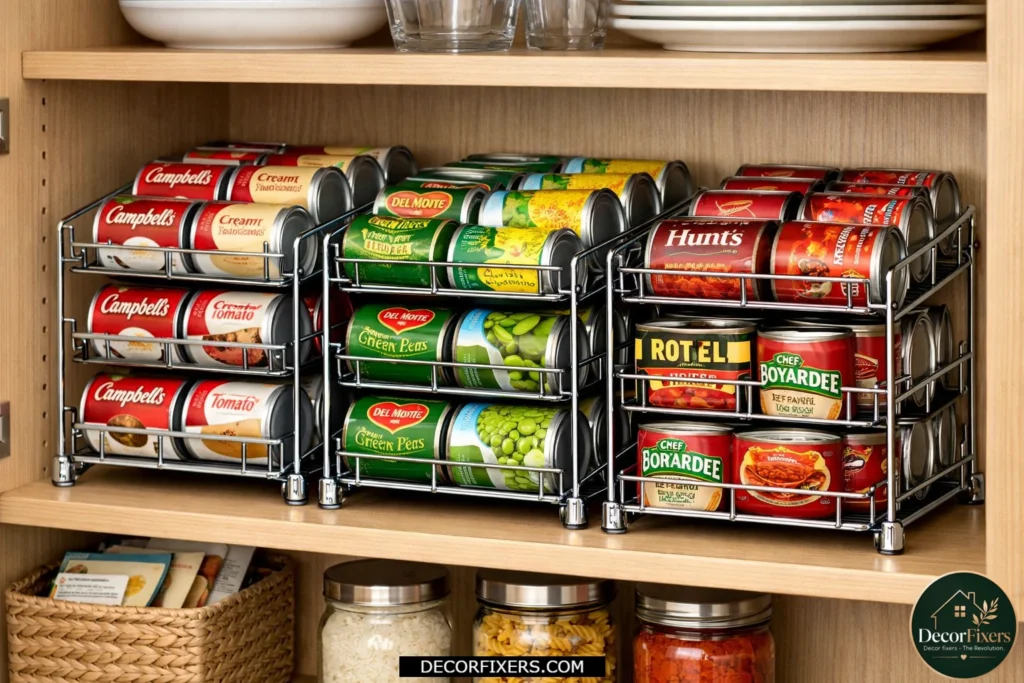
Canned goods are heavy, take up significant cabinet space, and, when stacked two or three deep, make it impossible to see what you have. A stackable can dispenser (usually $15–$30 for a set that holds 20–30 cans) organizes them in a first-in, first-out rotation. Load from the top. Use from the bottom. Nothing expires in the back unseen again.
These are especially useful in apartment kitchens where the pantry is actually just a single cabinet. They turn a flat shelf into a properly organized system. It’s one of those purchases that feels disproportionately satisfying once it’s set up.
22. Create a Dedicated Coffee and Tea Station
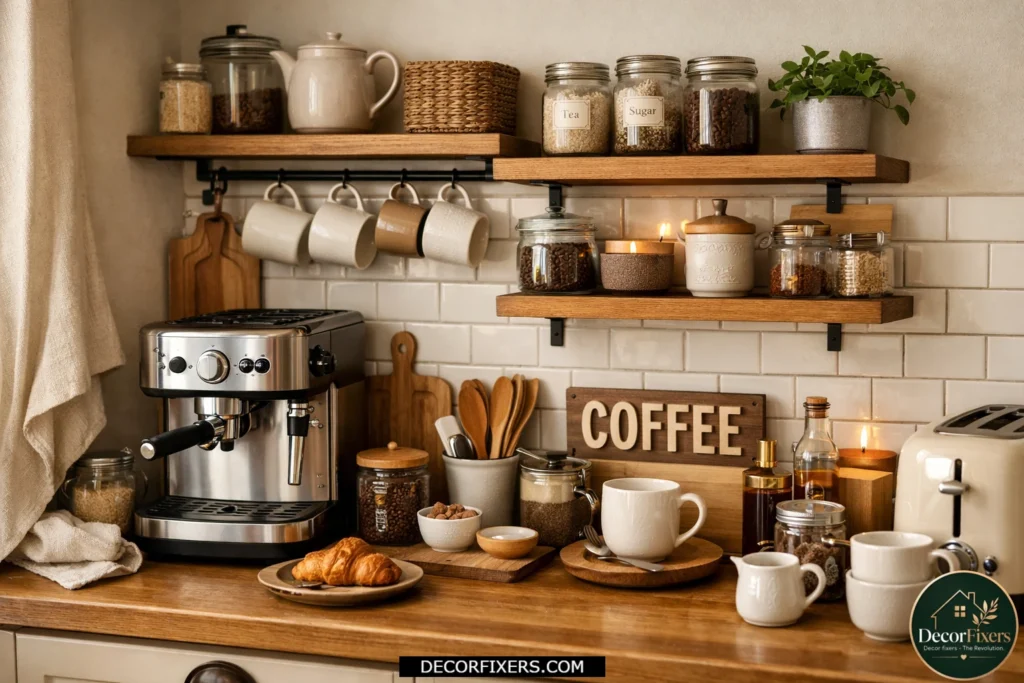
Scattered coffee pods, multiple tea boxes, and a misplaced kettle, the morning routine is one of the biggest contributors to small kitchen clutter. Designating one specific zone, even just 12 inches of counter space and one cabinet section, as the coffee and tea station brings immediate order.
Keep the kettle or coffee maker on the counter. Directly above or beside it is the mug shelf. In the drawer or cabinet immediately next to it: pods, tea bags, filters, sugar. Everything for the morning routine lives in one place. This is called zone organization, and it’s one of the fastest ways to make a kitchen feel dramatically more functional.
23. Maximize Drawer Space With Bamboo Drawer Organizers
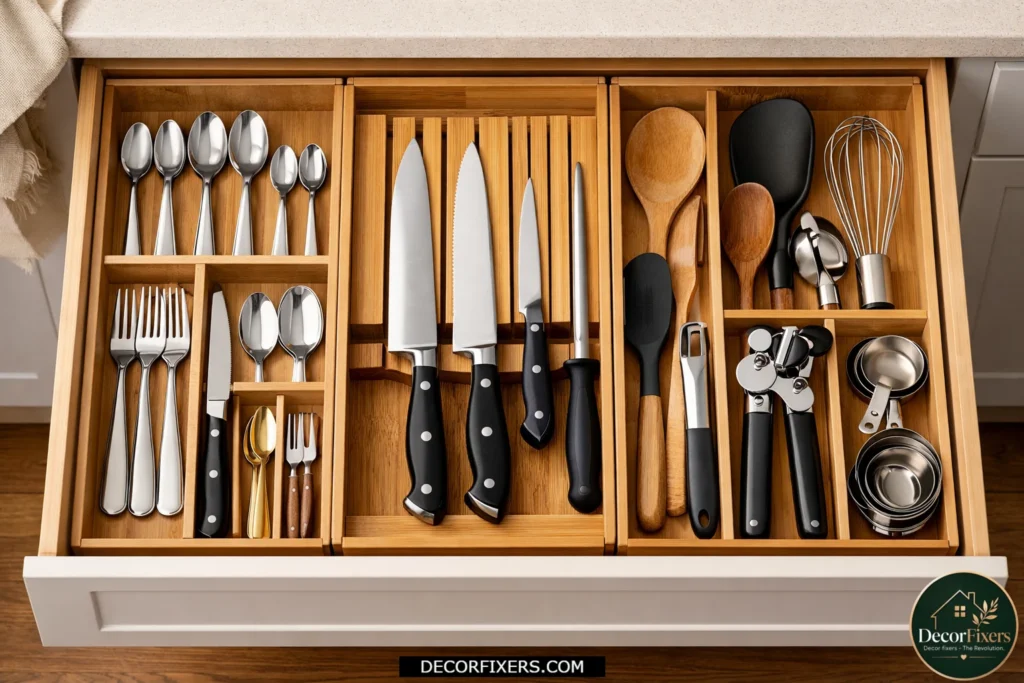
Kitchen drawers are universally chaotic, the junk drawer especially. But even the utensil drawer, the knife drawer, and the tools drawer tend to become jumbled over time because there’s no internal structure. Bamboo expandable drawer organizers ($12–$25 for a set) fit your exact drawer width and create dedicated compartments for every category.
Bamboo is the best material here: it looks clean, it’s durable, it does not slide around, and it does not stain the way plastic does. Measure your drawer interior before buying; expandable organizers adjust to fit, but there is a size range to account for.
24. Use a Wall-Mounted Paper Towel Holder to Free Up Counter Space
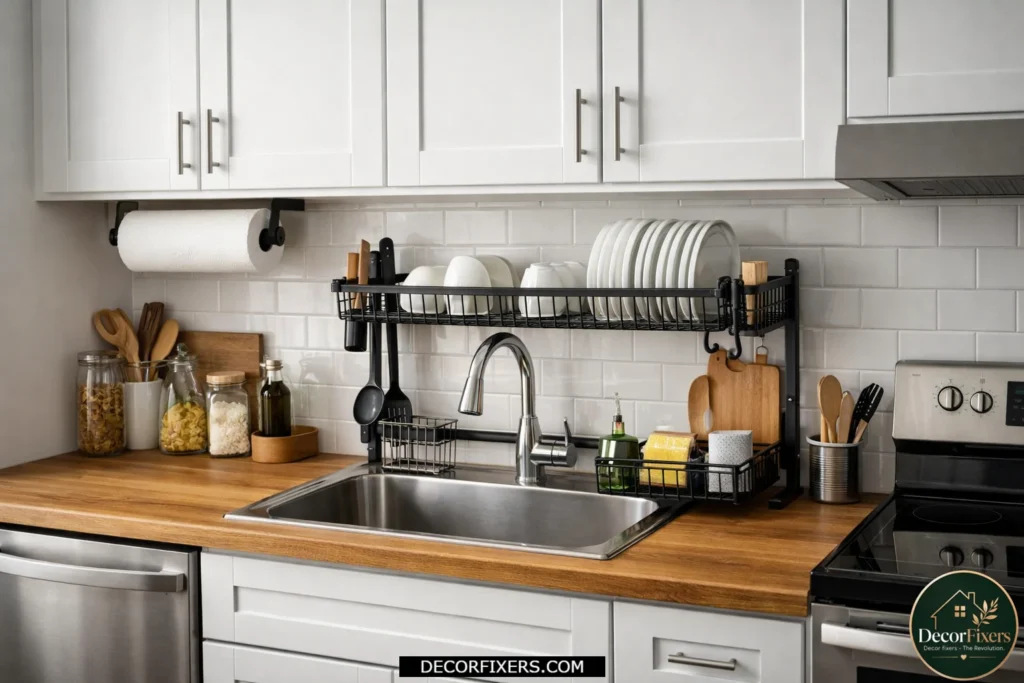
Paper towel holders that sit on the counter are a space tax. They take up roughly a square foot of counter real estate for no reason other than habit. A simple wall-mounted or under-cabinet paper towel holder costs $8–$20 and moves the roll off the counter entirely. This is a 5-minute change with a permanent payoff.
The same logic applies to your dish drying rack. If you can switch to an over-the-sink rack that drains directly into the sink ($20–$35), you reclaim the entire counter section beside the sink. Two simple swaps, maybe $30–$40 total, and your counter visually doubles.
25. Audit Your Organization System Every 3 Months
This last one is not a product. It’s a habit, and it might be the most important item on this list. Kitchen clutter creeps back. New items appear. Old systems stop working. Every three months, spend 20 minutes going through each zone: Does this still work? Is there anything that can go wrong? Is there a better spot for this?
The kitchens that stay organized are not the ones that had the perfect setup once. They’re the ones whose owners stay actively intentional about the space. A small kitchen is not a limitation; it just requires more ongoing attention than a large one. Keep that relationship with your kitchen, and it’ll work for you, not against you.
COMPARISON:
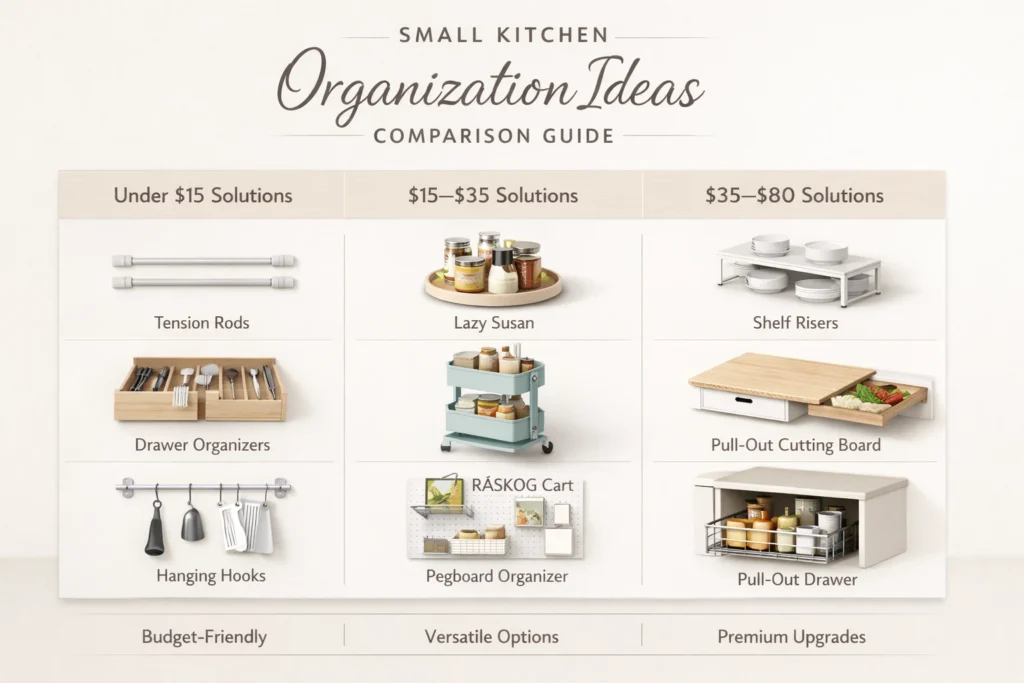
| Budget Range | Storage Solutions |
| Under $15 | Tension rod under sink, shelf risers, bamboo drawer organizers, under-shelf clip baskets, file organizer for pot lids |
| $15–$35 | IKEA RASKOG cart, iDesign stackable bins, Lazy Susan, magnetic knife strip, stackable can organizer |
| $35–$80 | Pegboard + hooks set, fold-down wall table, pull-out cutting board, elfa shelf system from The Container Store |
CONCLUSION:
I want to be honest with you: there is no single magic organizer that fixes everything. I’ve watched people spend $200 on bins and baskets only to have the same kitchen chaos two months later because the underlying habits did not change.
What actually works is a combination of decluttering first, setting up a few structural changes, rolling cart, cabinet door storage, vertical pan storage, and then maintaining it with small quarterly check-ins. Start with ideas 1, 3, and 5 from this list. Those three alone will transform how the kitchen feels day to day.
A small kitchen is not a problem to solve once. It’s a space to keep working with. The good news? Every idea in this list costs less than a single dinner out. You do not need more space. You need to make better use of the space you have.
FAQs:
Q: What is the best way to organize a small kitchen with no pantry?
Use cabinet interiors fully with shelf risers and door racks. Migrate overflow pantry items to a rolling cart or upper cabinet basket storage. Open shelving for daily-use staples frees cabinet space for everything else.
Q: How do I store pots and pans in a small kitchen?
Hang them on a wall rail or pegboard to clear cabinet space entirely. If you prefer cabinet storage, use vertical pan organizer racks or file organizers so each piece slides out individually rather than nesting in a tower.
Q: Should I buy more kitchen organizers or declutter first?
Declutter first, always. Organizers do not fix a volume problem. Remove anything unused in 12 months, then buy only what you need to house what remains. Buying bins for items you should discard is just expensive clutter.
Q: What is the best kitchen organizer brand for a tight budget?
iDesign (Linus line) and IKEA offer the best quality-to-cost ratio. Most iDesign pieces are $8–$18 and widely available on Amazon. IKEA’s storage items perform well and come in consistent sizes that stack cleanly together.
Q: When should I consider open shelving in a small kitchen?
Open shelving works when you have 10–15 attractive daily-use items to display. Avoid it if most of your kitchen items are mismatched or if you cook infrequently and surfaces collect dust quickly. It requires ongoing curation to stay functional.

Creator of DecorFixers, sharing practical home and interior ideas focused on real-life usability, simple design improvements, and budget-friendly solutions.
1 thought on “25 Small Kitchen Organization Ideas: Space-Saving Solutions”