

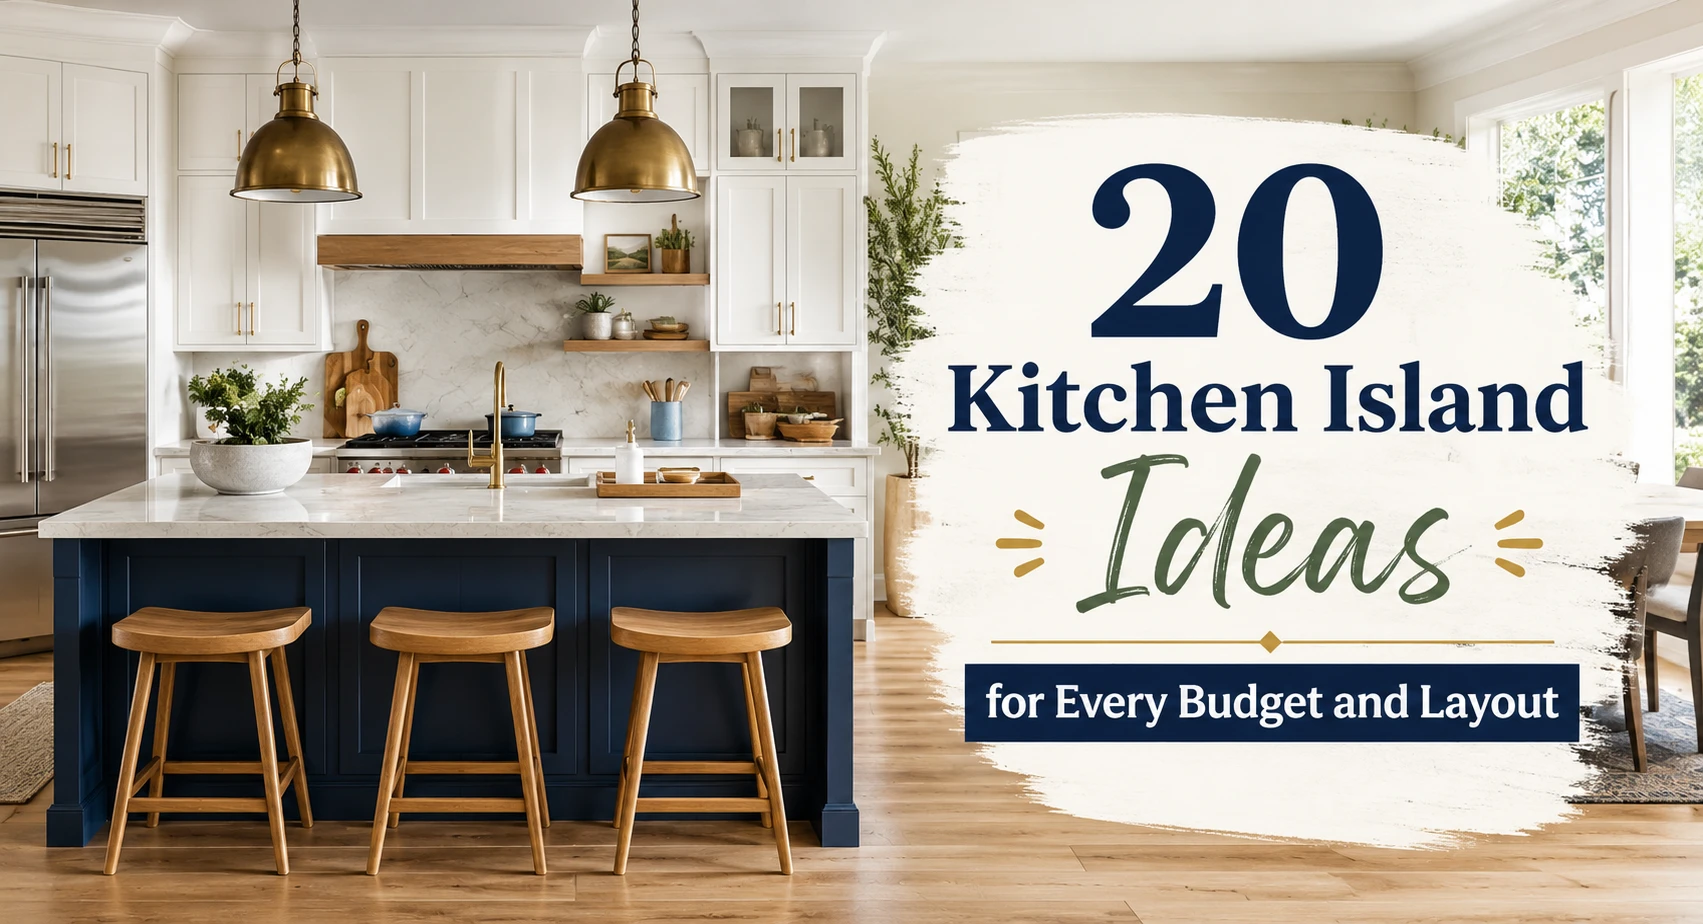
You’ve saved the pins. You’ve watched the renovation videos. And every time you stand in your kitchen, you feel that same quiet frustration; there’s so much wasted space in the middle of the room, or the island you have just doesn’t do enough. Maybe the contractor’s quote made your stomach drop. Maybe you’re not sure if your kitchen is even big enough for one.
Here’s the thing: most articles about kitchen island ideas show you beautiful photos and stop there. They don’t tell you whether that waterfall island will fit in a 10×12 kitchen, what it actually costs, or which mistakes to avoid before you sign anything. This guide does all of that.
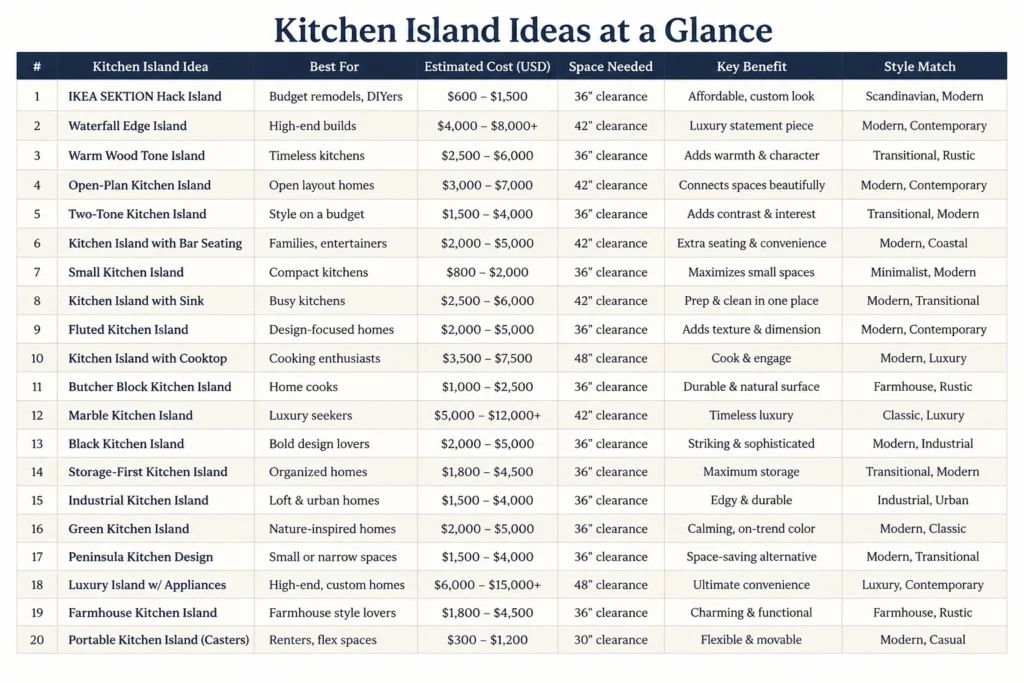
I’ve pulled together 20 kitchen island ideas covering every real scenario, small spaces, tight budgets, open-plan layouts, and high-end builds. For each one, I’ll tell you what it costs, who it suits, and what to watch out for. Let’s get into it.
What Are Kitchen Island Ideas? Kitchen island ideas refer to design concepts, layouts, and functional configurations for a freestanding or fixed counter unit placed in the center of a kitchen. A kitchen island adds workspace, seating, storage, or appliance integration, and can transform how an entire room flows and functions.
This guide covers permanent and semi-permanent islands for owner-occupied homes. It does not address mobile carts, rental-specific restrictions, or commercial kitchen regulations.
1. The IKEA SEKTION Hack, A Budget Island That Looks Custom

This is the most searched DIY kitchen island approach for good reason. Using IKEA SEKTION base cabinets as the island structure, then topping them with a butcher block or quartz slab, delivers a custom-looking result for under $1,500 in most markets.
The trick is adding shiplap or beadboard paneling to the island’s exterior sides, which hides the flat cabinet faces and makes the whole unit look built-in. Use furniture feet from a hardware store to lift it slightly off the floor for a furniture-style finish. No plumbing, no electrical, no permits required.
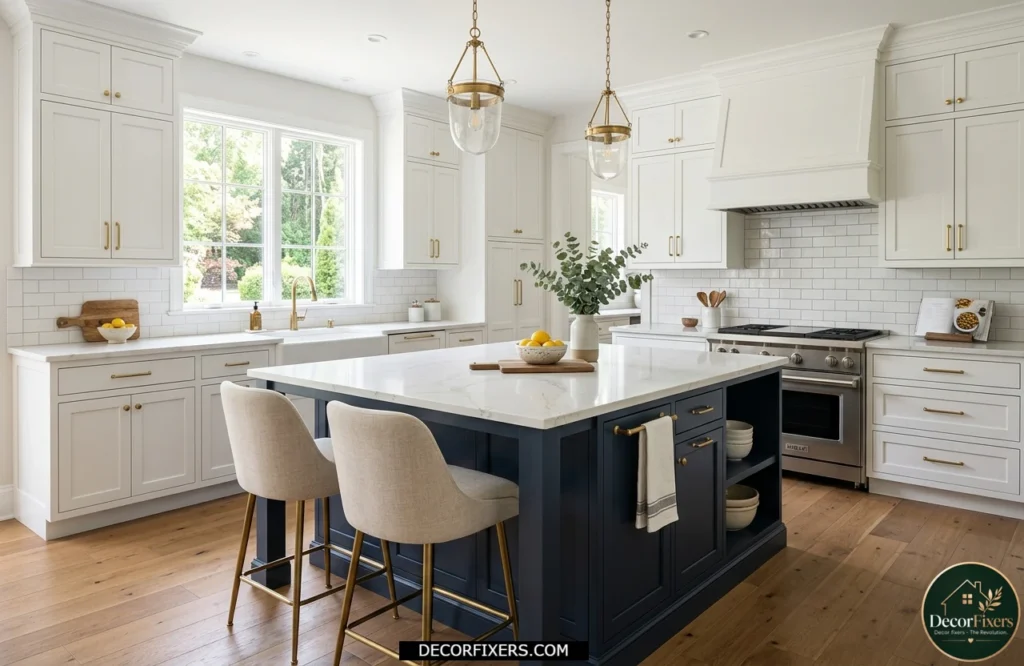
2. Waterfall Edge Island, The Statement That Earns Its Price Tag
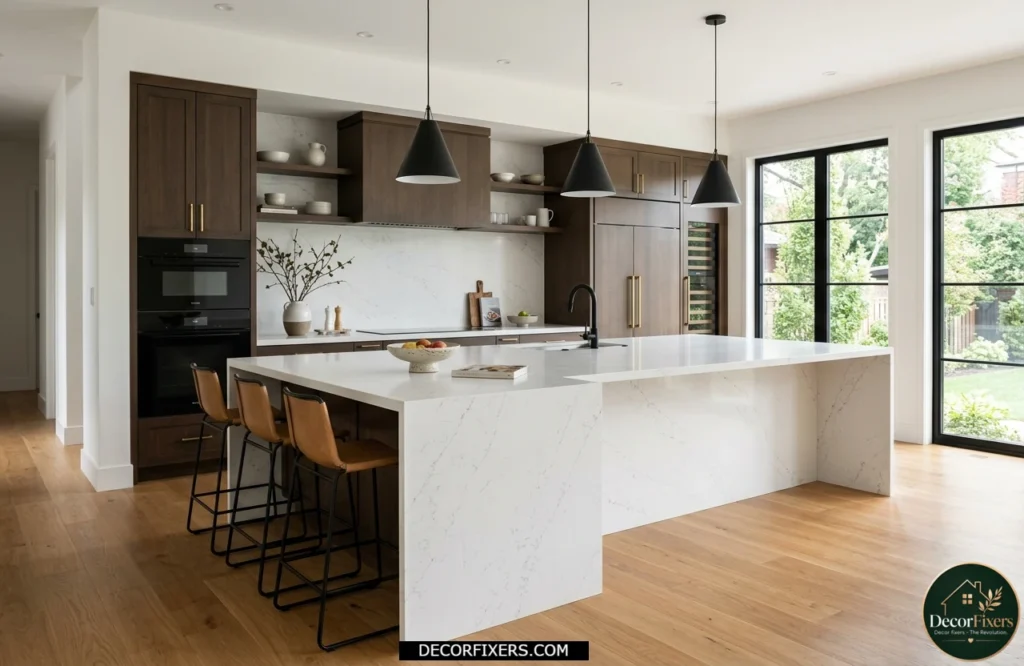
A waterfall kitchen island extends the countertop material vertically down both ends, creating an unbroken slab effect. It’s a genuine design statement. Caesarstone and Silestone make the most popular quartz versions, durable, non-porous, and available in marble-look veining without the maintenance headache.
Expect to add $1,500–$2,500 per waterfall side for the mitered joint fabrication. A single-sided waterfall on a mid-range quartz island runs $4,000–$8,000 fully installed. Some experts argue the cost isn’t worth it for a busy family kitchen where scratch resistance matters more than drama. That’s fair, if you have kids, a honed finish is more forgiving than polished.
3. Warm Wood Tone Island, The Trend That’s Outlasting the Trend Cycle
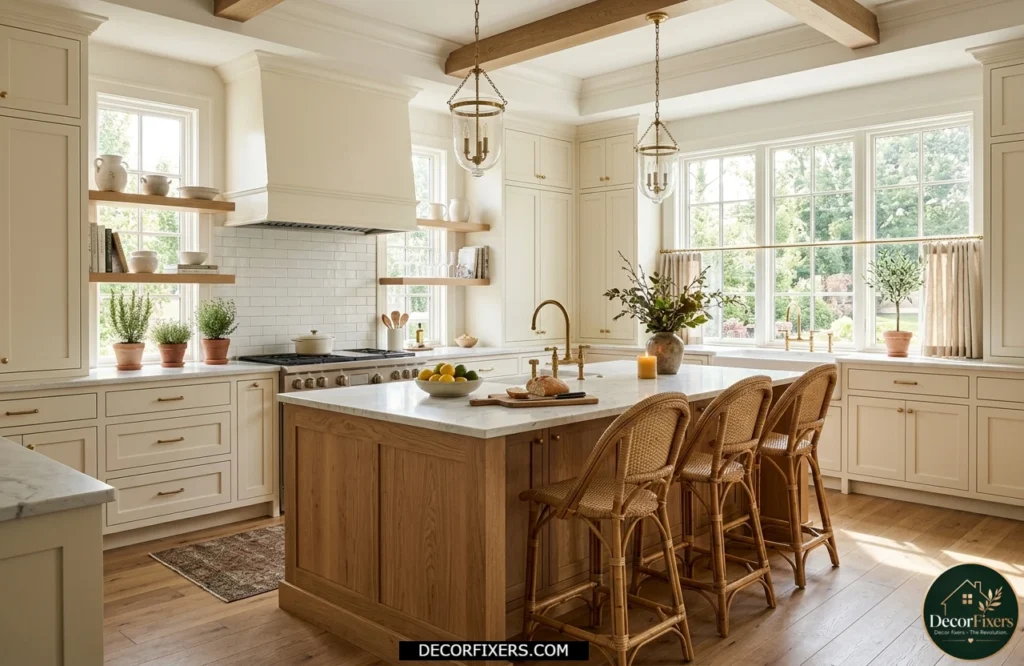
According to the 2026 NKBA Kitchen Trends Report, 57% of designers now say the island is the primary destination for statement Color and material in the kitchen, more than cabinets or backsplash. Warm wood islands in oak, walnut, or mixed species are leading that shift.
The reason this works so well: a wood island against white or cream perimeter cabinets creates the kind of layered, collected look that feels personal rather than showroom-perfect. White oak is the sweet spot for most budgets; it’s more affordable than walnut and takes stain beautifully if you want a darker tone.
4. Open-Plan Kitchen Island, Designing the Connector Between Rooms
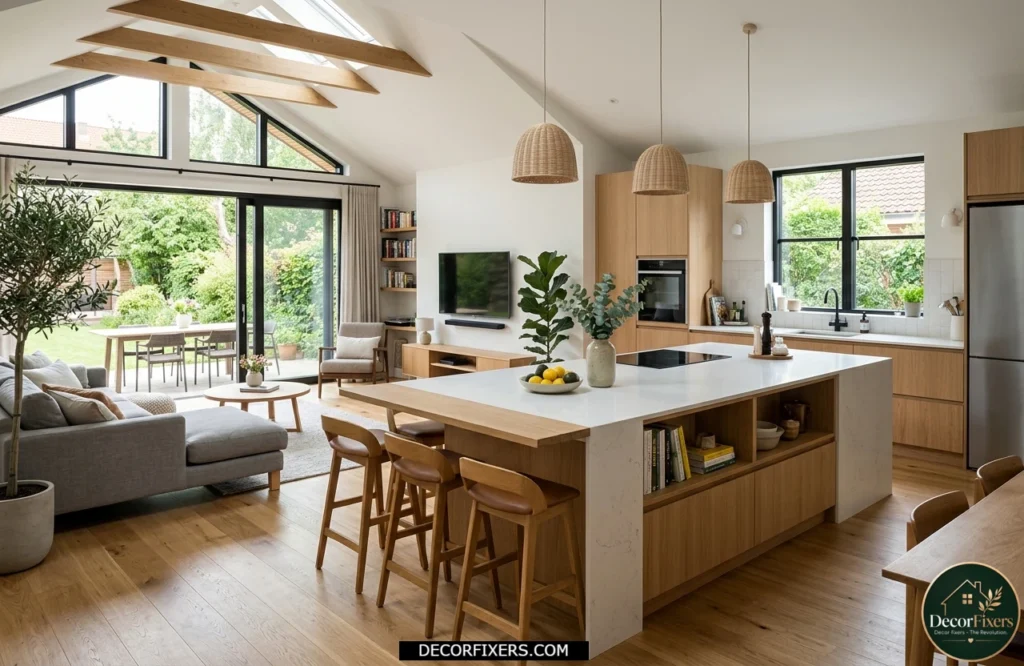
In an open-plan layout, the island isn’t just a prep surface. It’s doing architectural work, defining the boundary between the kitchen and the living or dining area without a wall. Get the placement wrong and the whole floor plan feels blocked.
The rule here is symmetry of function: one side of the island should face the kitchen and include deep drawers and appliance storage, while the seating overhang side faces the living area and provides 12–15 inches of knee clearance. For more details on how open kitchens handle the layout transition, see our guide on Open Plan Kitchen Ideas.
In the US, UK, Canada, and Australia, open-plan kitchen islands are now the most requested feature in new builds and renovations, particularly in homes where the kitchen doubles as a home office or homework zone. Contractors in these markets report that 70%+ of their remodel clients ask for seating integration at the island as part of the open-plan brief.
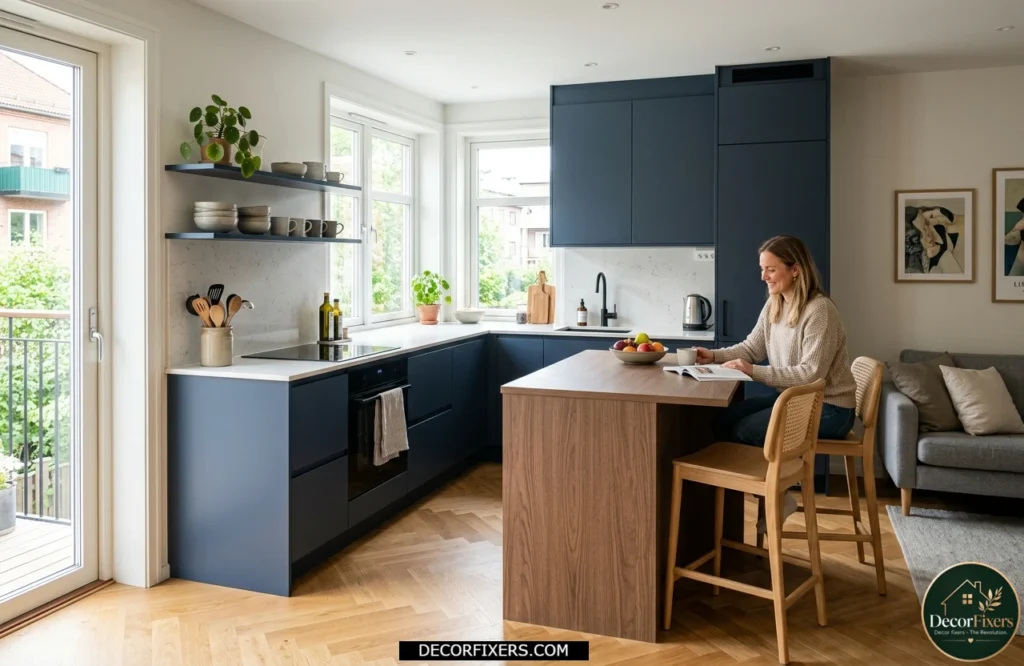
5. Two-Tone Kitchen Island, Contrast That Pulls the Room Together
A two-tone island, different Color or finish from the perimeter cabinets, is now standard practice for designers, not a trend to chase. It’s also one of the most budget-friendly ways to add visual interest. You’re just painting or refacing one unit, not the entire kitchen.
The 2026 NKBA data shows greens (86%) and blues (78%) are the top island accent colors chosen by designers. Navy, forest green, and charcoal are the most versatile for resale. Avoid trendy colors like terracotta or burnt orange if you plan to sell within three years; they date faster than neutrals.
How much space do you need for a kitchen island? A kitchen island requires a minimum of 36 inches of clearance on all sides for one-person use. According to NKBA guidelines, 42 to 48 inches is recommended for kitchens with multiple cooks or seating. Island size should be at least 4 feet by 2 feet for functional prep space.
6. Kitchen Island with Bar Seating, Making Breakfast Work Every Morning
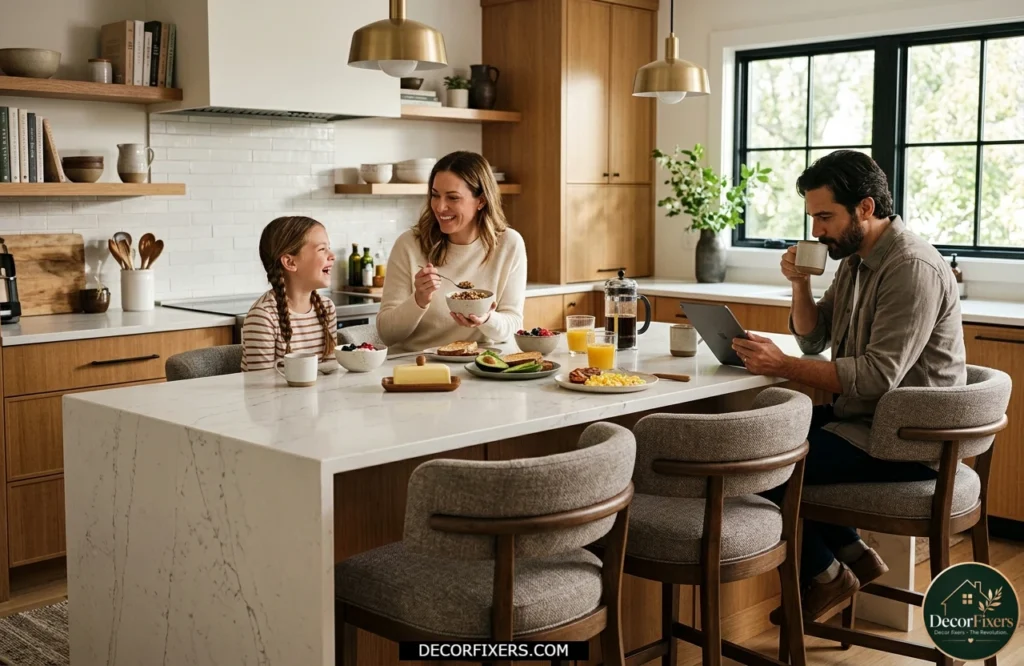
Bar seating at a kitchen island sounds simple until you get the measurements wrong. Counter height (36 inches) needs standard stools; bar height (42 inches) needs taller stools with foot rests. Each seat requires a minimum 24-inch width of overhang and 12–15 inches of knee clearance underneath.
Look, if you’re designing for a family with young children, consider a lower counter height on the seating side (34–36 inches) and use upholstered stools rather than bare metal. Kids sit longer. Adults are more comfortable. The casual seating trend noted by designers at Kitchens by Holloways shows families are moving away from bar stools toward softer, more relaxed seating integrated into the island design.
What Does a Kitchen Island Actually Cost? (DIY vs Custom, Real Numbers)
I’ve seen conflicting data on this across sources; some cite averages as low as $3,000; others push $15,000. My read, pulling from Angi, Fix, and HomeAdvisor 2025–2026 data, is this: the honest range depends entirely on whether you’re adding plumbing or electrical, and how custom you go.
Quick Comparison:
| Option | Best For | Key Benefit | Limitation |
| DIY / IKEA Hack ($300–$2,500) | Budget-conscious homeowners | Low cost, fully customizable | No plumbing/electrical without a pro |
| Prefab / Ready-Made ($800–$5,000) | Renters or quick remodels | Fast install, portable options | Limited size & style choices |
| Semi-Custom ($2,500–$7,000) | Most homeowners | Balance of style + budget | Fewer material choices than custom |
| Fully Custom ($7,000–$20,000+) | High-end or large kitchens | Bespoke design, max function | High cost, long lead times |
DIY saves money on labor, typically $500–$2,000 in installation costs, but anything involving a sink, cooktop, or new electrical circuit needs a licensed professional, regardless. Unpermitted plumbing or wiring can kill your home’s resale value. Budget separately for plumbing ($500–$1,900) and electrical ($7–$12 per linear foot of new wiring).
7. Small Kitchen Island Ideas, Making 4 Feet Do the Work of 8
You don’t need a big kitchen to have an island. The minimum functional size is 40 by 40 inches for a fixed unit. For tighter galley kitchens, a portable island on lockable casters gives you prep space when you need it and a clear floor when you don’t, essential for small kitchen layouts where traffic flow can’t be compromised.
The 10% rule applies here too: a 100-square-foot kitchen can support roughly a 10-square-foot island. In practice, that’s a 4×2.5-foot unit, enough for a prep zone and two stools if the overhang is right. Don’t go smaller than that, or you’ll spend more time moving around it than using it.
8. Kitchen Island with Sink, The Workflow Upgrade Worth the Plumbing Cost
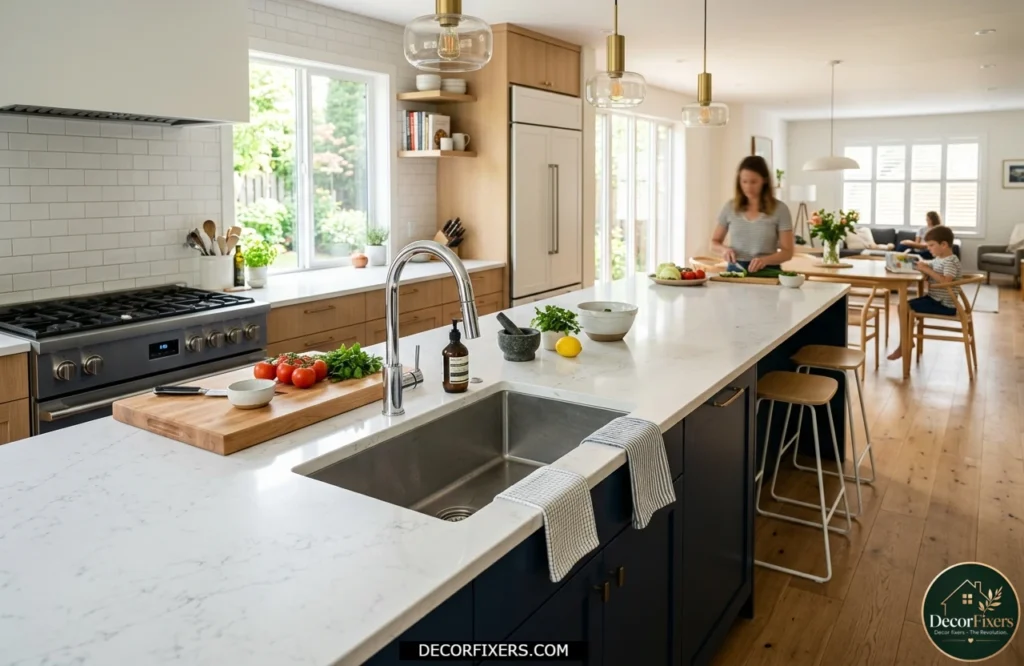
Adding a sink to your kitchen island relocates the primary washing zone to the center of the room, which changes how you cook entirely. Prep, rinse, and plate without ever crossing the kitchen. The NKBA’s 2025 survey found that 83% of designers agree that sinks with food prep and serving areas are becoming the preferred island feature.
The practical cost: plumbing a new sink to an island runs $500–$1,900, depending on your slab of concrete situation and how far the drain needs to run. If your island is more than 8 feet from the existing drain stack, costs climb. Always get this quoted before you fall in love with the floor plan.
9. Fluted Kitchen Island, Texture That Earns Attention Without Shouting
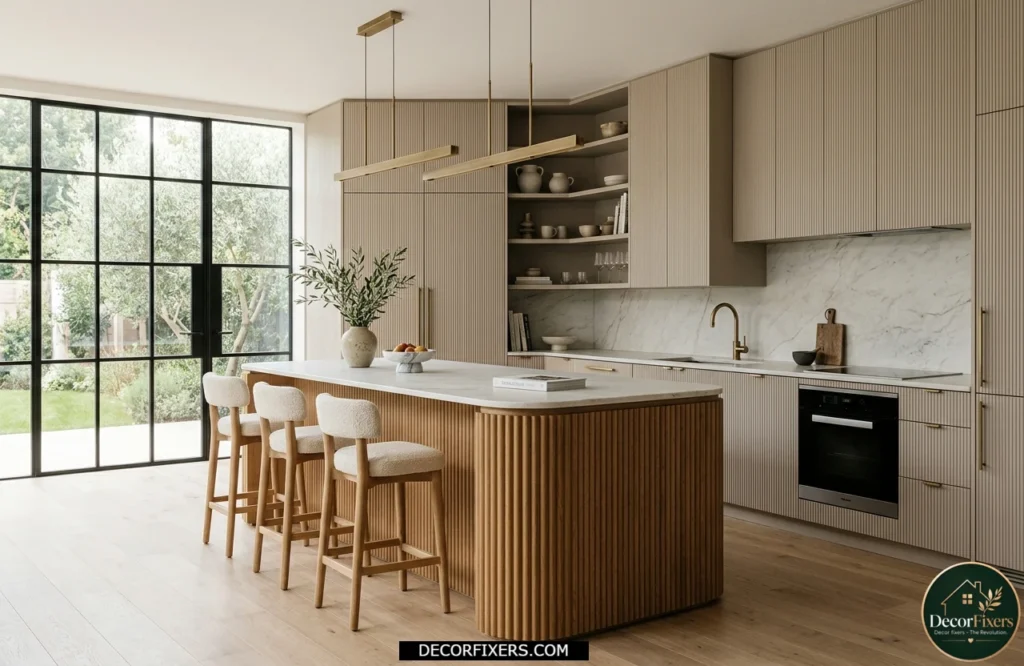
Fluted detailing, vertical ridges carved or applied to the island exterior, is one of the cleaner 2026 design moves. It adds texture without pattern, weight without bulk. Works on painted wood, oak veneer, or even plaster-finished panels.
Or maybe I should say it this way: fluting is what you use when you want the island to look expensive without the island being expensive. Applied fluted MDF panels over flat-fronted base cabinets cost $300–$600 for a standard-size island, versus $3,000+ for custom-carved cabinetry. The visual result is nearly identical from across the room.
10. Kitchen Island with Cooktop, Centralizing the Cooking Zone
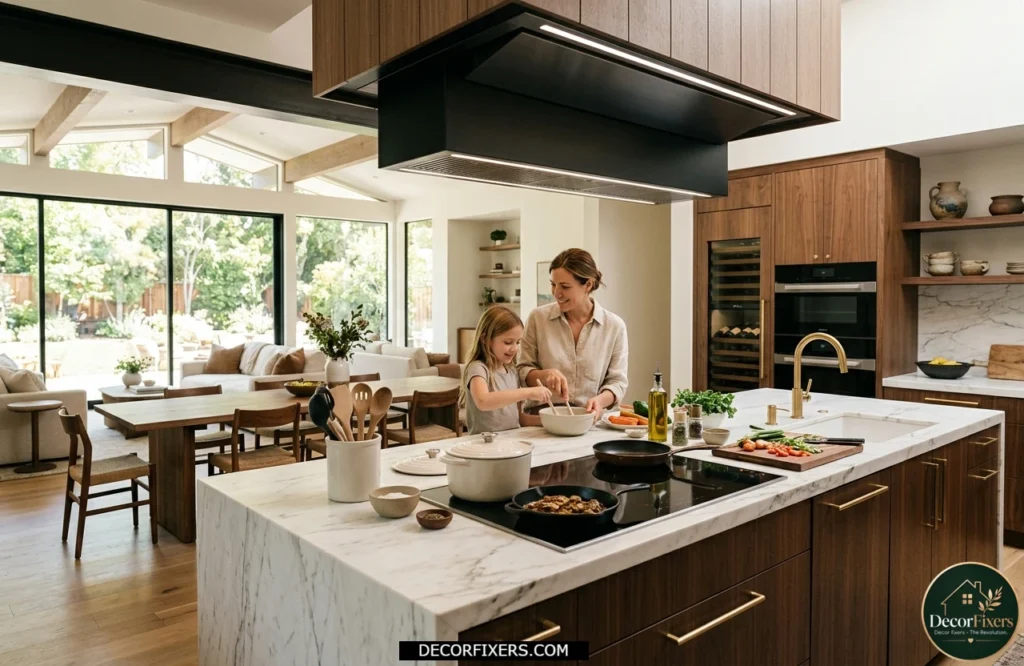
A cooktop island changes the kitchen hierarchy entirely. Instead of facing the wall while you cook, you face the room, the guests, the family, and the living area. It’s the design choice that makes a kitchen feel genuinely social.
It also comes with real constraints. You need a ventilation solution directly above, either a ceiling-mounted hood or a downdraft extractor built into the island surface. Downdraft units are less effective with high-heat cooking. Gas requires a licensed gas engineer for the line. Add $2,000–$5,000 to your island budget if you’re going this route.
In the United States, cooktop islands with pot-filler faucets are a staple of high-end new construction, particularly in homes above $800K in markets like the Northeast and California. In the UK and Australia, induction cooktop islands are increasingly standard due to stricter gas regulations in new builds. If you’re in a new home in these markets, confirm gas access before planning a gas hob island.
11. Butcher Block Kitchen Island, Warm, Practical, and Easier to Maintain Than You Think
Butcher block gets a bad reputation for maintenance. The reality: if you oil it every few months with food-grade mineral oil and sand out deep scratches every couple of years, it outlasts most countertop materials and gets better looking with age.
The cost advantage is significant. A 3×6-foot butcher block top runs $200–$600 at IKEA or at lumber suppliers, versus $800–$2,000 for a comparable quartz slab. For a DIY island build, this is the countertop choice that brings the whole budget under control without compromising on warmth or character.
12. Marble Kitchen Island, When the Material Is the Design
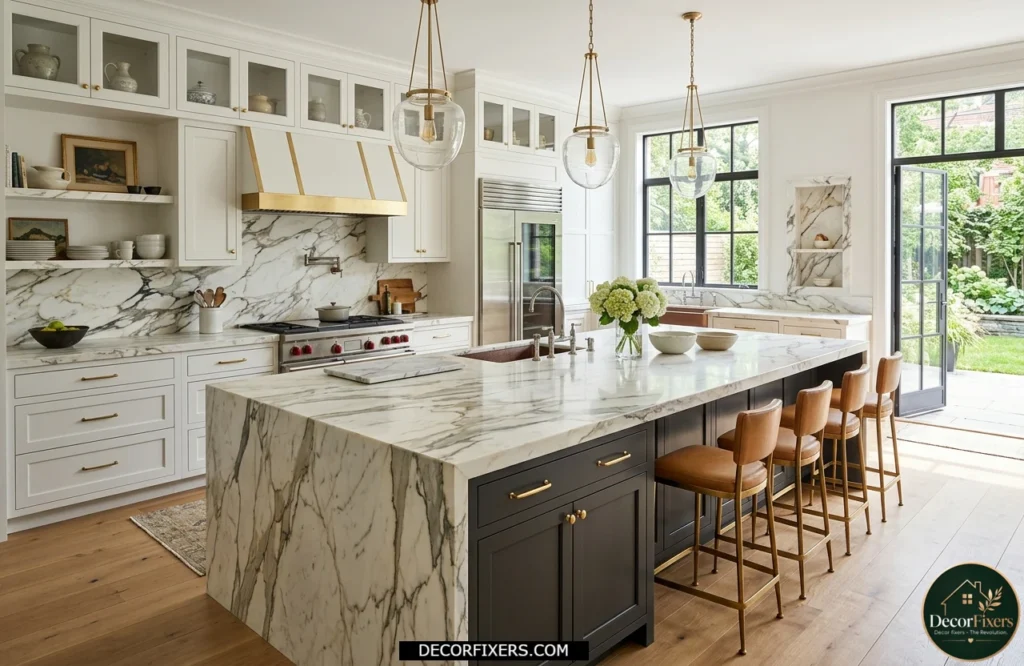
Marble is genuinely high-maintenance. It etches from acidic foods and drinks, stains from oil, and needs sealing annually. Most guides either pretend this isn’t true or use it to scare you off entirely. The honest position: if you cook seriously and use the island daily, quartzite or a marble-look quartz from Caesarstone gives you 90% of the aesthetic with 10% of the worry.
If you still want real marble, honed (matte) finishes are more forgiving than polished; they disguise etching better and develop a patina that many homeowners find even more beautiful than the original. Calcutta and Carrara remain the most timeless choices for resale appeal.
13. Black Kitchen Island, The Contrast Move That Rarely Fails
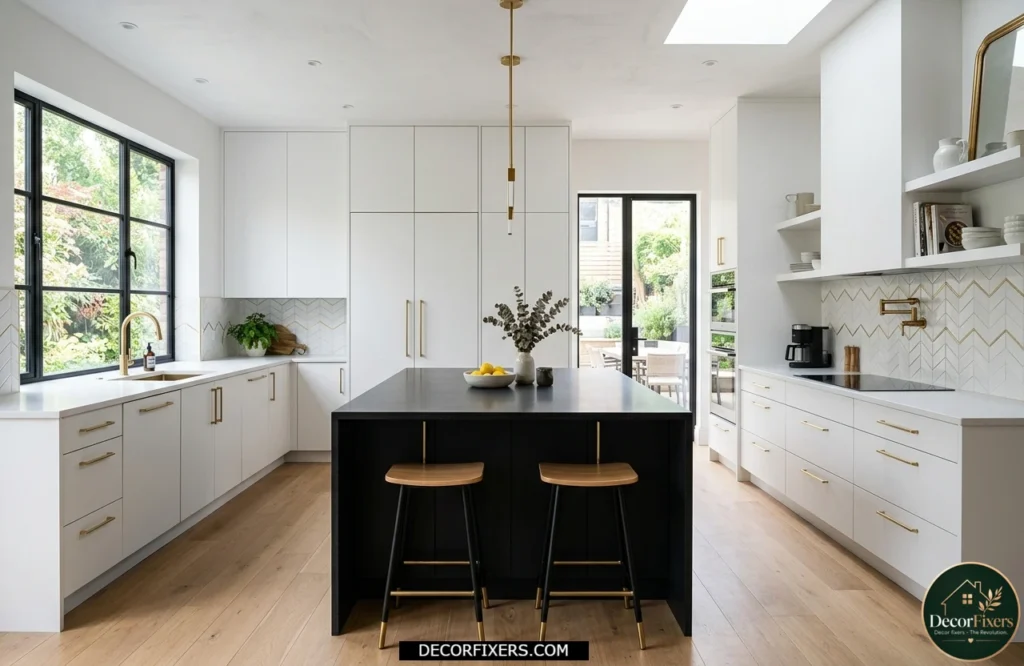
A matte black island in an otherwise white or cream kitchen is one of the safest bold design choices you can make. The contrast is dramatic but not difficult to live with, and it works across farmhouse, modern, and transitional styles without looking costume-y.
Paint is the most accessible route. Benjamin Moore’s Onyx or Sherwin-Williams’ Caviar are the two most consistently recommended colors by kitchen designers for island painting projects. Use a cabinet-grade enamel, not wall paint, for durability. Professionally repainted kitchen cabinets have an ROI of around 96% according to 2026 remodeling cost data.
14. Storage-First Kitchen Island, When Function Outranks Everything Else
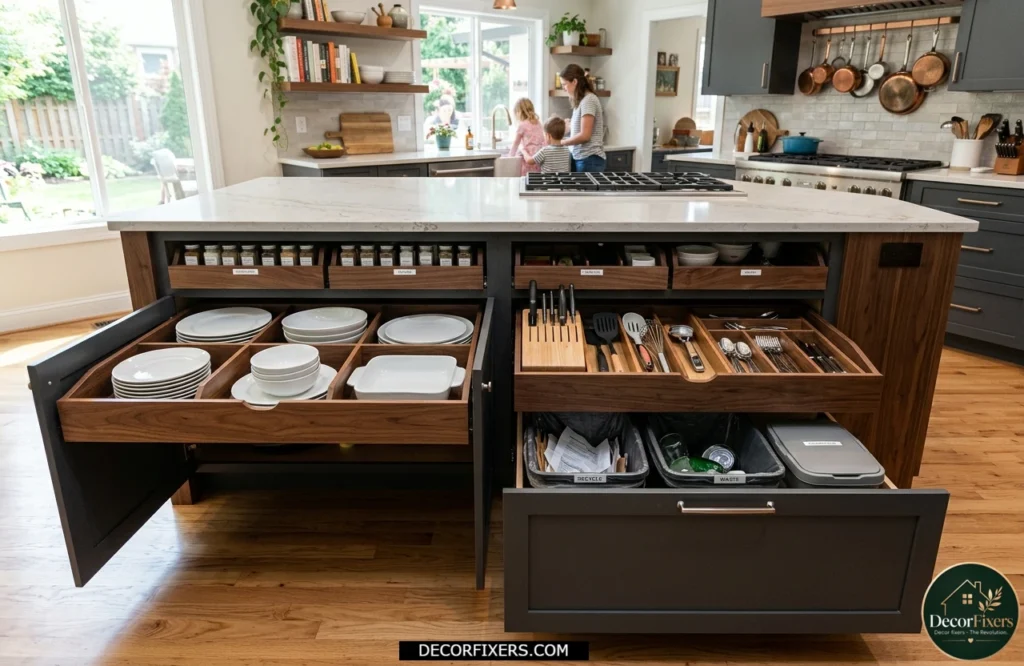
About half of renovated islands now exceed seven feet in length, according to 2026 NAR trend data, and the main driver isn’t seating. It’s storage. Deep drawers with full-extension runners, vertical dividers for baking sheets and cutting boards, and hidden bins for compost and recycling are what homeowners actually use every day.
The design rule: treat the island like a piece of furniture with a job. Decide what it stores before you decide how it looks. A drawer for pots, a drawer for prep tools, a section for everyday plates and bowls, a well-organized island cuts 30–40% of your kitchen movement patterns without changing a single other thing in the room.
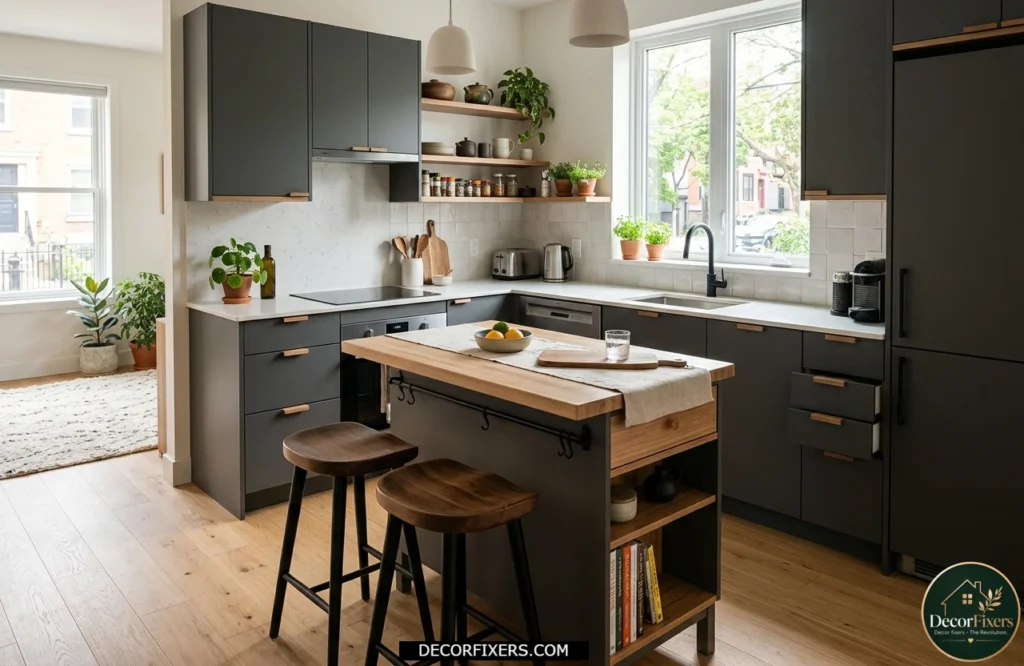
15. Industrial Kitchen Island, Concrete, Steel, and Reclaimed Wood
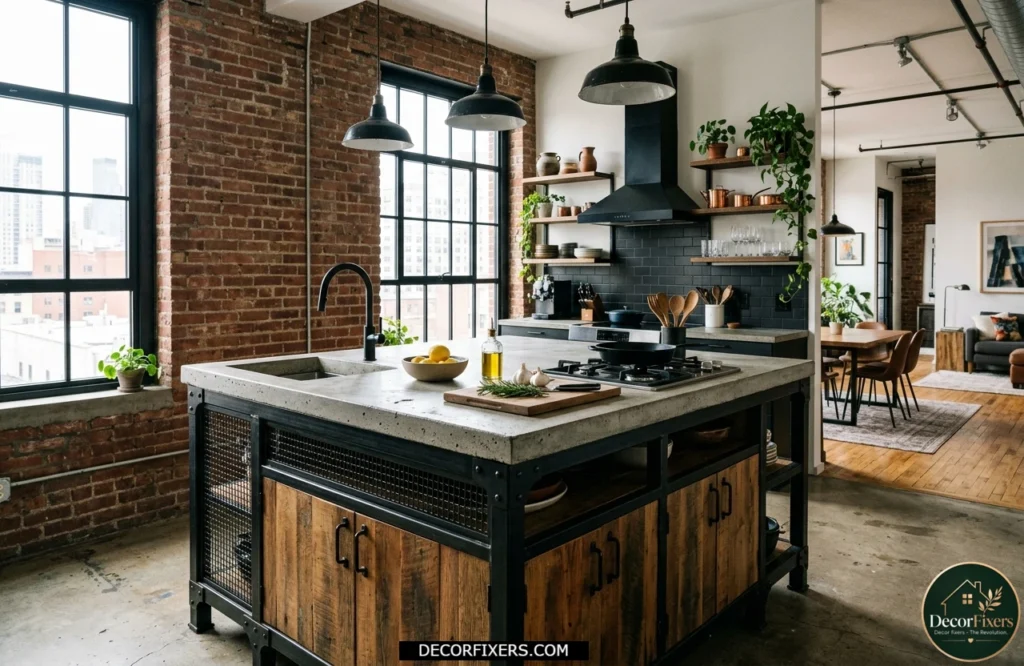
Concrete countertops are having a sustained moment, particularly in urban apartments and loft conversions. They’re genuinely unique; no two poured surfaces look identical, and they can be tinted, embedded with glass, or sealed to a silky matte finish.
The weight is the real consideration most people miss. Poured concrete at 1.5 inches thick weighs 18–20 lbs per square foot. A 6-foot island top can weigh 600+ lbs; the substructure underneath needs to be designed for that load. This is a job for a structural carpenter who understands the base cabinet requirements.
16. Green Kitchen Island, The Color Trend That’s Actually Here to Stay
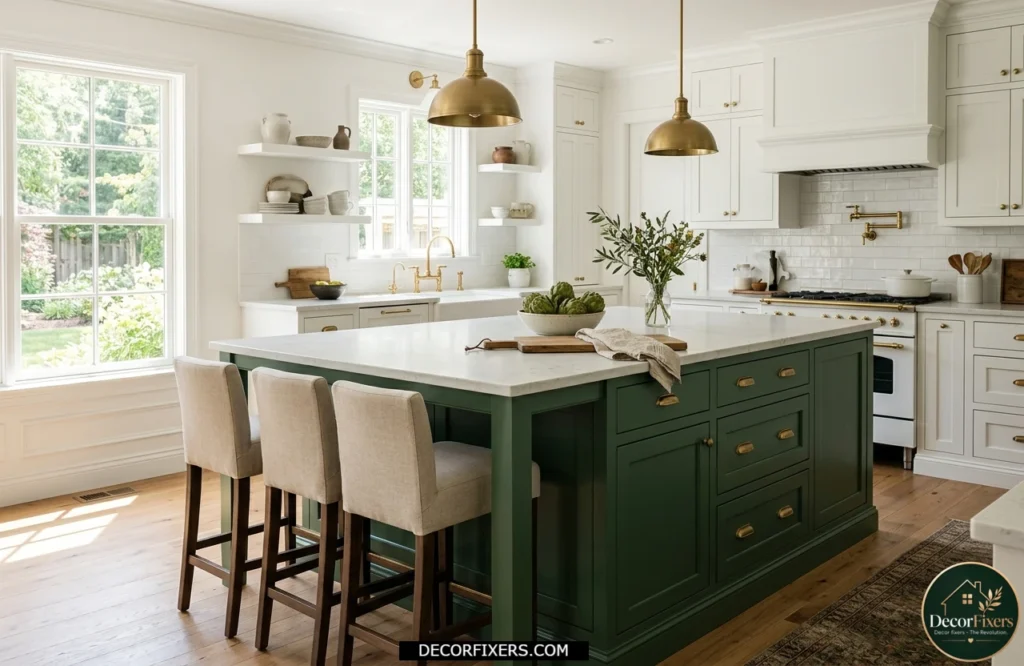
Green is the most-endorsed island Color in the 2026 NKBA Trends Report, with 86% of designers identifying it as a top client request. Forest green, sage, and deep olive are the most widely specified shades; they read differently in natural versus artificial light, which is part of the appeal.
What makes green more permanent than, say, navy blue (the 2020 trend) is its range. A sage green island reads almost neutral in a warm, earthy kitchen. A deep forest green reads bold in a white minimalist one. It adapts to the room rather than dominating it. That flexibility is what keeps it in rotation.
17. Peninsula Instead of Island, The Smart Choice for Smaller Kitchens
Some experts argue that peninsulas are simply a compromise for kitchens that can’t fit a real island. That’s valid for large, open layouts. But if you’re dealing with a kitchen under 150 square feet, a peninsula is often functionally superior; it requires clearance on only three sides, adds seating without breaking traffic flow, and can be designed with the same materials and features as a freestanding island.
The planning distinction: a peninsula attaches to a wall or existing cabinetry run. This means plumbing and electrical runs are dramatically cheaper, you’re extending existing lines rather than routing new ones across the open floor. For kitchens where an island would leave less than 36 inches of clearance, a peninsula is the professional recommendation, not the fallback.
18. Luxury Kitchen Island with Integrated Appliances, The One-Island-for-Everything Approach
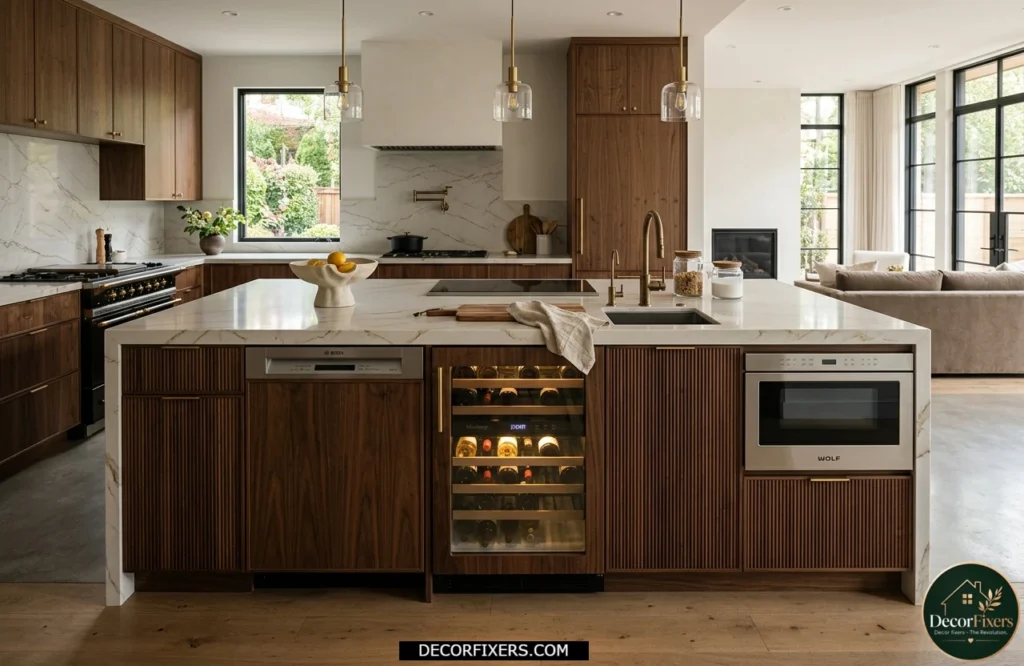
The 2025 NKBA report found that more than half of homeowners are now integrating appliances, dishwashers, microwaves, and wine fridges directly into their island, turning it from a prep surface into the room’s operational hub. This is the fastest-growing configuration in high-end remodels.
The cost of a fully integrated island with sink, dishwasher, microwave drawer, and wine refrigerator runs $12,000–$20,000+ fully installed. Every appliance adds complexity: the dishwasher needs a drain, the wine fridge needs a dedicated electrical circuit, and the microwave drawer needs proper ventilation clearance. Budget $500–$2,500 for just the additional electrical and plumbing trade work.
In Australia, the UK, Canada, and the US, high-end island appliance integration is standard in homes over $1M, particularly in markets like Sydney, London, Toronto, and San Francisco, where kitchen functionality directly influences property value. In these markets, a fully integrated island can add $15,000–$30,000 to the assessed home value in a competitive sale.
For inspiration on how integrated island features sit within a wider luxury kitchen aesthetic, see our full guide on Modern Luxury Kitchen Ideas.
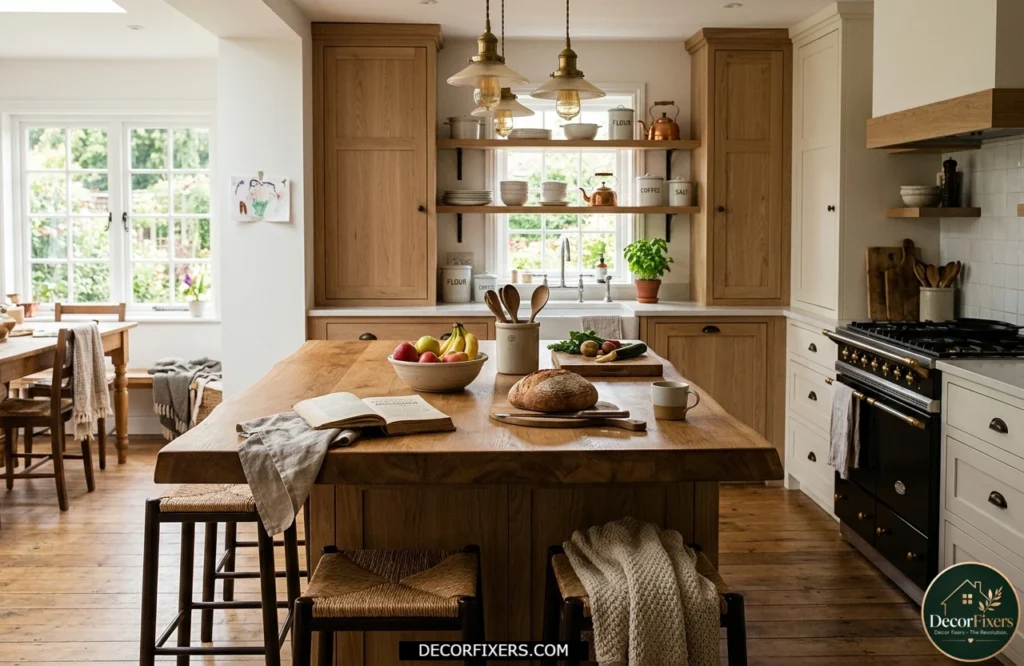
19. Farmhouse Kitchen Island, Legs, Wood, and Lived-In Character
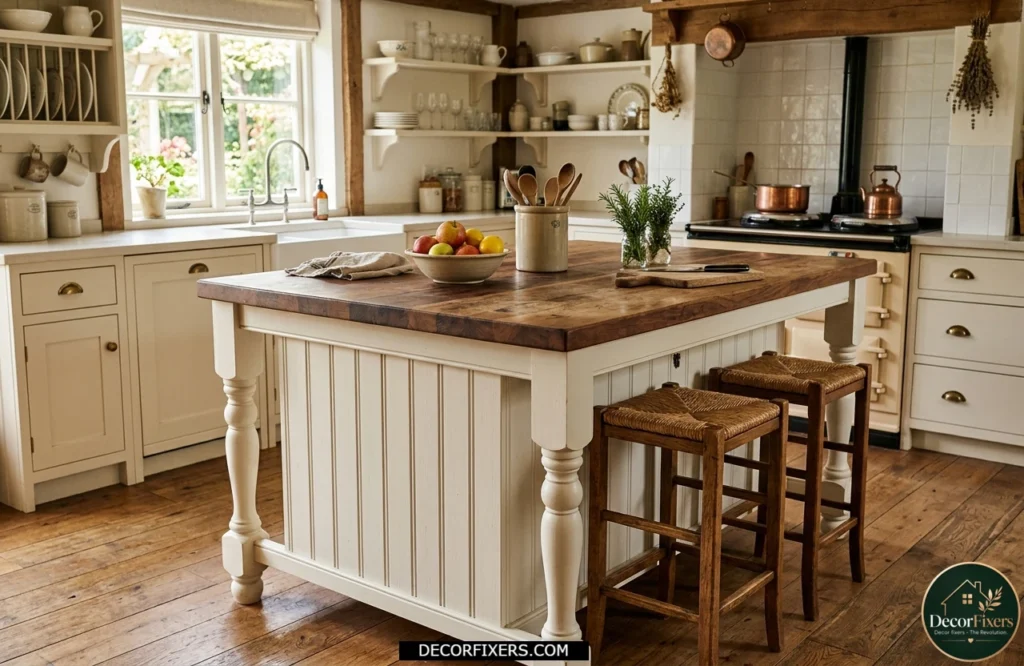
The farmhouse island distinguishes itself from standard shaker-style by one element: it has furniture legs instead of a toe kick. This lifts the island off the floor, giving it the look of a freestanding worktable rather than built-in cabinetry. It’s the detail that makes the whole kitchen feel less showroom and more home.
Executed well, a farmhouse island ages beautifully, especially with a butcher block top that develops a genuine patina. Look for turned or tapered leg options from Osborne Wood or similar suppliers ($30–$80 per leg for standard sizes). Bolt them directly to the base cabinet corners before wrapping the exterior in beadboard or shiplap paneling.
20. Portable Kitchen Island on Casters, Flexibility for Renters and Evolving Layouts
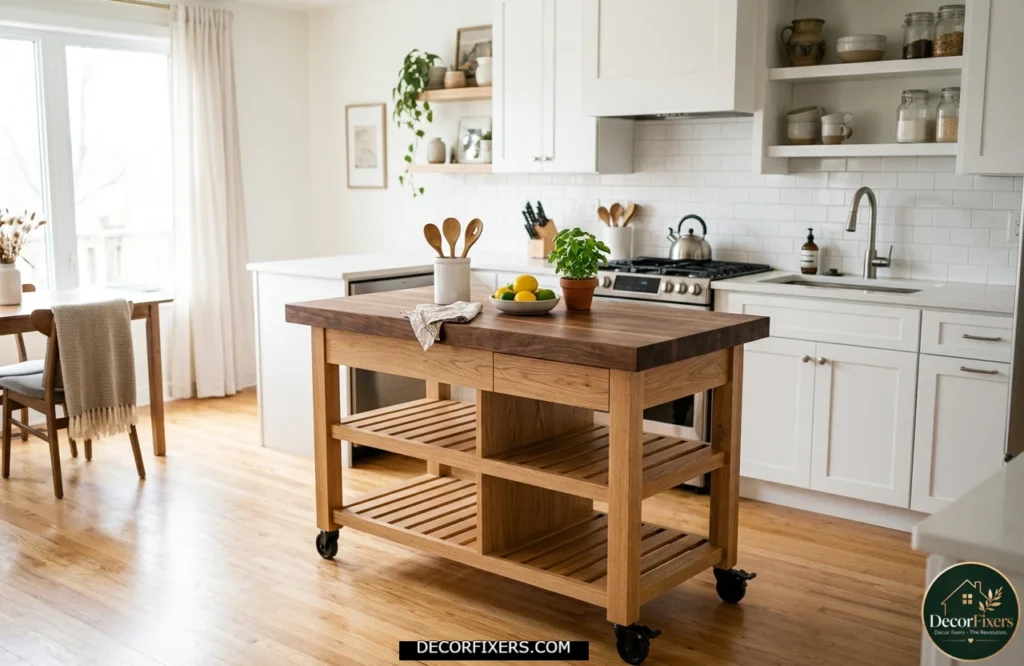
Don’t count this one out. A rolling kitchen island on locking casters solves the rental problem entirely, no permanent fixtures, no landlord permissions, full flexibility. When you move, it moves with you.
The IKEA RÅSKOG trolley and the Crosley Furniture Roscoe Island are two of the most commonly recommended entry-level options in the $200–$600 range. For something sturdier with a solid wood top, look at John Boos butcher block carts. They start around $400 and hold up to serious daily prep use. A mobile island also lets you test your layout before committing to a permanent build. Homeowners who used a portable island for 6–12 months before a full renovation consistently report making better decisions about final placement and size.
How to Plan a Kitchen Island in 5 Steps
To add a kitchen island that works, follow these steps:
- Measure your kitchen and calculate 42–48″ clearance on all sides of the planned island
- Decide the island’s primary function: prep, seating, storage, or all three
- Set a realistic budget: DIY ($300–$2,500) or contractor-built ($5,000–$20,000+)
- Choose your countertop material based on use, not just looks: quartz for durability, wood for warmth
- Get plumbing and electrical quotes before finalizing the design if adding a sink or appliances
CONCLUSION:
If I had a mid-size kitchen and a $5,000–$8,000 budget, I’d build a semi-custom island using RTA cabinet boxes, top it with a quartz slab in a warm white or soft grey, and add fluted MDF panels on the exterior sides. That combination gets you 90% of the custom look at half the price.
If the budget was tight, under $1,500, I’d go the IKEA SEKTION route with a butcher block top and paint the exterior in a warm navy or forest green. It’s the build I’ve seen more kitchen designers quietly recommend to their own friends than any other option.
Whatever you choose, get the clearance right first. Every other decision, material, color, and feature is reversible. A poorly placed island that kills your traffic flow is a problem you’ll feel every single day. Start with the floor plan. Everything else follows.
FAQs:
Q: What’s the best kitchen island idea for a small kitchen?
A: A portable island on casters or a compact fixed unit (4×2 feet minimum) gives you prep space without blocking traffic. Peninsula layouts are often smarter than freestanding islands in kitchens under 150 square feet; they need clearance on three sides, not four.
Q: How do I add a kitchen island on a budget?
A: Use IKEA SEKTION base cabinets as the structure, add a butcher block top, and clad the exterior in beadboard or shiplap panels. Total cost: $300–$1,500 depending on size. No plumbing, no permits, and the result looks genuinely custom if finished well.
Q: Should I put a sink in my kitchen island?
A: Yes, if your layout allows, it changes how you cook entirely. Expect $500–$1,900 for plumbing, more if the drain run is long. Make sure your contractor checks the drain slope requirements before drawing up a plan.
Q: Why does my kitchen island feel cramped even though it fits?
A: Clearance is almost always the issue. If you have less than 36 inches between the island and surrounding cabinets, the space will feel tight even if the island itself is correctly sized. 42–48 inches is the threshold where the kitchen starts to feel generous.
Q: When should I hire a contractor instead of DIYing a kitchen island?
A: DIY works for freestanding or pre-built islands with no plumbing or electrical. The moment you’re adding a sink, dishwasher, cooktop, or new circuits, hire licensed professionals. Unpermitted work can void home insurance and hurt resale value.

Creator of DecorFixers, sharing practical home and interior ideas focused on real-life usability, simple design improvements, and budget-friendly solutions.