


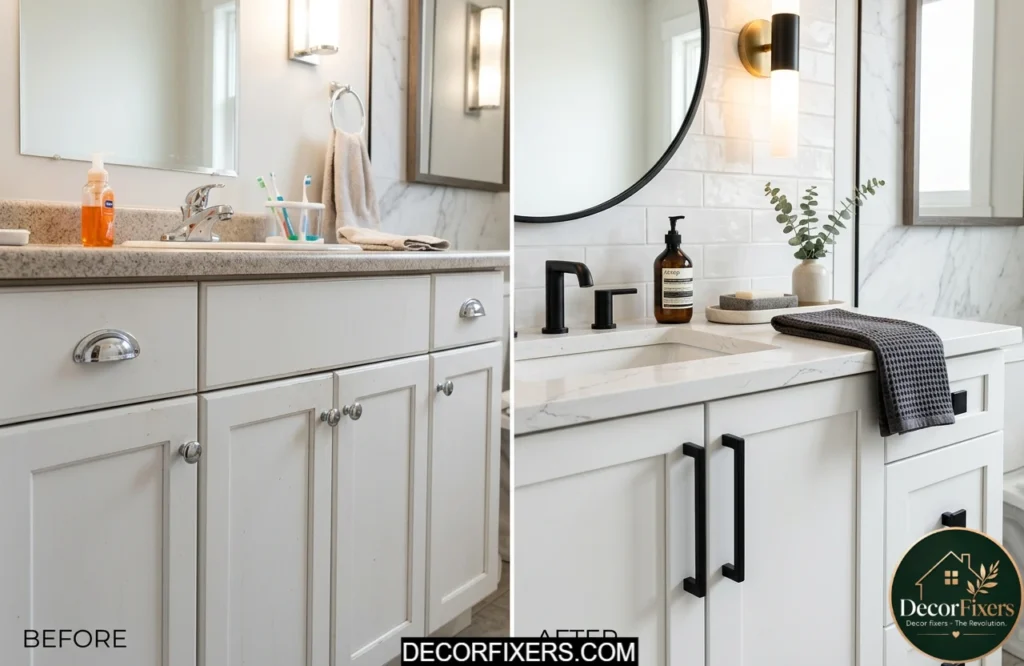
I remember standing in my bathroom one Sunday morning, coffee in hand, staring at a vanity that looked like it had survived the Reagan administration. Worn laminate, chunky brass pulls, and a color that I can only describe as ‘sad beige.’ A full bathroom renovation quote came back at $14,000. I almost cried.
That wasn’t happening. So, I spent the next three weekends testing every budget-friendly trick I could find, and the results genuinely surprised me. This guide is everything that actually worked, organized by cost so you can pick the approach that fits your budget right now.
Bathroom vanity makeover ideas are targeted cosmetic updates, such as painting, hardware swaps, or countertop replacements, that visually transform an existing vanity without tearing it out. They cost a fraction of a full renovation and can be completed in a single weekend.
1. Swap the Hardware for an Instant Bathroom Vanity Update on a Budget
Approximate cost: $15–$60 | Time: 30–60 minutes | Skill level: Beginner
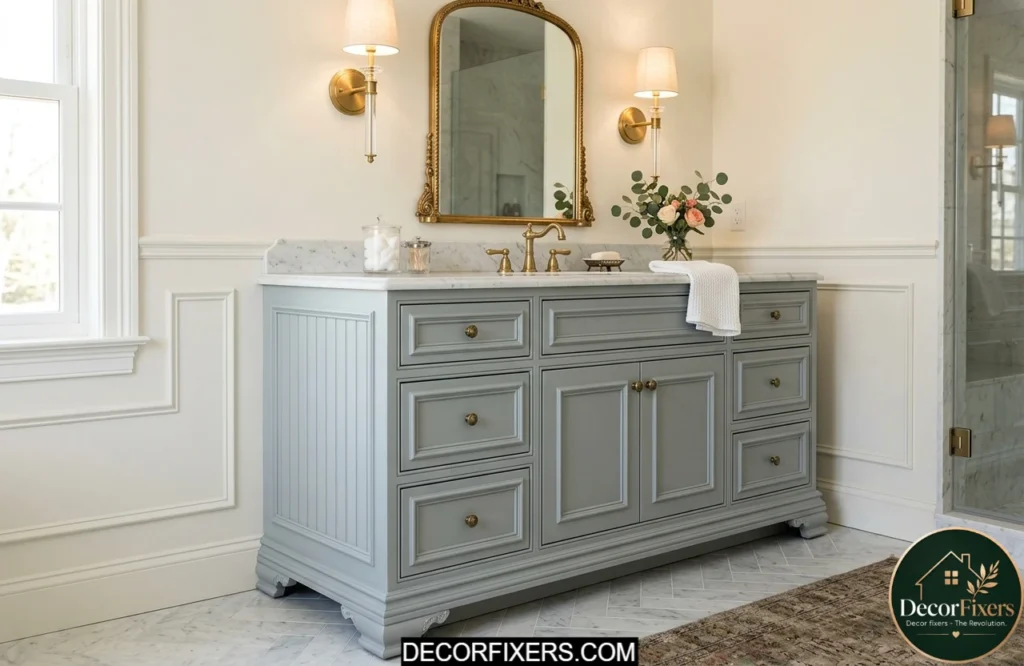
This is the fastest bathroom vanity makeover idea on the entire list, and it’s genuinely shocking how much difference it makes. Builders install the cheapest possible hardware by default. Those dull chrome pulls and flat knobs that came with your vanity? They were chosen by someone trying to hit a price point, not to make your space look good.
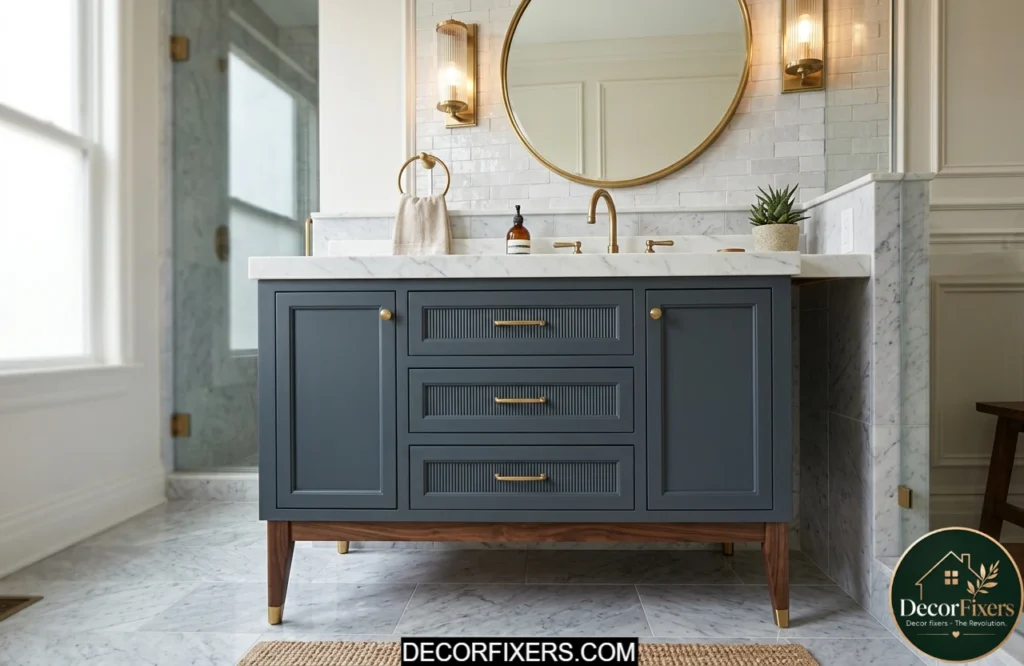
Pull them off. Replace with brushed gold, matte black, or satin nickel, all trending in 2025–2026 and widely available at hardware stores for $3–$8 per piece. On a six-drawer vanity, that’s under $50 total and takes less than an hour with a screwdriver. The visual payoff is disproportionate to the effort.
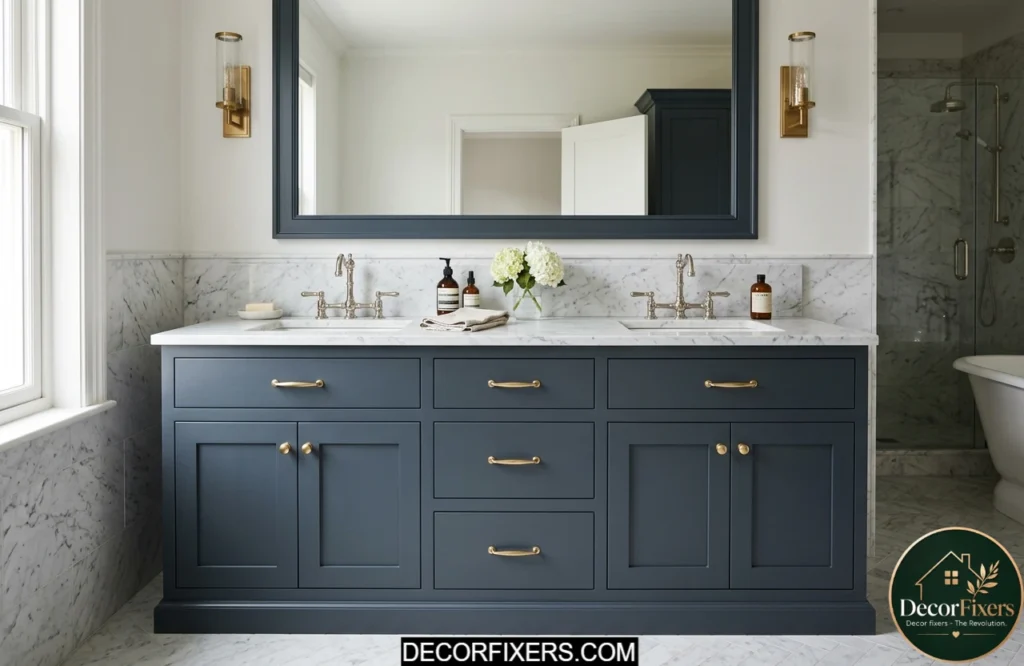
2. Try a Bathroom Vanity Paint Makeover With a No-Sand Formula
Approximate cost: $60–$120 | Time: 1–2 weekends | Skill level: Intermediate
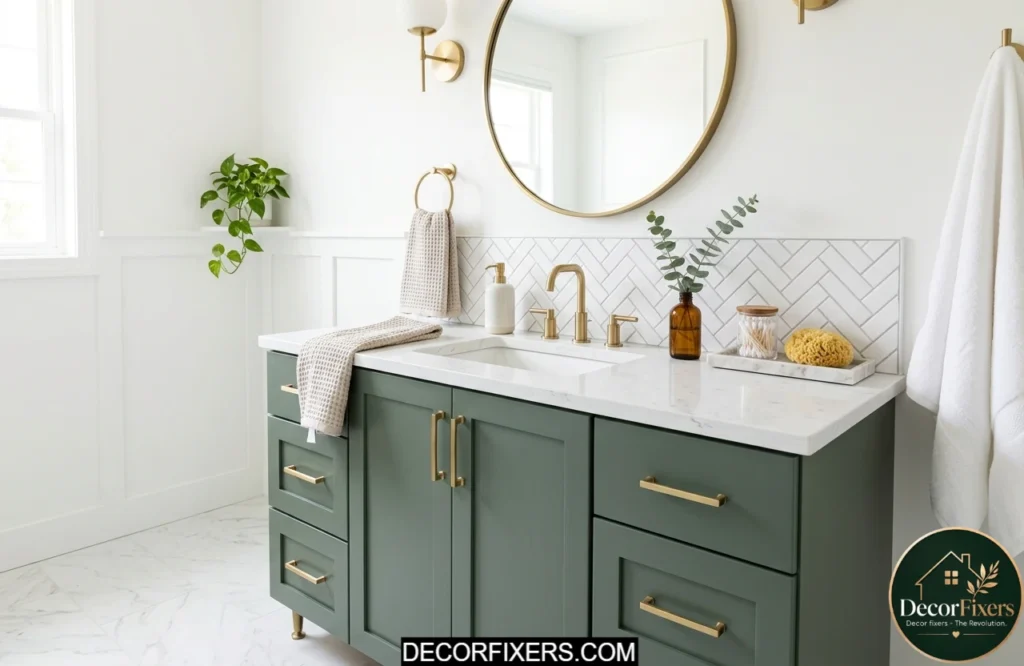
Painting a vanity is the single highest-impact bathroom vanity makeover you can do under $120. The key mistake most people make is using regular wall paint, which peels in humid environments within months. You need either a dedicated cabinet enamel or a kit specifically designed for this.
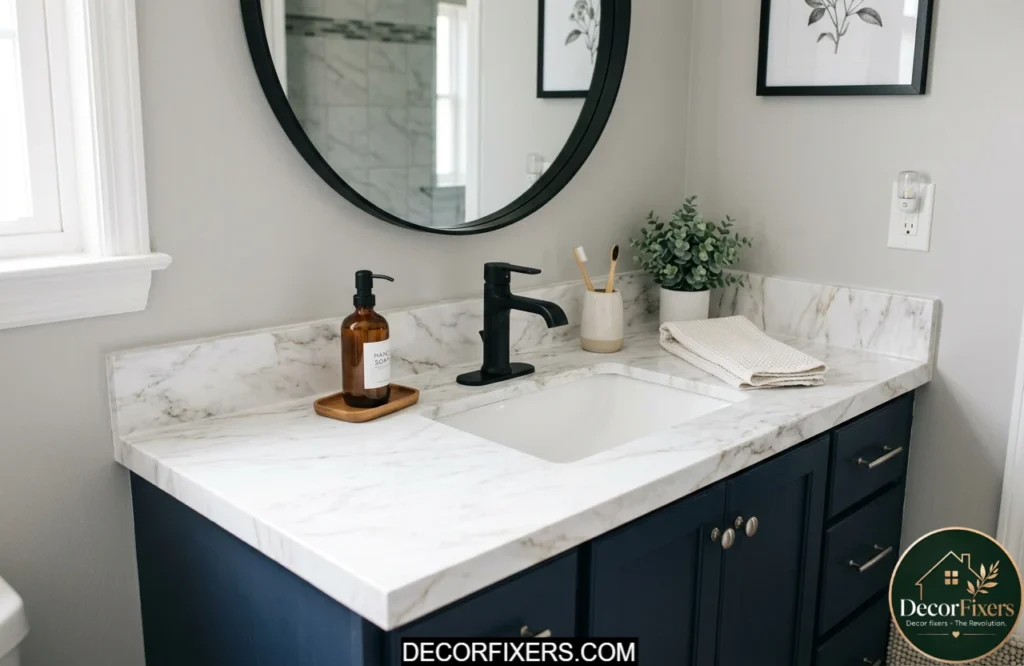
The Rust-Oleum Cabinet Transformations Kit is widely available, uses a no-sand formula, and holds up exceptionally well in humid conditions. In the UK and Australian markets, the Dulux Renovation Range is formulated specifically for bathroom cabinetry with moisture-resistant properties. Charcoal gray, navy, and deep sage are all strong 2026 choices, or go crisp white if you want something clean and timeless.
Or maybe I should say it this way: the color matters less than the prep. Degrease the surface, apply a bonding primer, then your topcoat in thin layers. Don’t rush the dry time between coats.
3. Replace the Faucet to Modernize Your Vanity’s Entire Look

Approximate cost: $50–$200 | Time: 1–2 hours | Skill level: Intermediate
A rusted chrome faucet from 2003 is one of those things you stop noticing, until a guest uses your bathroom. Swapping it out is one of the most underrated small bathroom vanity refresh ideas because it changes the temperature and feel of the entire sink area instantly.
Match your new faucet finish to the hardware you chose in Step 1 for a cohesive look. Brushed gold, matte black, and polished nickel are all strong picks right now. Most single-hole and three-hole faucets are DIY-installable with basic tools and a YouTube tutorial. If you’re nervous about plumbing, the actual water connections are simpler than they look; it’s tightening two supply lines and reconnecting a drain.
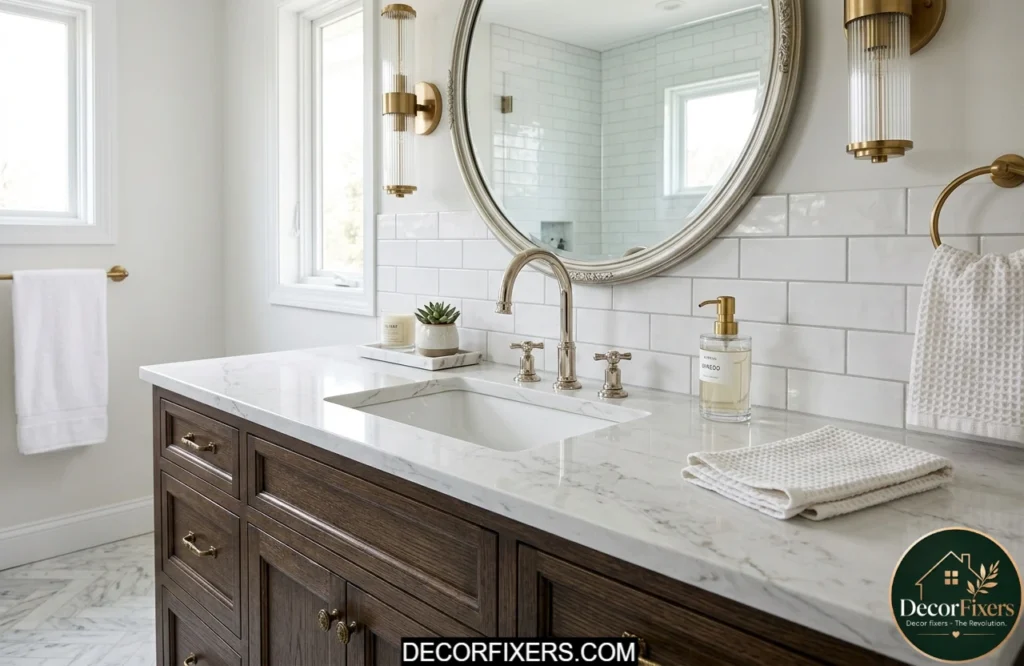
4. Install Peel-and-Stick Backsplash Tile Around the Vanity
Approximate cost: $30–$80 | Time: 2–4 hours | Skill level: Beginner
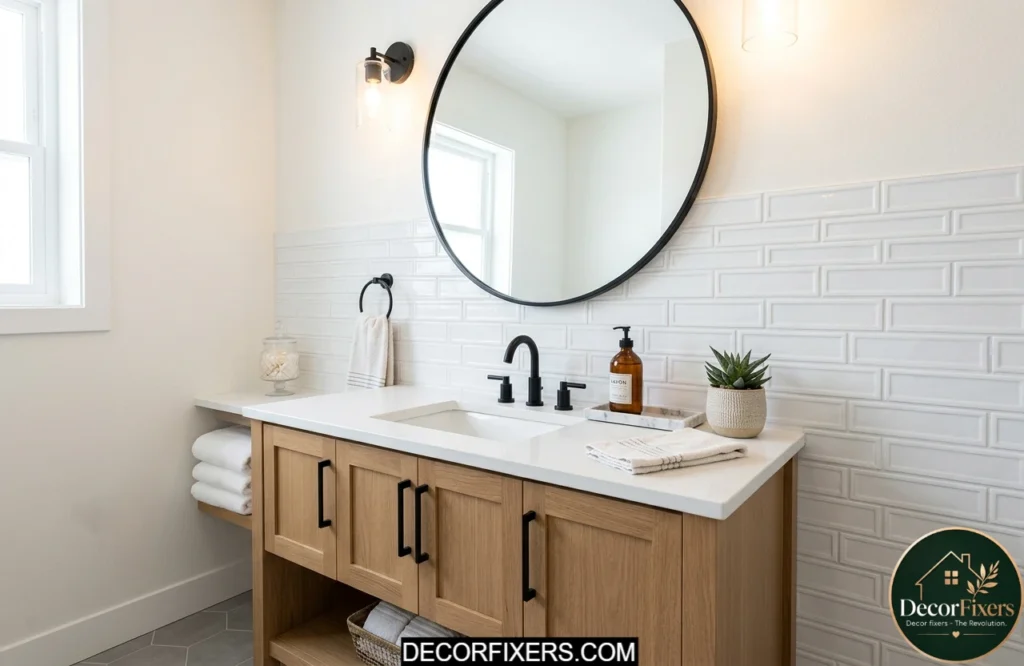
The wall space between your vanity top and mirror is a missed opportunity in most bathrooms. Adding a small peel-and-stick tile backsplash here adds texture, color, and a finished look that makes the whole vanity feel intentional, not builder-grade.
Look for subway tile, herringbone, or mosaic peel-and-stick panels. They require no grout, no adhesive, and no special tools. They’re also landlord-safe; they remove cleanly. I’ve seen conflicting data on long-term adhesion in high-humidity environments; some sources say they hold for years, others report peeling after 18 months. My read is: apply to a clean, primed surface and add a thin bead of clear caulk at the edges for insurance.
5. Use Contact Paper for a Renter-Friendly Bathroom Vanity Makeover
Approximate cost: $10–$40 | Time: 1–3 hours | Skill level: Beginner
Look, if you’re renting and your landlord won’t allow painting or permanent changes, contact paper is not a compromise. It’s a genuinely good option that has improved dramatically in quality over the last five years. A roll of marble-effect contact paper for $10–$20 can transform a scratched laminate vanity top into something that reads as stone from a normal viewing distance.
Apply it to cabinet doors, drawer fronts, and the vanity top surface. Use a squeegee to push out bubbles as you go, starting from the center outward. Cut carefully with a craft knife at the edges for a clean finish. It removes without damage when your lease ends, and that alone makes it one of the smartest small bathroom vanity refresh ideas for renters.
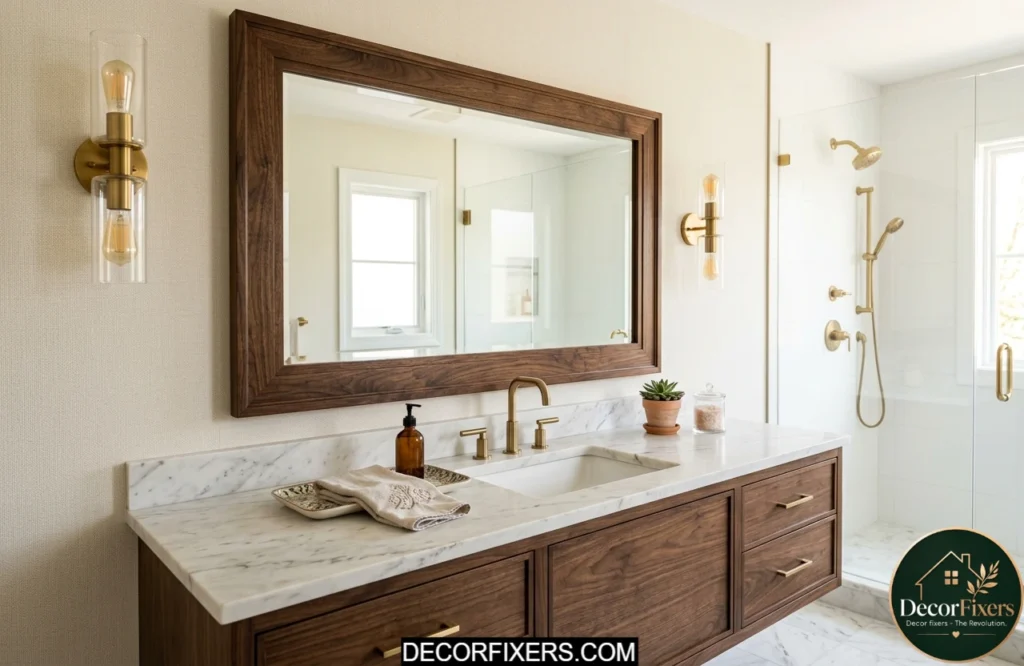
6. Upgrade the Vanity Mirror or Add a DIY Frame
Approximate cost: $25–$120 | Time: 1–3 hours | Skill level: Beginner
That flat, unframed rectangle of glass above most builder vanities is the visual equivalent of a blank wall. You have two options: frame what you have, or replace it entirely.
Framing is cheaper. Use pre-cut molding from any hardware store, miter the corners, paint to match your vanity or go contrasting, and glue directly to the mirror glass with mirror adhesive. Total cost: under $30. If you’d rather replace, arched mirrors and wood-framed styles are among the strongest 2026 trends; they instantly shift a bathroom from generic to designed. Rounded shapes specifically are replacing sharp, angular mirrors in contemporary bathroom styling.
7. Upgrade the Vanity Lighting to Change the Entire Mood
Approximate cost: $40–$150 | Time: 1–2 hours | Skill level: Intermediate
Older bathrooms almost always have a single, flat overhead light that casts unflattering shadows and makes the space feel dim and dated. A vanity light bar, mounted above or on either side of the mirror, changes both the function and the feeling of the space.
Look for fixtures in a finish that matches your hardware. Replacing a light fixture is a beginner-to-intermediate electrical job: switch off the breaker, remove the old fixture, connect matching wires (black to black, white to white, ground to ground), and mount the new one. Warm white bulbs (2700K–3000K) give a softer, more flattering result than the cool blue light most stock bulbs produce.
8. Replace or Resurface the Vanity Countertop for a High-Impact Update
Approximate cost: $200–$500 (DIY) | Time: 1–2 days | Skill level: Intermediate
A cracked or badly stained countertop is hard to disguise with paint or paper. Replacing it is the item on this list, but it’s still dramatically cheaper than a full vanity replacement, and it completely transforms the focal point of the room.
If your existing top is solid but ugly, look at epoxy resurfacing kits (around $50–$80) that can be applied to simulate marble or stone. The caveat here: epoxy finishes in high-moisture environments require proper sealing; skipping that step is how you get peeling six months later.
How to Update a Vanity Countertop (Basic Steps):
- Turn off the water supply valves under the sink.
- Disconnect the drain and supply lines from the faucet.
- Cut the caulk seal around the existing top with a utility knife.
- Lift out the old countertop, get a helper for heavier slabs.
- Set the new prefab top in place, reconnect plumbing, and seal edges with silicone caulk.
9. Replace Cabinet Doors for a Custom-Looking Small Bathroom Vanity Refresh
Approximate cost: $150–$400 | Time: Half a day | Skill level: Intermediate
Most people don’t realize that vanity cabinet boxes, the actual structural carcass, are almost always in fine shape. It’s the doors and drawer fronts that look dated. Swapping just those out gives you a custom-looking result at a fraction of the full replacement cost.
Shaker-style doors are the most versatile choice for 2025–2026: they work across modern, transitional, and farmhouse aesthetics. If you have an IKEA GODMORGON vanity carcass, this is a particularly popular hack; third-party door makers sell custom fronts sized to IKEA dimensions, giving you a premium look on a very budget-friendly base. Measure twice, order once.
10. Add Decorative Trim or Beadboard Panels to the Vanity Cabinet Sides
Approximate cost: $20–$80 | Time: 2–4 hours | Skill level: Intermediate
Flat-front cabinet sides and a plain toe kick are classic builder hallmarks. Adding thin trim molding or beadboard panels to the sides, front face frame, or kick plate area gives a flat-slab vanity the kind of detail that makes it look custom-built.
This is a bathroom vanity update on a budget that barely anyone talks about, which is exactly why it makes such a strong impression. Use wood glue and finish nails, prime, and paint to match. The visual difference between a plain flat side panel and one with vertical beadboard is significant, especially in photos and at a viewing distance.
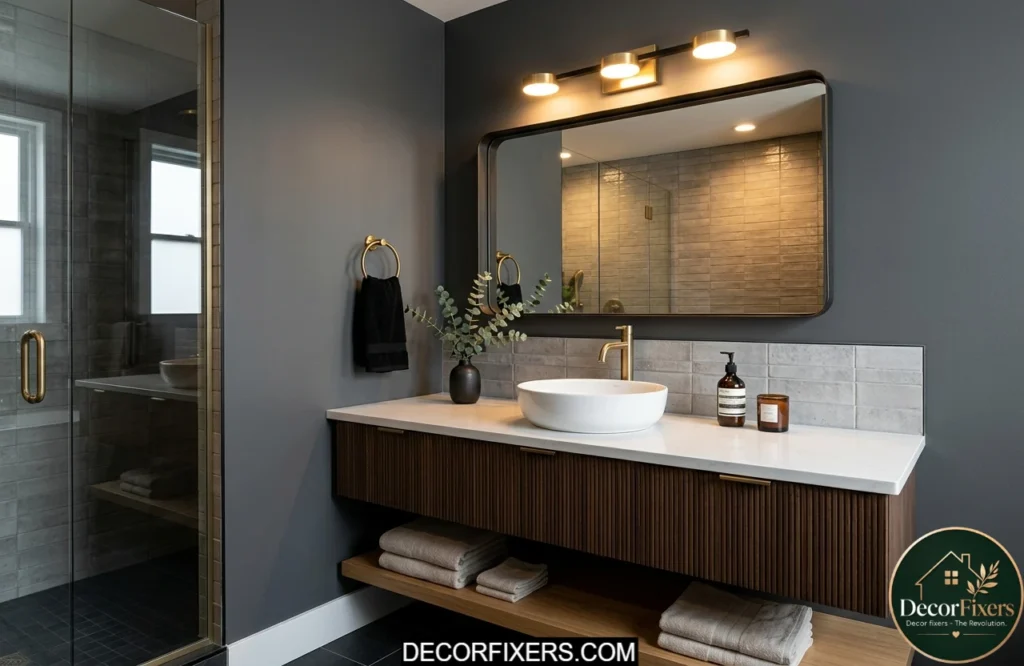
11. Swap the Sink for a Modern Basin Style
Approximate cost: $80–$250 | Time: 1–3 hours | Skill level: Intermediate
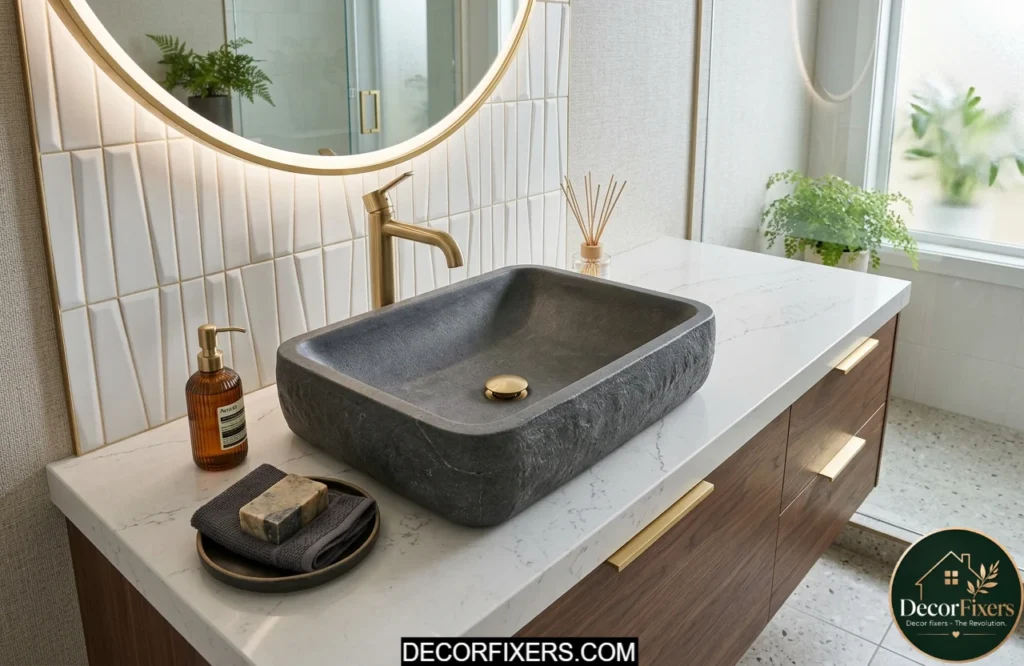
Most stock vanity sinks are drop-in styles with an integrated deck that fills the countertop opening and sits flush. Swapping to an undermount or vessel style, if your counter and plumbing configuration allows, makes a dramatic visual statement.
Vessel sinks in particular (those that sit on top of the counter surface) have surged back in popularity in a more refined form in 2025–2026: matte stone-look finishes, round or oval shapes, and concrete-effect basins. They pair especially well with a simple vanity paint makeover below, drawing the eye upward. Just confirm your existing drain rough-in location before ordering.
12. Add an Under-Sink Curtain for a Furniture-Style Look
Approximate cost: $15–$50 | Time: Under 1 hour | Skill level: Beginner
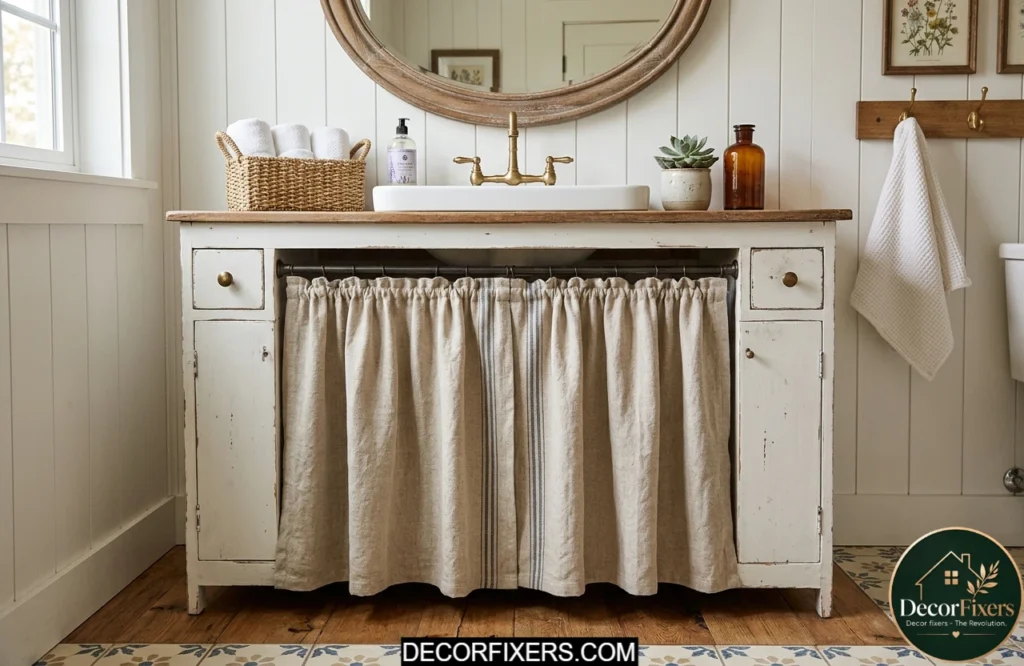
This is one of those bathroom vanity makeover ideas that sounds too simple until you see it done well. An under-sink curtain on a tension rod replaces cabinet doors entirely, giving a vintage, furniture-style look that works beautifully in cottage, farmhouse, and eclectic bathrooms.
It’s also a legitimate renter hack. A tension rod inside the vanity opening requires zero drilling, holds light curtain fabric without issue, and comes down in minutes.
Use a patterned or textured fabric to add personality, and it conceals any clutter under the sink. To maximize the benefit of this hidden storage area, our Bathroom Organization Tips guide covers practical ways to keep everyday essentials tidy and easy to access.
Combine this with our Bathroom Closet Organization strategies to keep what’s behind that curtain actually tidy.
13. Convert a Cabinet Section to Open Shelving for Visual Interest
Approximate cost: $20–$100 | Time: A few hours | Skill level: Intermediate
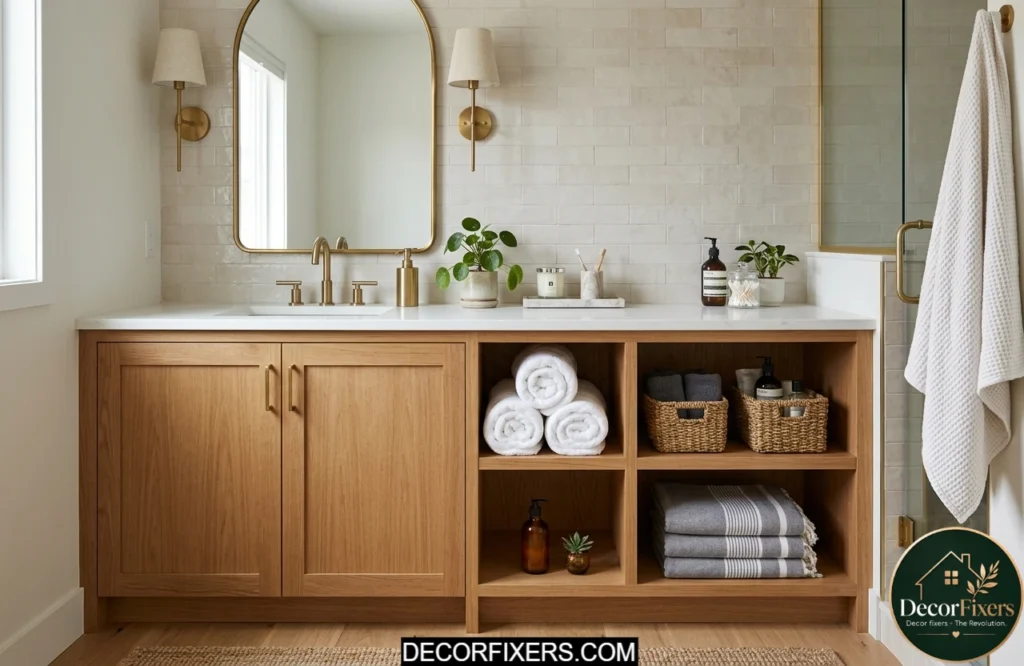
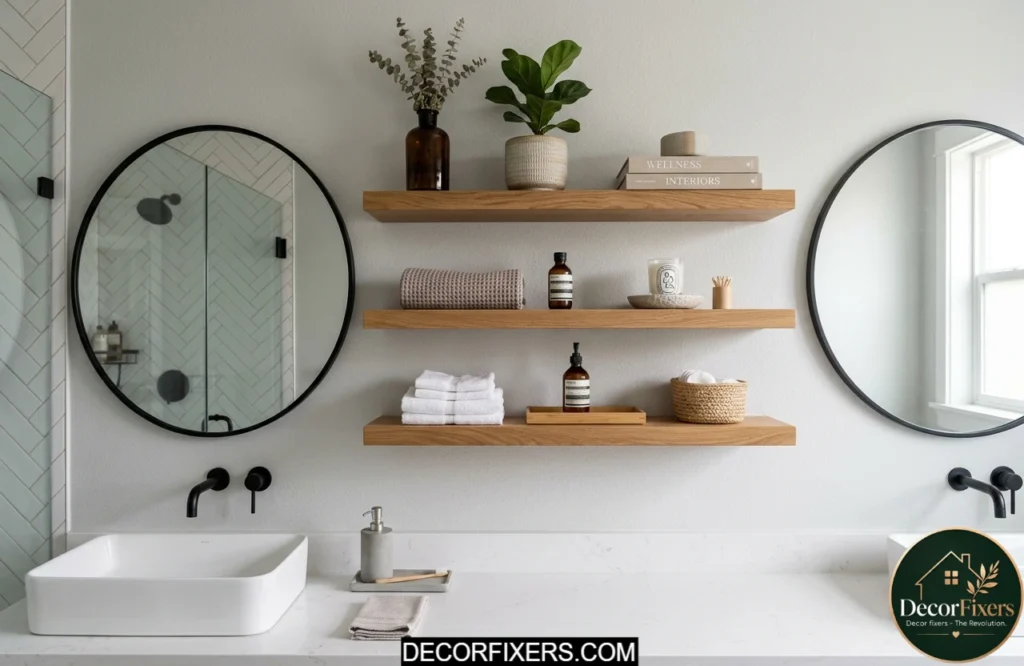
Some experts argue that open shelving in bathrooms creates clutter and looks messy over time. That’s valid in poorly organized spaces. But if you’re deliberate about what goes on those shelves, folded towels, a plant, a few organized baskets, the result is a bathroom that looks styled and intentional, not like a storage room.
Remove one vanity door. Sand and paint the interior of that cabinet section in a contrasting color or the same shade as the exterior. Add a small shelf bracket in the middle if needed.
Display rolled towels and small accessories. If you are refreshing the entire space rather than just the vanity, these Bathroom Remodel Ideas can help you create a more cohesive and updated bathroom design. The asymmetry of one open section and one closed door also creates a custom, non-builder feel that most renovation guides skip entirely.
14. Add Furniture Legs to Replace the Toe Kick for a Freestanding Look
Approximate cost: $30–$120 | Time: 2–4 hours | Skill level: Intermediate
This is one of the more dramatic bathroom vanity makeover ideas on the list, and it’s one that competitors rarely mention. The standard toe kick base that runs along the bottom of most vanities makes them look obviously built-in and utilitarian. Remove it, add furniture legs, and the whole vanity transforms into something that looks like a custom piece pulled from a boutique hotel.
Hairpin legs, turned wood legs, and tapered mid-century legs are all available at hardware stores and online retailers for $10–$30 per set. You’ll need to cut the base trim carefully and attach the legs with screws to the cabinet frame. Paint or stain to match. The space created below the vanity also makes the bathroom feel larger, a welcome side effect in small bathrooms.
15. Install a Medicine Cabinet or Add Floating Shelves Above the Vanity
Approximate cost: $50–$200 | Time: 1–3 hours | Skill level: Intermediate
Adding vertical storage above or beside the vanity completes the look and solves a real-world problem at the same time. For homeowners who need additional storage beyond the vanity area, our Bathroom Closet Organization guide shares smart solutions for keeping towels, toiletries, and household supplies neatly arranged.
Floating shelves in wood or black metal brackets add visual weight to a plain vanity wall and create display space for items that would otherwise crowd the counter.
A recessed or surface-mounted medicine cabinet is the more functional upgrade; it hides daily-use items while keeping the counter clear. What most guides skip is this: even a non-recessed surface-mount medicine cabinet, painted to match the wall, disappears visually and adds significant storage without a single hole in tile. Width, depth, and mirror style matter; measure your wall space and stud locations before ordering.
Bathroom Vanity Paint Makeover vs. Full Vanity Replacement:
A paint makeover is better suited for structurally sound vanities with dated finishes, costing $60–$120 for a DIY result that lasts 5–8 years with proper prep. Full replacement works better when the cabinet is water-damaged or the wrong size, but costs $800–$3,000 installed. The key difference is whether the problem is cosmetic or structural.
Quick Comparison:
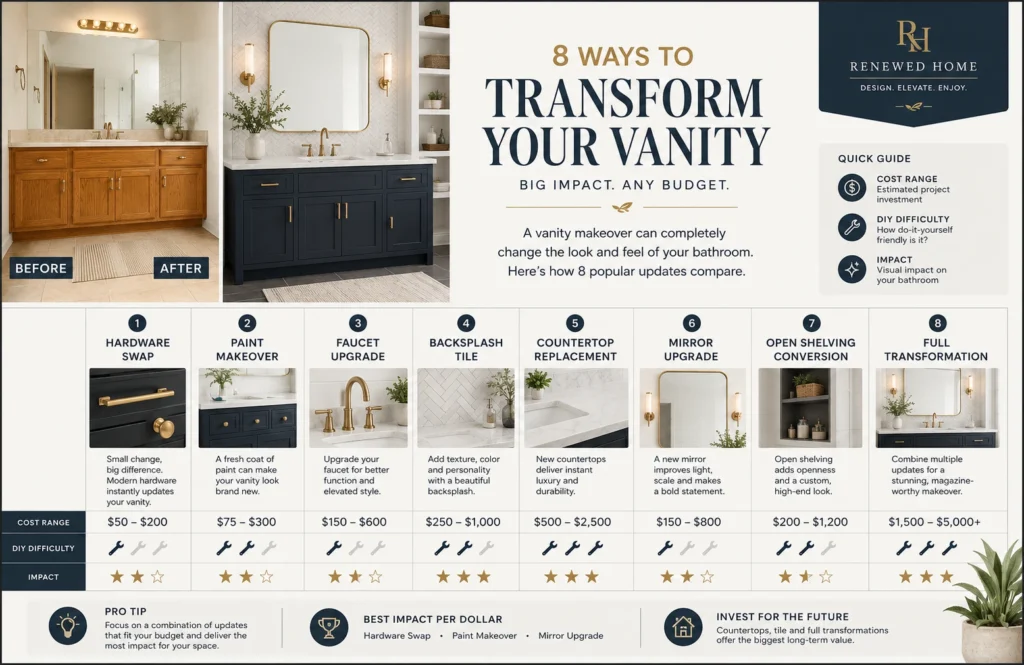
| Update Method | Best For | Approximate Cost | DIY Difficulty |
| Hardware swap | Quick weekend refresh | $15–$60 | Easy |
| Cabinet paint makeover | Dated color or laminate | $60–$120 | Intermediate |
| Contact paper / peel-and-stick | Renters & no-damage needs | $10–$40 | Easy |
| Countertop replacement | Worn or cracked tops | $200–$500 | Intermediate |
| Cabinet door replacement | Structural cabinet upgrade | $150–$400 | Intermediate |
| Lighting upgrade | Dark or flat-feeling vanity area | $40–$150 | Easy–Intermediate |
| Mirror frame or swap | Boring builder-grade mirror | $25–$120 | Easy |
| Faucet replacement | Outdated or rusted fixture | $50–$200 | Intermediate |
| Peel-and-stick backsplash tile | Bare or dated splash area | $30–$80 | Easy |
| Open shelving conversion | Storage and visual interest | $20–$100 | Intermediate |
CONCLUSION:
After going through all of these myself over the past few years, I’ll tell you what I actually think: the hardware swap is where you start, every time. It’s fast, reversible, cheap, and it tells you immediately whether the rest of the vanity is worth investing in. If you swap the pulls and the vanity still looks hopeless, move up to paint. If paint alone makes it look great, you just saved $2,000.
The most common mistake I see is people doing nothing because they’re overwhelmed by all the options. Pick the one that fits your budget right now. You can layer in more updates later; that’s actually the smarter approach anyway.
Anyway, that builder-grade vanity I mentioned at the start? Paint, new hardware, a framed mirror, and a peel-and-stick backsplash. Total spend: $94. I’ve had guests ask if I renovated the bathroom. I have.
This article covers cosmetic vanity updates only. Always consult a licensed plumber for supply line or drain configuration changes, and a licensed electrician for light fixture wiring if you’re not comfortable with basic electrical work.
FAQs:
Q: What’s the best bathroom vanity makeover idea on a tight budget?
A: Swapping hardware is the best return for the least money, under $60 and under an hour. For the most dramatic change under $120, a full paint makeover with cabinet enamel is hard to beat.
Q: How do I update my bathroom vanity without spending a lot?
A: Start with hardware ($15–$60), add peel-and-stick backsplash tile ($30–$80), and frame or replace the mirror ($25–$120). Combined, these three changes cost under $250 and visually transform the space.
Q: Should I paint or replace my bathroom vanity?
A: Paint it if the cabinet structure is solid and the doors aren’t warped. Replace only if there’s water damage, structural failure, or the size doesn’t work for your space. Painting saves $800–$2,000 compared to full replacement.
Q: Why does my bathroom vanity look so outdated?
A: Usually, it’s a combination of dated hardware finishes (old brass, chrome), an aging laminate or wood stain color, and a flat unframed mirror. Each of those is fixable for under $100 individually.
Q: When should I replace a bathroom vanity instead of repainting it?
A: Replace when there’s significant water damage to the cabinet box, when doors won’t hang straight, or when the vanity size genuinely doesn’t fit your needs. Cosmetic issues, color, hardware, and finish are almost always better solved with a makeover.

Creator of DecorFixers, sharing practical home and interior ideas focused on real-life usability, simple design improvements, and budget-friendly solutions.