

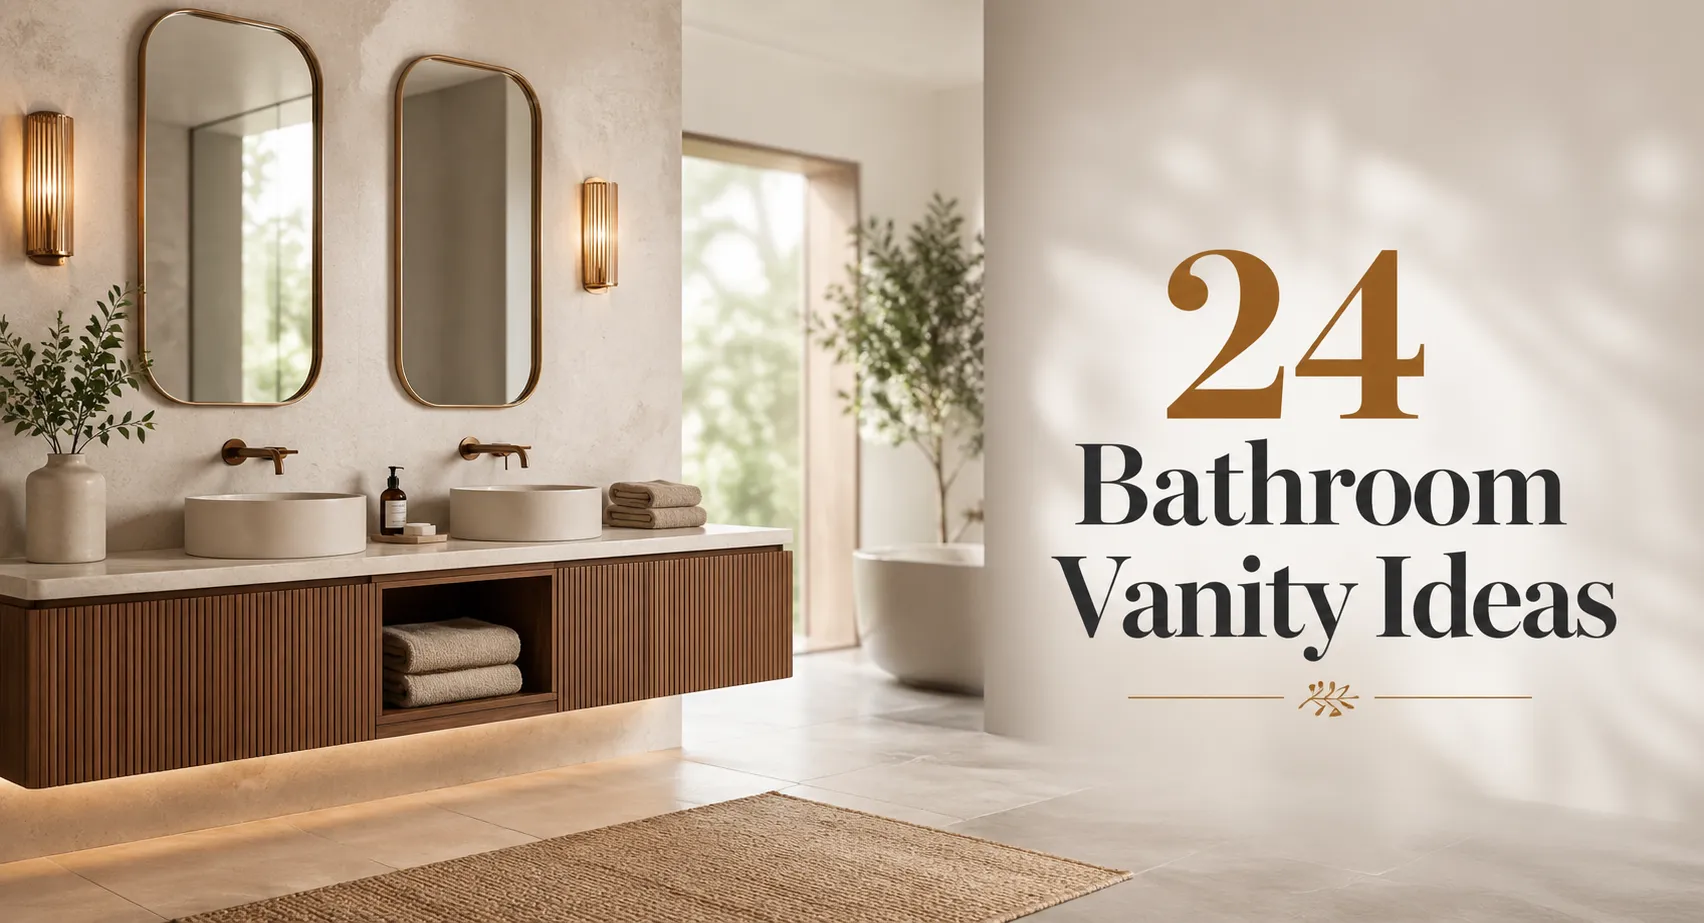
What are bathroom vanity ideas? Bathroom vanity ideas are design approaches, covering style, material, size, lighting, and storage, that help homeowners transform a dated vanity into a functional, visually cohesive centerpiece. The right idea depends on your bathroom size, existing tile, and budget.
Your vanity is the first thing you see every morning. And if it looks like it came with the house in 2005, it’s quietly dragging down the whole room, with a wrong finish, no storage, and bad lighting.
The good news? You don’t need a full gut renovation to fix it. According to Grand View Research (2025), the global bathroom vanities market was valued at USD 43.34 billion and is growing at a 7.3% annual rate, meaning there are more style options at every price point than ever before.
This guide covers 24 specific, actionable ideas that work for middle-class homeowners on real budgets. No demolition required for most of them.
Why Your Bathroom Vanity Matters More Than You Think
The bathroom vanity sets the visual tone of the entire room. It’s the single piece that combines storage, lighting, and style, which is why a dated or mismatched vanity makes even a clean bathroom feel unfinished.
Homeowners who’ve replaced only their vanity (without touching tile or floors) consistently report that the bathroom feels like a different room. That’s not a coincidence. The vanity occupies eye level, frames your reflection, and anchors your daily routine.
This guide covers standard residential bathrooms. It does not address hotel-grade or accessible-design vanity specs.
Quick Comparison: Vanity Types at a Glance
| Option | Best For | Key Benefit | Limitation |
| Floating / Wall-Mounted | Small bathrooms, modern look | Opens up floor space visually | Requires wall reinforcement |
| Freestanding / Floor-Mount | Traditional or transitional style | Easier to install, more storage | Consumes more floor space |
| Double Sink Vanity | Shared master bathrooms | Eliminates morning sink conflicts | Needs 60″+ wall width |
| Vessel Sink Vanity | Statement aesthetic | Dramatic look, easy to swap sinks | Less practical for daily splash |
| Pedestal / Console | Powder rooms & tight spaces | Airy, minimal look | Zero under-sink storage |
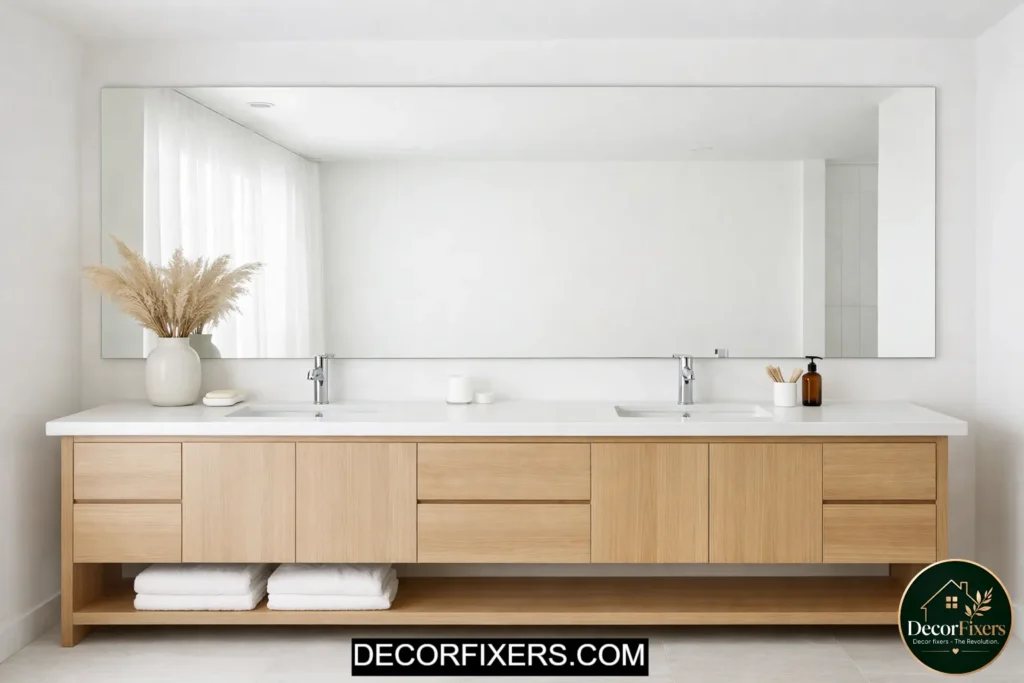
1. Go Floating for an Instantly Modern Look
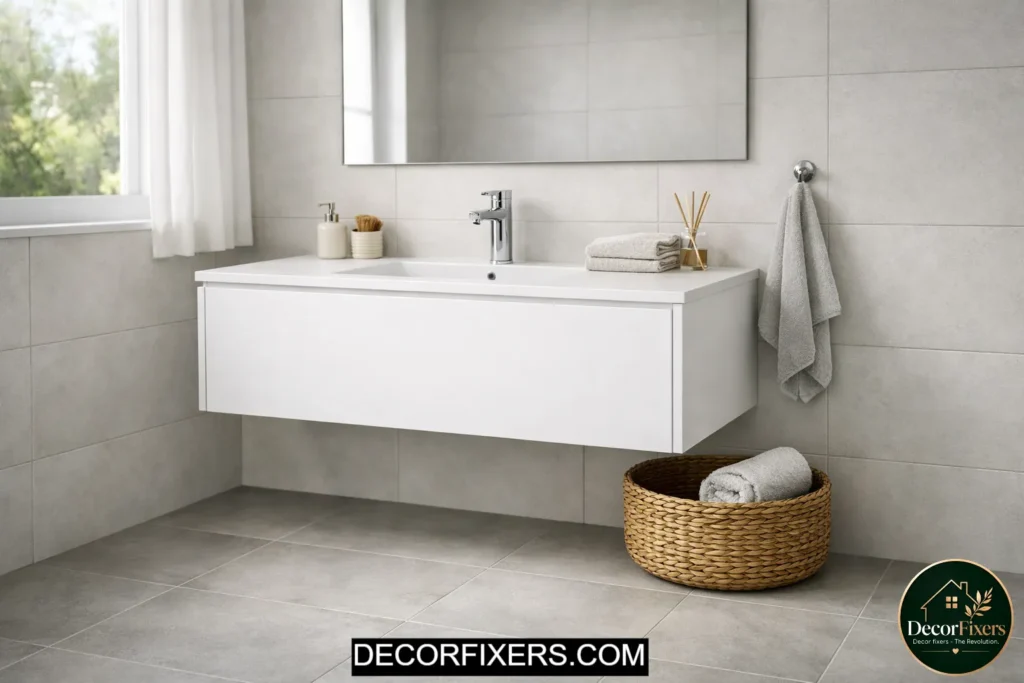
A floating vanity is the fastest visual upgrade in a small bathroom. Wall-mounted units lift off the floor, which makes the room read as larger even when the square footage hasn’t changed. IKEA’s GODMORGON series starts around $200–$350 and comes in matte white, walnut effect, and high-gloss gray, genuinely good-looking without the showroom price tag.
The one real catch: you need a wall that can support the load. Standard drywall won’t cut it. A plywood backer board or blocking between studs is the correct fix, and if that sounds intimidating, a handyman can do it in under two hours.
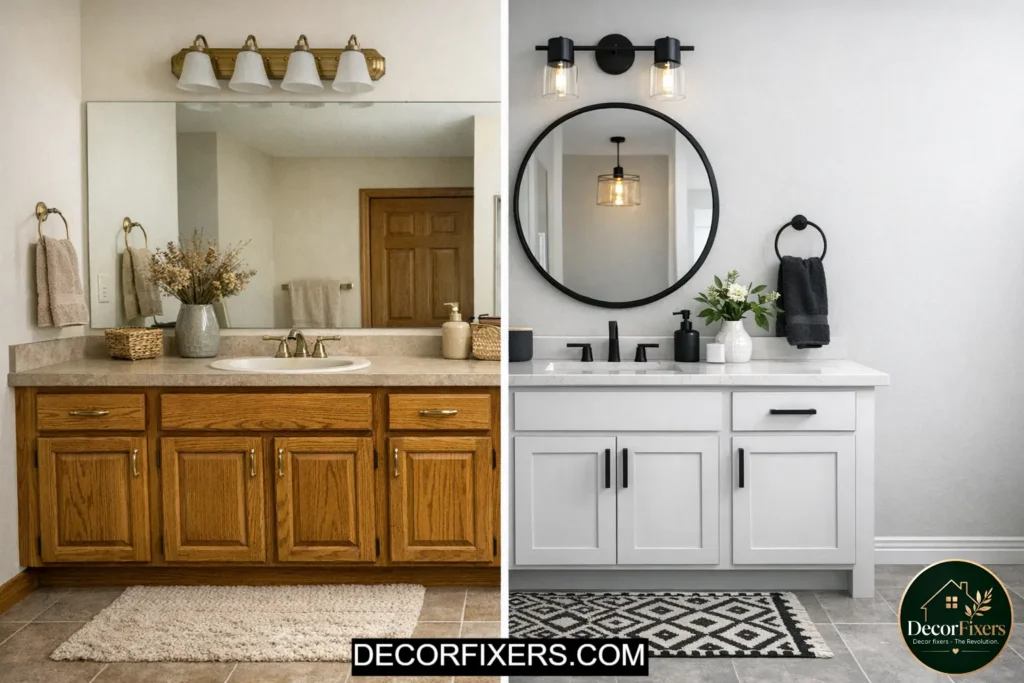
2. Choose a Two-Tone Finish
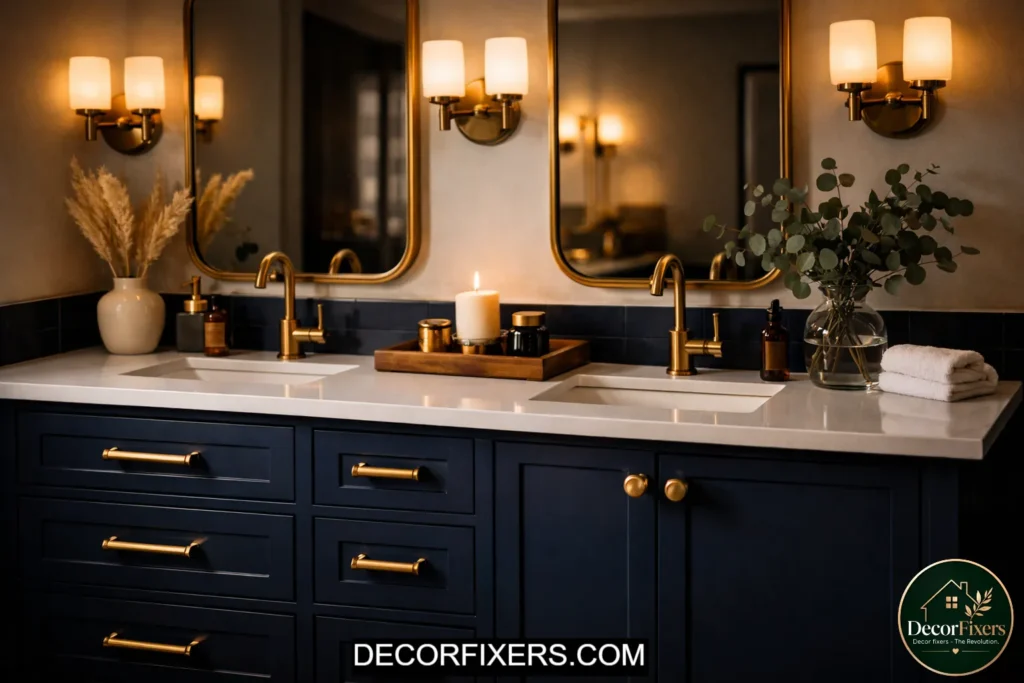
Two-tone vanities, dark lower cabinet, white or light countertop, are trending hard for good reason. They break the visual monotony of an all-white bathroom without demanding bold color decisions. Think navy or charcoal base with a white quartz top.
You can achieve this without buying new: repaint an existing cabinet in a deep matte shade and pair it with a new countertop. Total spend? Often under $150.
3. Try a Wood-Finish Vanity for Warmth
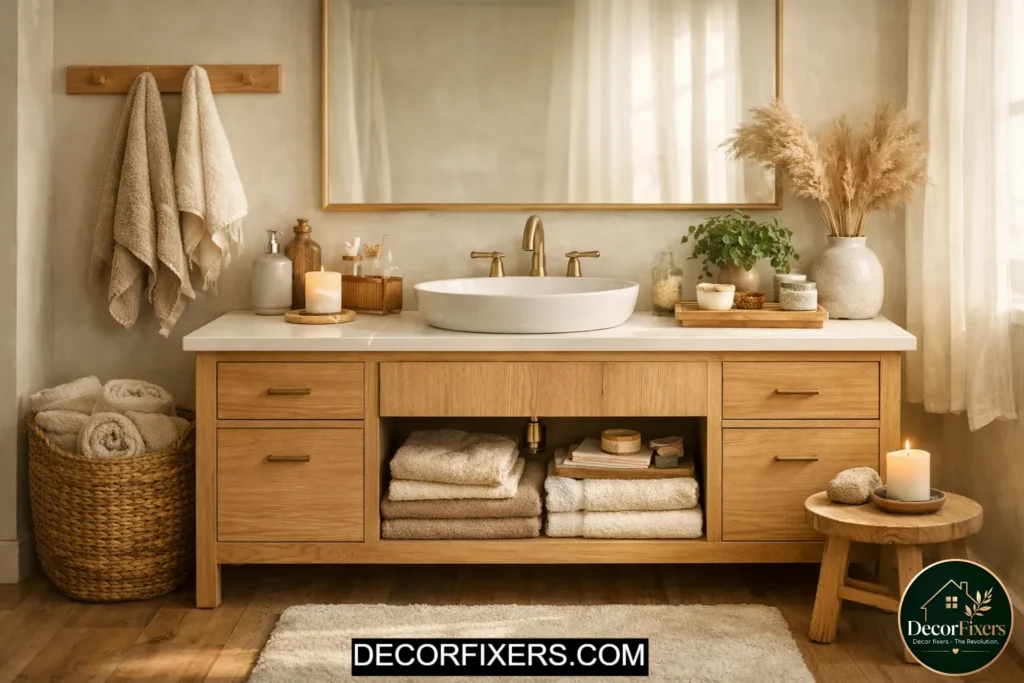
All-white bathrooms can feel cold, especially in winter. A wood-finish or warm-toned vanity, light oak, walnut, or even teak, immediately makes the space feel like a retreat. James Martin Furniture makes solid wood vanities in the $800–$1,800 range that look custom-built without the custom price.
Here’s the thing: wood in a bathroom sounds risky. But sealed and properly finished wood holds up fine in a ventilated bathroom. The mistake most people make is using unsealed or cheap veneer, not real wood.
4. Add a Vessel Sink for a Statement Piece
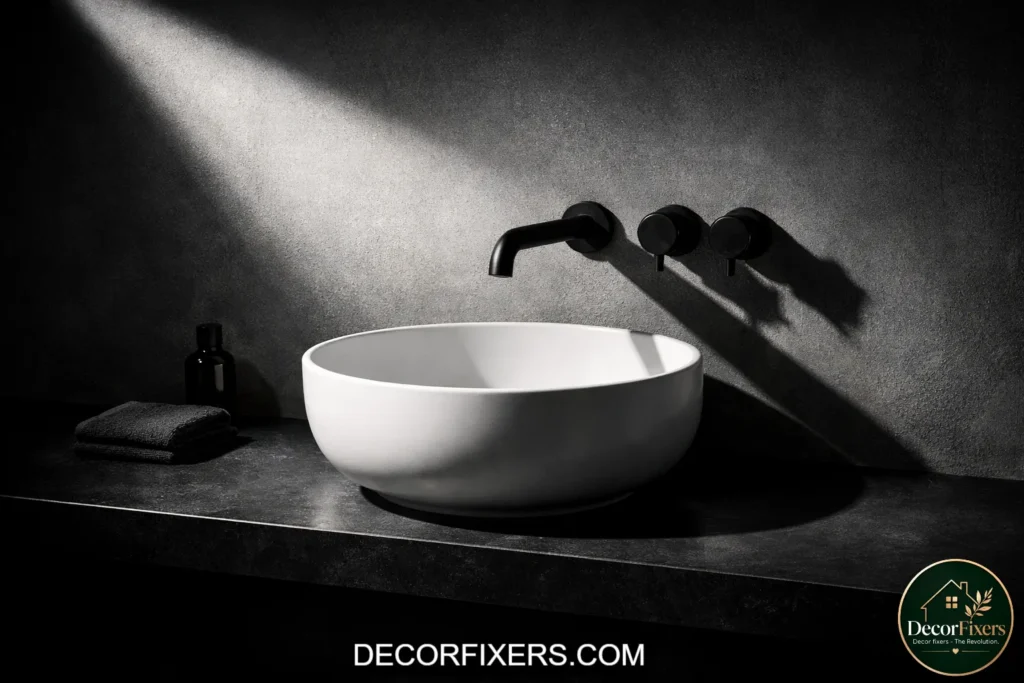
A vessel sink, one that sits on top of the counter rather than dropping in, works like jewelry on a vanity. It’s an instant style upgrade, especially when paired with a simple flat-top cabinet that lets the sink do the talking.
Kohler’s Vox and Verticyl vessel sinks are worth a look in the $100–$300 range. Pair them with a wall-mounted faucet to keep the countertop clean and the look intentional.
5. Install an Antique or Furniture-Style Vanity
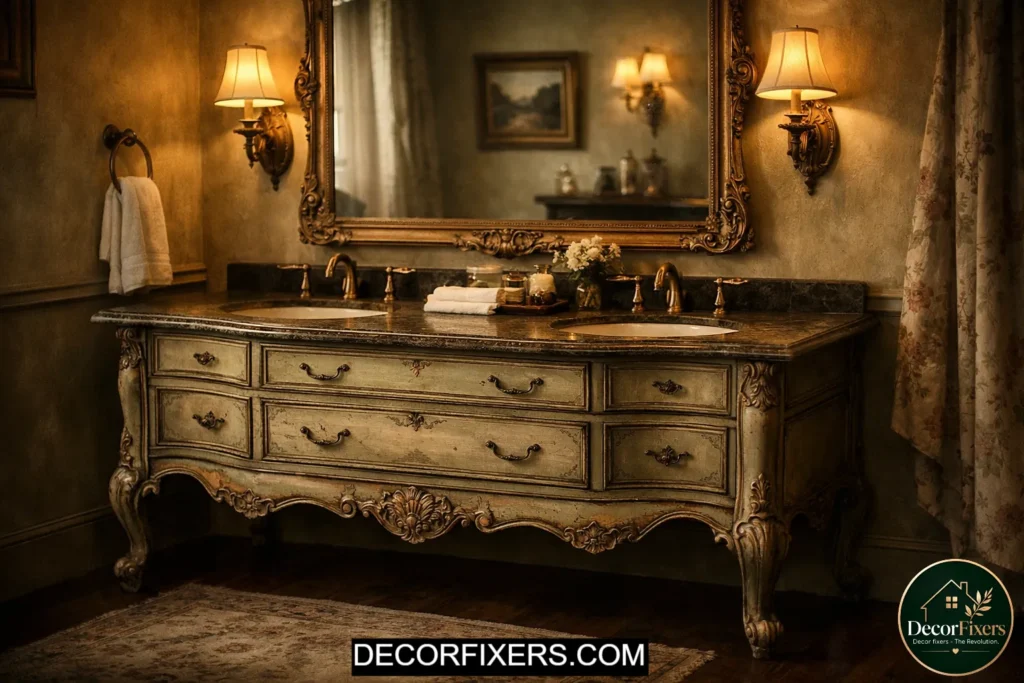
Not every bathroom needs to look modern. If your home leans traditional, a furniture-style vanity, one that mimics a dresser or console table, fits naturally. These are freestanding, often come with legs, and look like they belong in a thoughtfully decorated home rather than a generic rental.
What most guides skip is that furniture-style vanities often have deeper countertops (22″–24″) than standard units (21″), which actually gives you more prep space. That’s a practical win, not just an aesthetic one.
6. Go Monochromatic, Match Vanity to Wall
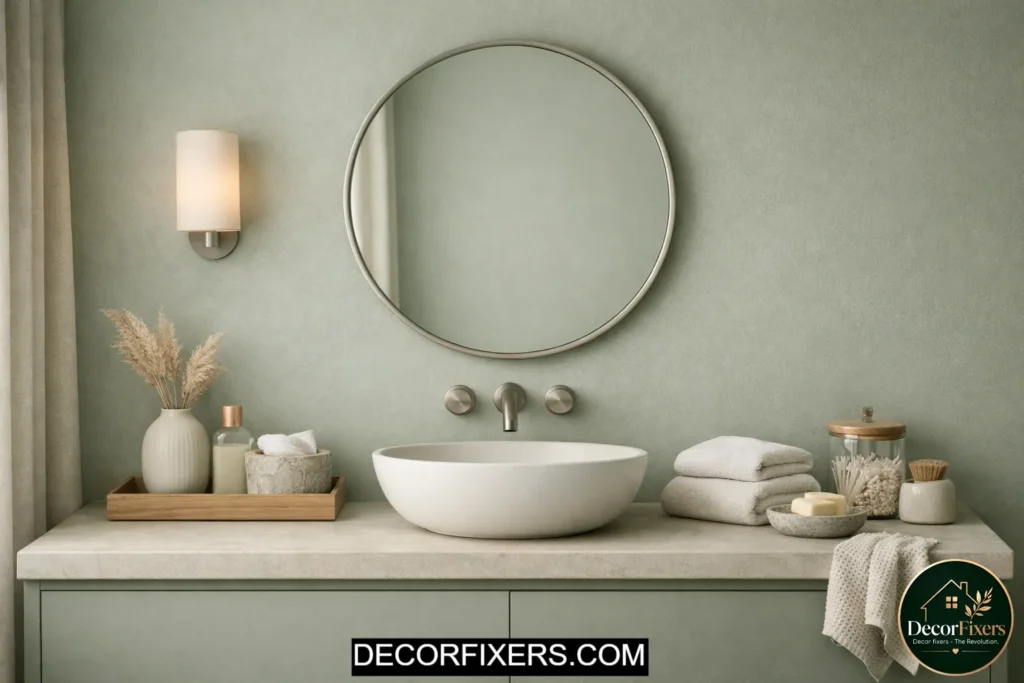
A tonal approach, where the vanity finish closely matches the wall color, creates a calm, spa-like atmosphere that feels expensive. Soft greens, warm creams, dusty grays. The key is to vary texture, not color: matte wall paint against a satin cabinet finish prevents it from feeling flat.
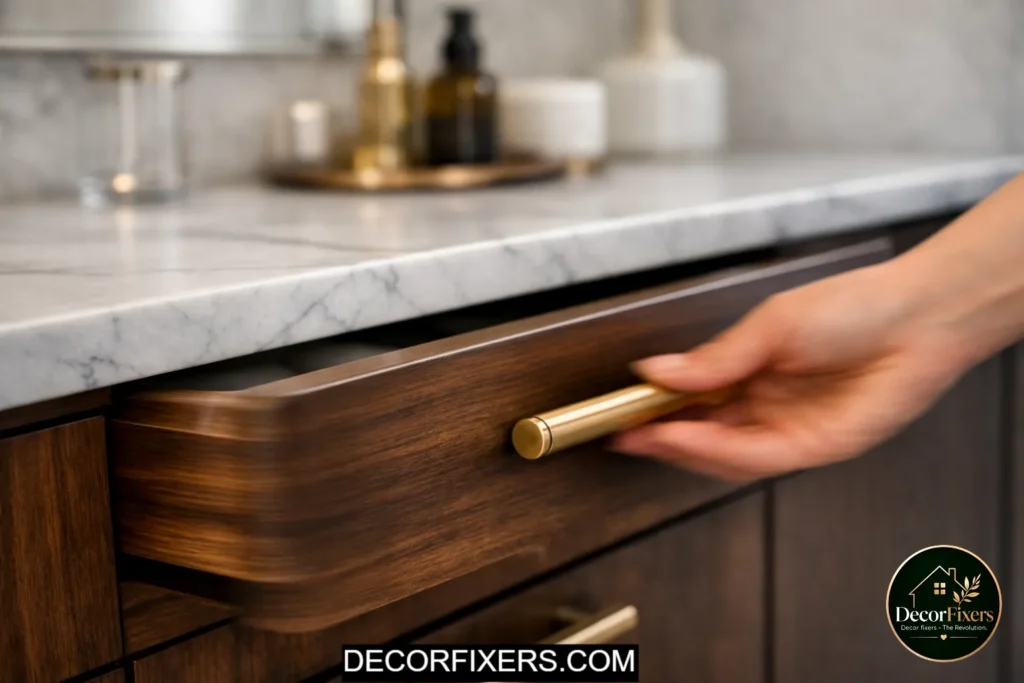
7. Choose a Vanity with Drawers, Not Just a Door
Swing-open cabinet doors are the enemy of organized bathrooms. Drawers, especially deep bottom drawers, dramatically improve daily usability. You can see everything. No more kneeling down to dig around in the dark.
When shopping, count the drawers before you admire the finish. A good rule: at least two drawers for a single-sink vanity, four for a double.
8. Add a Side Tower or Linen Cabinet
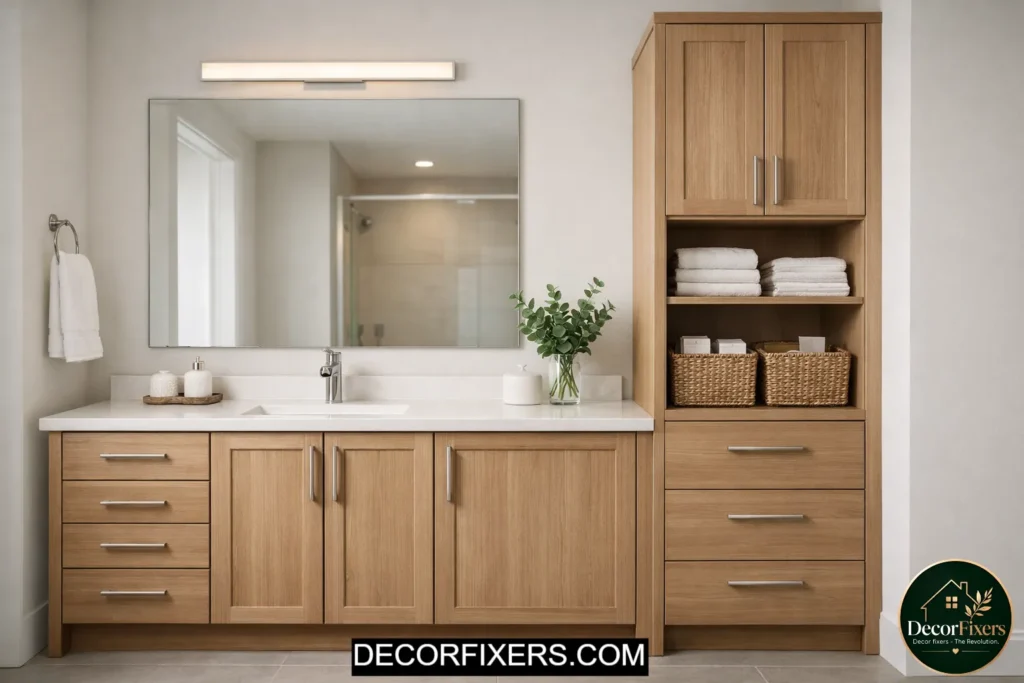
If your main vanity is short on storage, pair it with a matching side tower. Many manufacturers sell coordinating linen cabinets designed to sit beside or be bolted to the vanity unit. This gives you vertical storage without touching the plumbing.
Look for tall cabinets with adjustable shelves; they’re far more useful than fixed ones once you actually live with them.
9. Use Open Shelving Below for a Curated Look
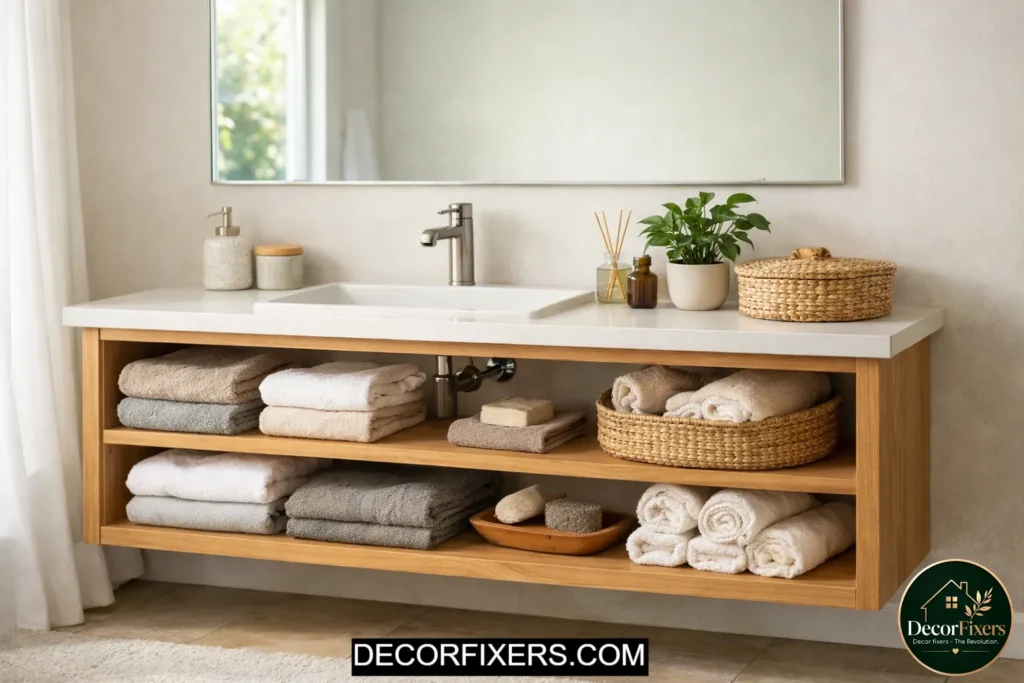
Open lower shelves on a floating vanity, with neatly folded towels, a small plant, and a basket of cotton rounds, and transform a utilitarian space into something that looks intentional. This works best in bathrooms that stay genuinely tidy.
Or maybe I should say it this way: open shelving is beautiful when staged, and a mess when lived in. Be honest with yourself about which category you fall into before committing.
10. Install Soft-Close Drawers, An Underrated Upgrade
Soft-close drawer hardware costs $3–$8 per drawer and can be retrofitted into most existing vanity cabinets in about 20 minutes. The result: zero slamming, and a surprisingly premium feel.
It’s one of those upgrades that feels disproportionate to its price. Every person who’s done it says the same thing.
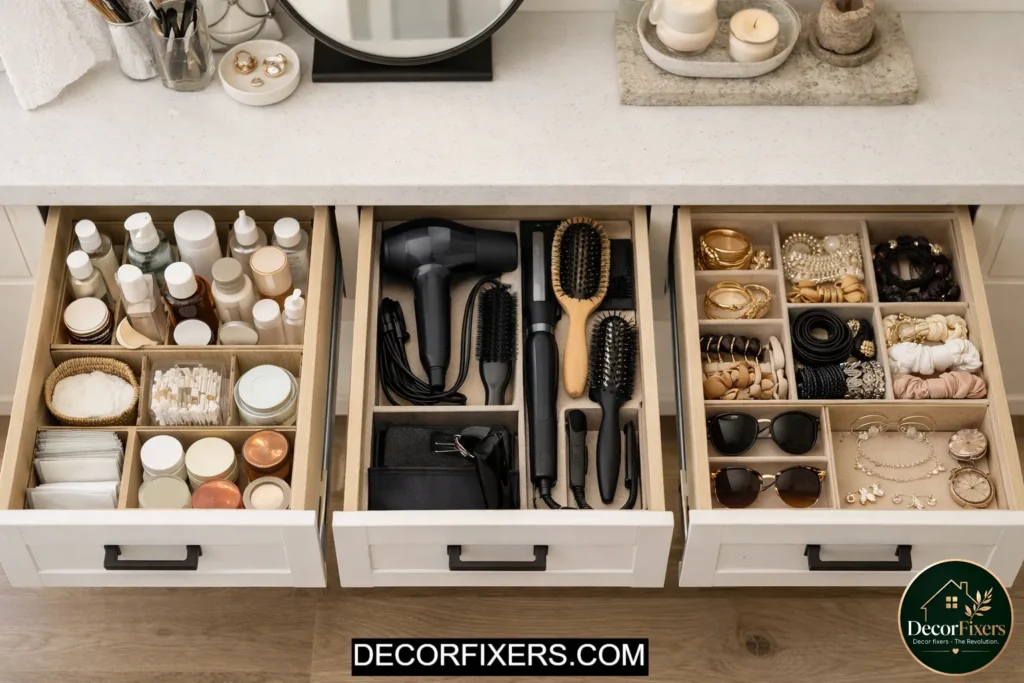
11. Add Pull-Out Organizer Trays Inside Drawers
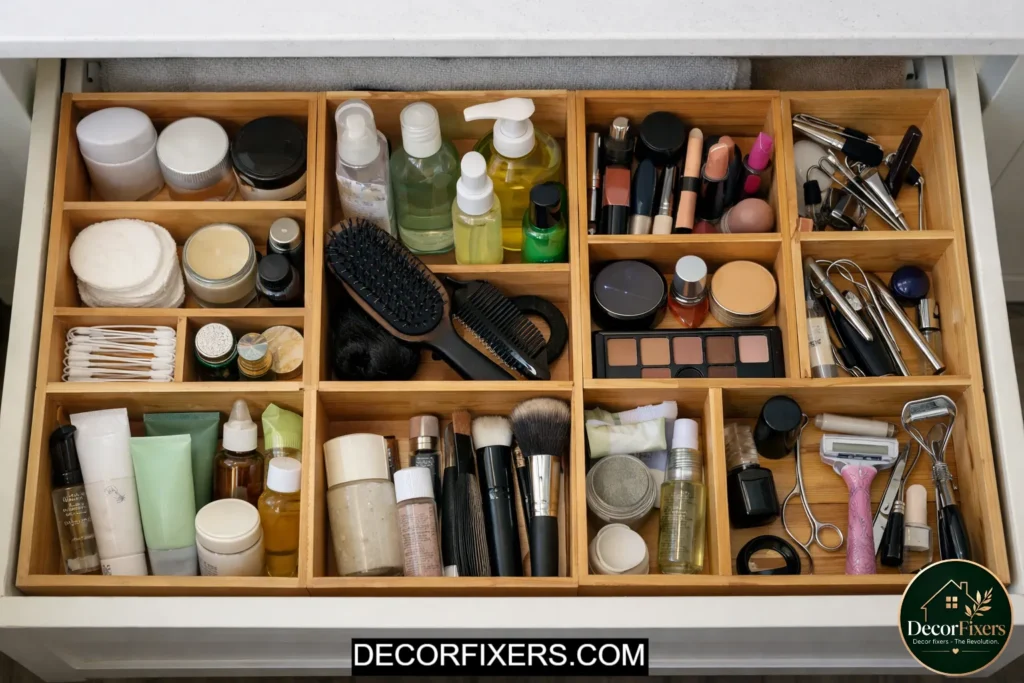
Deep drawers are great. Deep drawers with organizer inserts are better. Bamboo or acrylic divider trays (available for $10–$25 online) separate makeup, skincare, and hair tools so you can find things without excavating the whole drawer.
This is an especially smart move if you’re sharing the bathroom with a partner; it silently solves 80% of the clutter arguments.
12. Choose a Double Sink Vanity for Shared Bathrooms
A double sink vanity is the single most practical upgrade for a shared master bathroom. Two sinks, two prep zones, two humans with different routines, and nobody’s waiting for a turn.
You need at least 60 inches of wall width to make a double sink vanity feel comfortable rather than cramped. Most double units run 60″–72″ wide. Kohler’s Poplin line offers double-sink configurations in that range with solid, clean-lined cabinetry.
13. Try Quartz Countertops, The Practical Luxury
Quartz has become the go-to countertop material for middle-class bathrooms, and for good reason. It looks like stone, requires almost no sealing or maintenance, and resists staining from toothpaste, makeup, and haircare products better than marble or granite.
Some experts argue that real marble is the only premium-feeling option. That’s valid for design-forward homes with budgets to match. But if you’re dealing with a busy family bathroom, quartz will look better five years from now than marble ever will.
14. Choose Matte Black Hardware for a Dramatic Edge
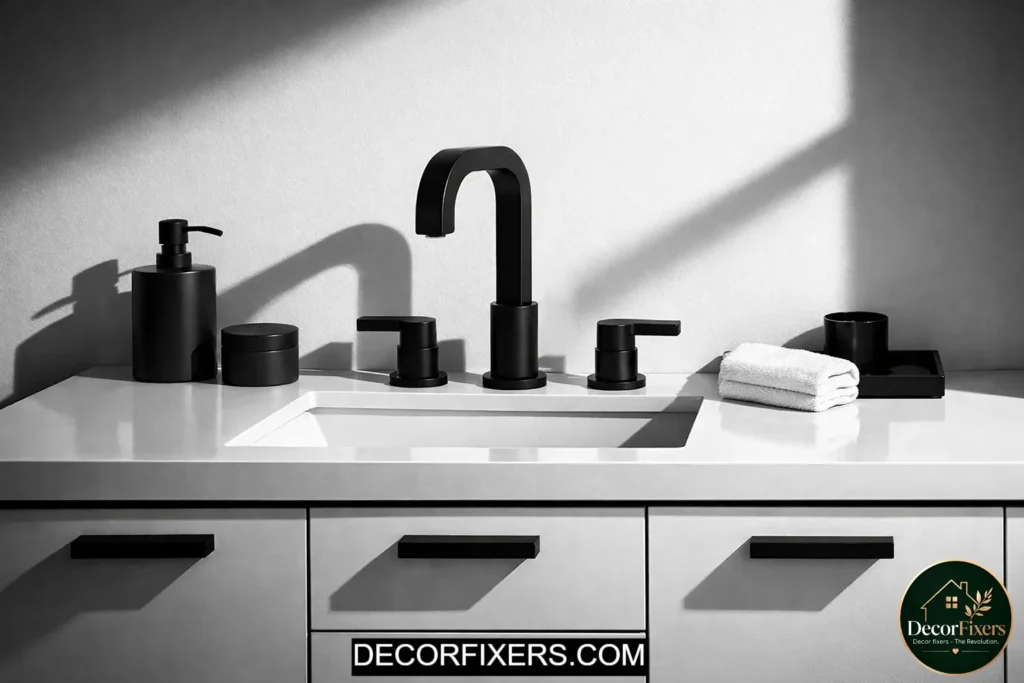
Swapping cabinet pulls and faucet hardware to matte black is a $50–$150 upgrade that changes the whole energy of a bathroom. It’s particularly striking against white or cream cabinetry, and it’s consistent with the broader shift toward moody, intentional bathroom design.
Quick note: Verify your existing faucet holes before buying a new faucet. Single-hole, three-hole, and wall-mount are not interchangeable without extra drilling or plates.
15. Use Engineered Wood (MDF with PVC Wrap) for Humidity Resistance
Real wood is beautiful, but in a high-humidity bathroom with poor ventilation, it can warp over time. Engineered wood, MDF core with a moisture-resistant PVC or thermofoil wrap, offers the same clean-line look without the swelling risk.
I’ve seen conflicting claims from interior designers on this: some say real wood is fine with proper ventilation, others say always go engineered in bathrooms. My read: if your bathroom has an exhaust fan you actually use, real wood is fine. If ventilation is poor, go engineered.
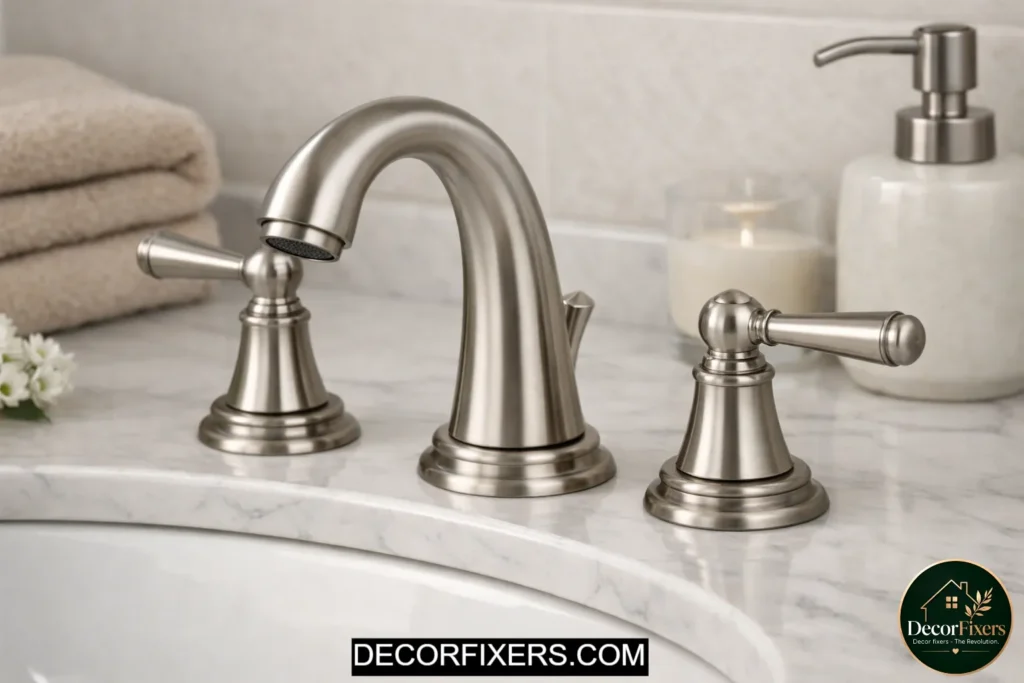
16. Go With Satin or Brushed Nickel for a Timeless Finish
Chrome is affordable but shows water spots. Polished brass is bold but divisive. Brushed nickel and satin finishes sit in the sweet spot: they photograph well, age gracefully, hide everyday splashing, and match almost any cabinet color.
For a middle-class bathroom that needs to look clean and current for a decade, satin nickel is the safest hardware choice you can make.
17. Try a Concrete or Stone-Look Sink
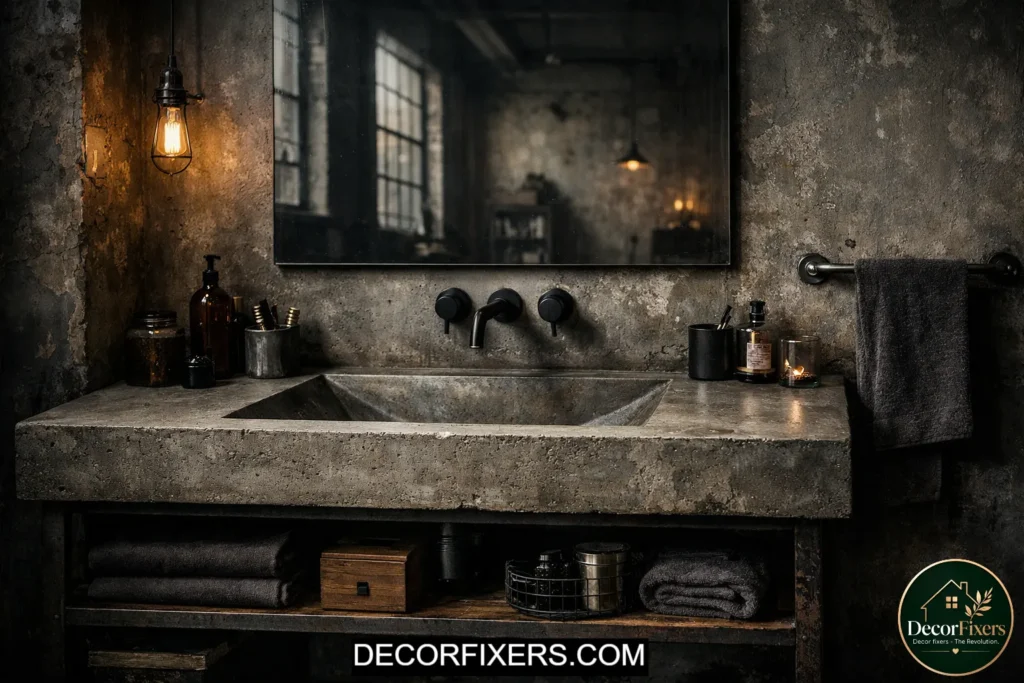
Concrete-look composite sinks have been quietly growing in popularity. They give an industrial, artisan feel that’s hard to achieve with standard ceramic. They’re also integrated (sink and counter are one piece), which eliminates the caulk lines that get dirty over time.
Expect to pay $200–$600 for a decent integrated stone-look or concrete composite vanity top. Less maintenance in the long run.
READ MORE:Small Bathroom Decor Ideas: 25 Ways to Make Tiny Spaces Look Bigger
18. Paint Your Existing Vanity Instead of Replacing It
Look, if you’re in a rental or on a tight budget, here’s what actually works: a $30 can of cabinet-specific paint (Benjamin Moore Advance or Rust-Oleum Cabinet Transformations) and new hardware can make a builder-grade oak vanity look like something you chose intentionally.
Prep is everything. Sand, prime, and apply in thin coats. Don’t skip the topcoat sealant. Done right, a painted vanity holds up for 3–5 years before needing a refresh.
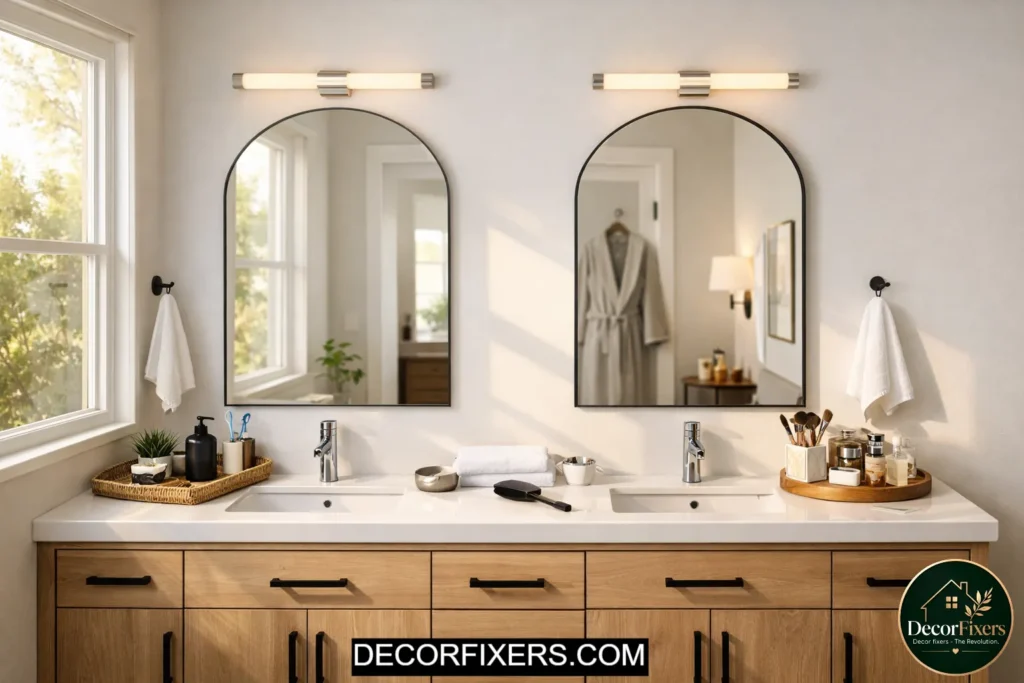
19. Use Vertical Sconces Instead of a Bar Light
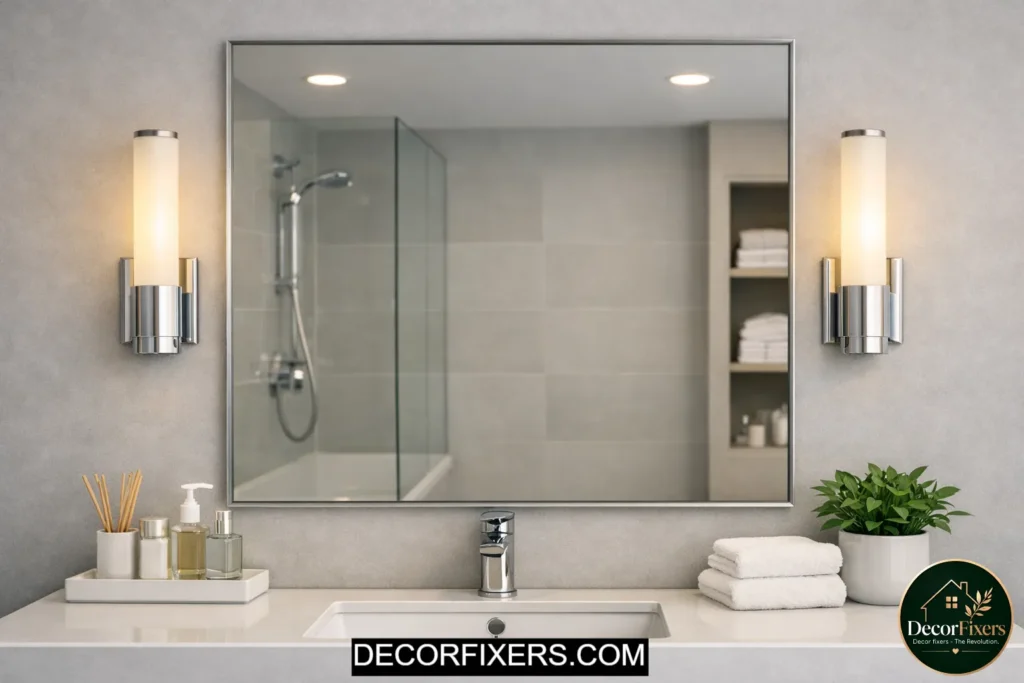
Horizontal vanity bar lights cast a shadow from above, which is exactly the wrong direction for applying makeup or shaving. Vertical sconces mounted on either side of the mirror light your face evenly from both sides. Dermatologists and makeup artists use side lighting for a reason.
This is the lighting-vanity pairing point that almost every vanity guide skips. Getting the lighting wrong undermines the most beautiful vanity you can buy.
20. Choose an Oversized Mirror, Go Larger Than Feels Right
Most people buy a mirror sized to the vanity cabinet width. Go wider. A mirror that extends 4″–6″ beyond each side of the vanity makes the wall feel intentional, the room feel larger, and the whole setup look designed rather than default.
It costs the same. The visual payoff is outsized.
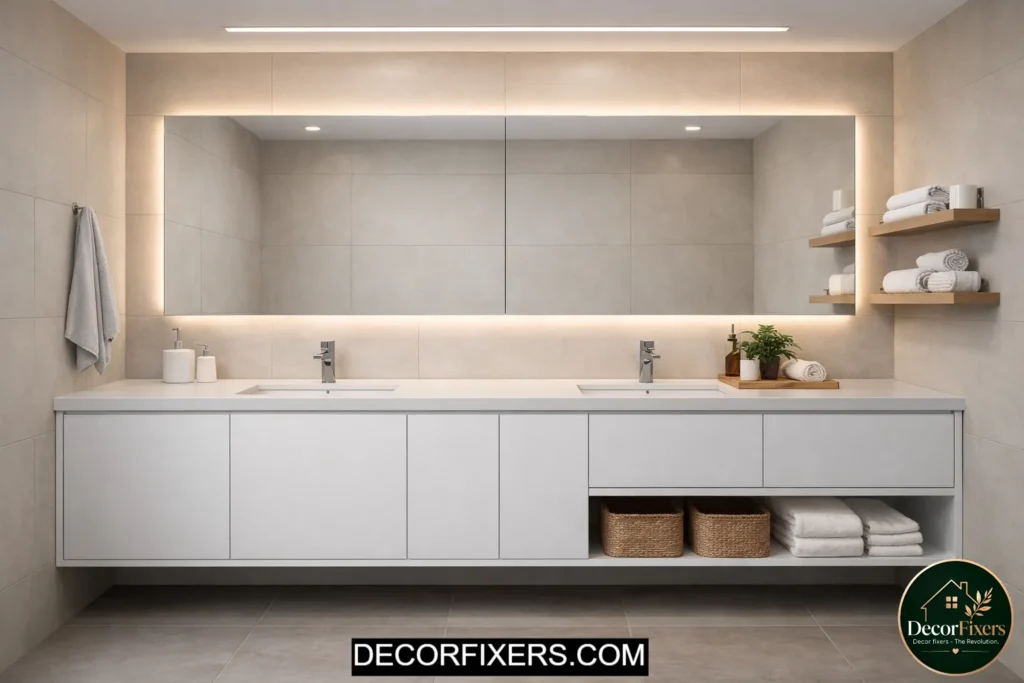
21. Add a Backlit or LED Mirror

LED mirrors, with built-in back or edge lighting, serve as both mirror and lighting in one fixture. They eliminate the need for a separate vanity light, reduce clutter on the wall, and give a clean, contemporary look.
Prices range from $80 to $400. The dimming and color-temperature function (warm vs. cool light) is worth paying for if you use the bathroom for grooming, as it lets you match the lighting to the task.
22. Install a Medicine Cabinet for Hidden Storage
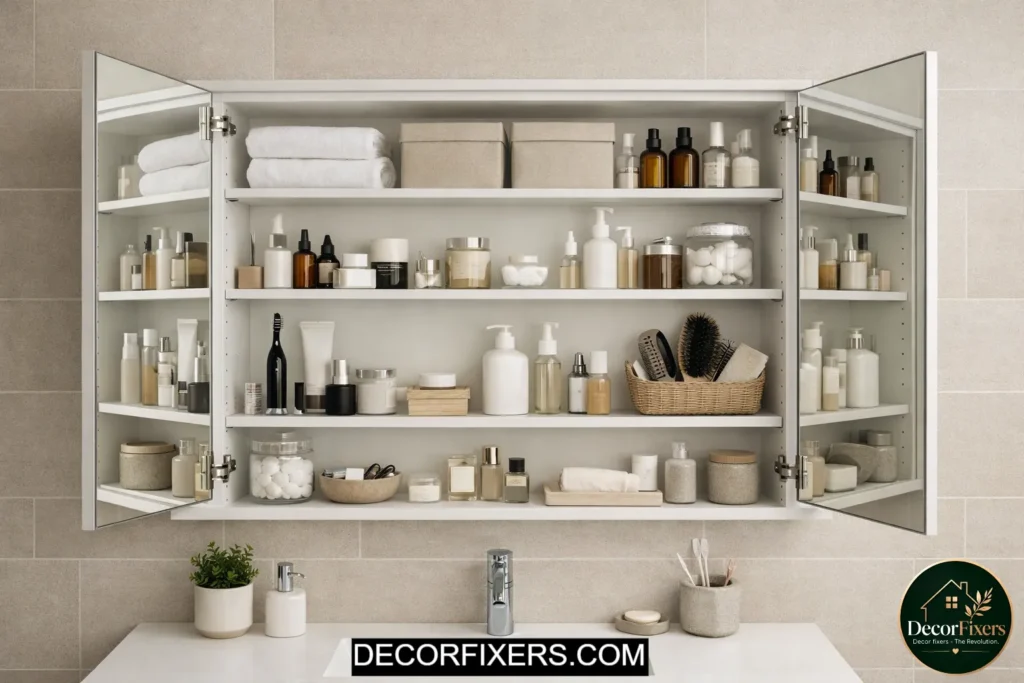
A recessed medicine cabinet sits inside the wall rather than protruding from it, which means it doesn’t eat up any bathroom space. The inside holds medicine, skincare, and daily-use items. The outside is a flat mirror. That’s two functions from one footprint.
Recessed installation requires cutting into the wall between studs, doable as a weekend project if you’re comfortable with drywall. Surface-mount versions exist if you’re not.
23. Add Open Shelving Above the Toilet as a Visual Pair to the Vanity
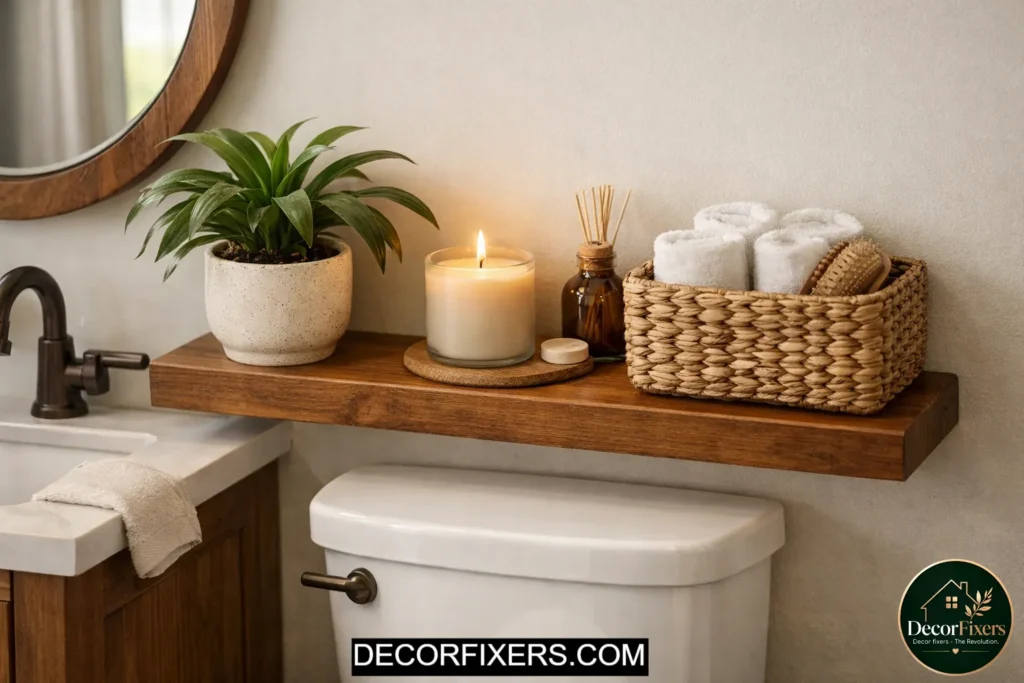
The wall above the toilet is underused in most bathrooms. A simple floating shelf, in the same finish as the vanity, creates a visual through-line that makes the bathroom feel designed as a whole rather than assembled piece by piece.
Keep the styling minimal: one or two items maximum. A plant, a candle, a small basket. The shelf should feel curated, not crowded.
24. Replace Knobs with Bar Pulls, A 10-Minute Hardware Swap
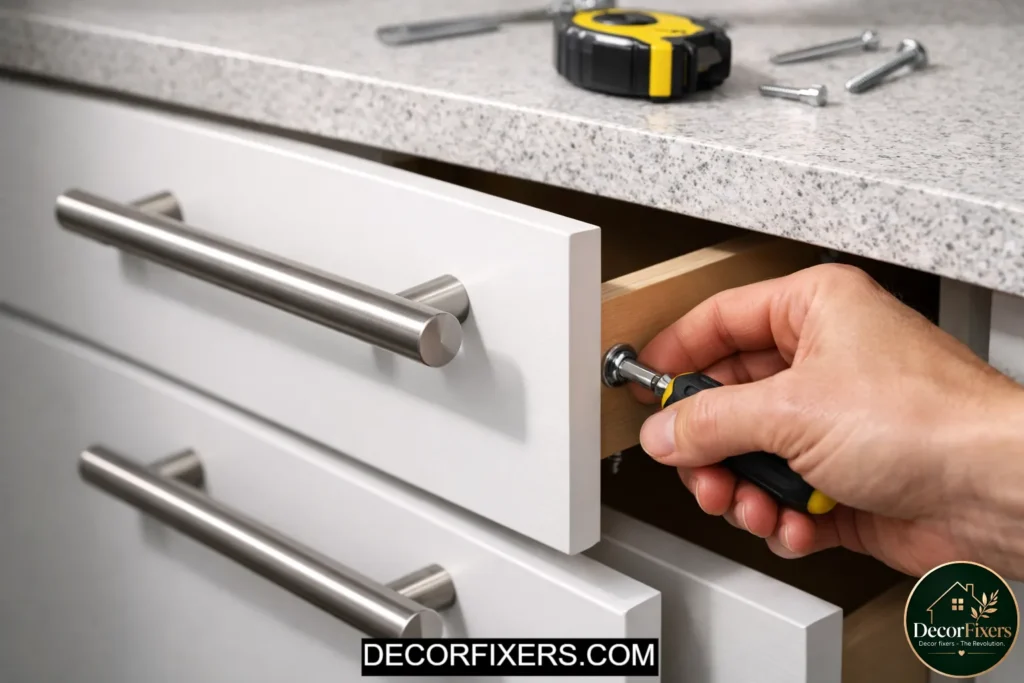
Bar pulls, the long, linear handles, modernize a traditional or transitional vanity cabinet faster than almost any other single change. One screwdriver, 10 minutes, $20–$60 total. The visual shift can be dramatic.
Match the pull finish to your faucet and towel bar for a coordinated look. Mismatched metals read as accidental; intentionally mixed metals (e.g., matte black pulls with brushed brass faucet) can work, but require a practiced eye.
CONCLUSION:
I don’t start with trends. I start with what’s already in the bathroom, the tile, the lighting, the space, and then choose a vanity idea that works with it, not against it. Because I’ve seen this mistake too many times: people chase a look they saw online, ignore their actual layout, and end up with something that feels off, no matter how expensive it is.
From my experience, the biggest difference doesn’t come from replacing everything. It comes from fixing the right thing. Sometimes that’s switching to drawers instead of doors. Sometimes it’s correcting bad lighting. Sometimes it’s just repainting the vanity and upgrading the hardware.
What visitors actually need isn’t 24 ideas. They need one idea that fits their bathroom and solves a real problem, such as storage, lighting, or visual balance.
If you take one thing from this guide, let it be this: don’t try to copy a bathroom. Build one that makes sense for how you use it every day. That’s what lasts, and that’s what ends up looking intentional.
One Honest Caveat Before You Start
This guide covers 24 real ideas across style, storage, material, and lighting, but not every idea belongs in every bathroom. A vessel sink in a kids’ bathroom is impractical. A floating vanity without a properly reinforced wall is a liability.
Start with what you have: assess your existing tile, lighting, and plumbing layout before choosing a direction. The right vanity for your bathroom is the one that works with what’s already there, not against it.
FAQs
Q: What’s the best bathroom vanity style for a small bathroom?
A: A floating (wall-mounted) vanity. It opens up floor space visually, making the room feel larger. For storage, choose a model with drawers rather than swing-open doors. IKEA GODMORGON is a practical starting point.
Q: How do I upgrade my bathroom vanity without replacing it?
A: Paint the cabinet with a brush-on cabinet enamel, swap hardware to matte black or brushed nickel bar pulls, and replace the countertop or faucet. Three changes, under $200, and the vanity reads as new.
Q: Should I match my vanity to my tile?
A: Not exactly, complement it instead. If you have cool-toned gray tile, a warm wood vanity creates intentional contrast. A perfect match reads as safe; a thoughtful contrast reads as designed.
Q: Why does my bathroom vanity look cheap even after upgrading?
A: Almost always, it’s the lighting or the mirror. A beautiful vanity under a harsh overhead bar light will always look flat. Fix the light source before blaming the vanity.
Q: When should I hire a professional for a vanity upgrade?
A: If you’re moving plumbing, adding a double sink where only one existed, or installing a floating vanity in drywall without existing blocking, hire a plumber or handyman. Everything else listed here is DIY-friendly.

Creator of DecorFixers, sharing practical home and interior ideas focused on real-life usability, simple design improvements, and budget-friendly solutions.
8 thoughts on “24 Bathroom Vanity Ideas to Upgrade Your Look”